Customized online wedding invitations
If you are planning a wedding, you know how important it is to set the right tone from the very beginning. One of the first things your guests will see is your wedding invitation, and it should reflect your unique style and personality. With RenderForm, you can create beautiful, customized online wedding invitations that are as unique as your love story.
In this blog post, we will show you how to create personalized online wedding invitations for your guests using RenderForm's no-code platform.
Why choose online wedding invitations?
Online wedding invitations offer a modern, eco-friendly, and highly customizable alternative to traditional printed cards. Here are a few benefits:
- Personalization at scale: Customize each invitation with the guest's name or a special message.
- Eco-conscious: Go paperless and reduce waste without sacrificing elegance.
- Faster delivery: Send invitations instantly via email, messaging apps, or even social media.
- Easier RSVPs: Include direct RSVP links to manage your guest list with ease.
- Budget-friendly: Avoid printing and postage costs while still making a beautiful impression.
Create your wedding invitation template
Let's start by creating a template for your wedding invitation. You can use RenderForm's Canvas editor to design your invitation visually or the HTML editor for more control over the code.
-
Choose your template size. A common size for online invitations is 1080x1920 pixels (Instagram Stories), but you can adjust it to fit your needs.
-
Add a background image or color that matches your wedding theme. You can use a solid color, a gradient, or an image that represents your style. In my example, I used a custom paper-like SVG background image created in Sketch.
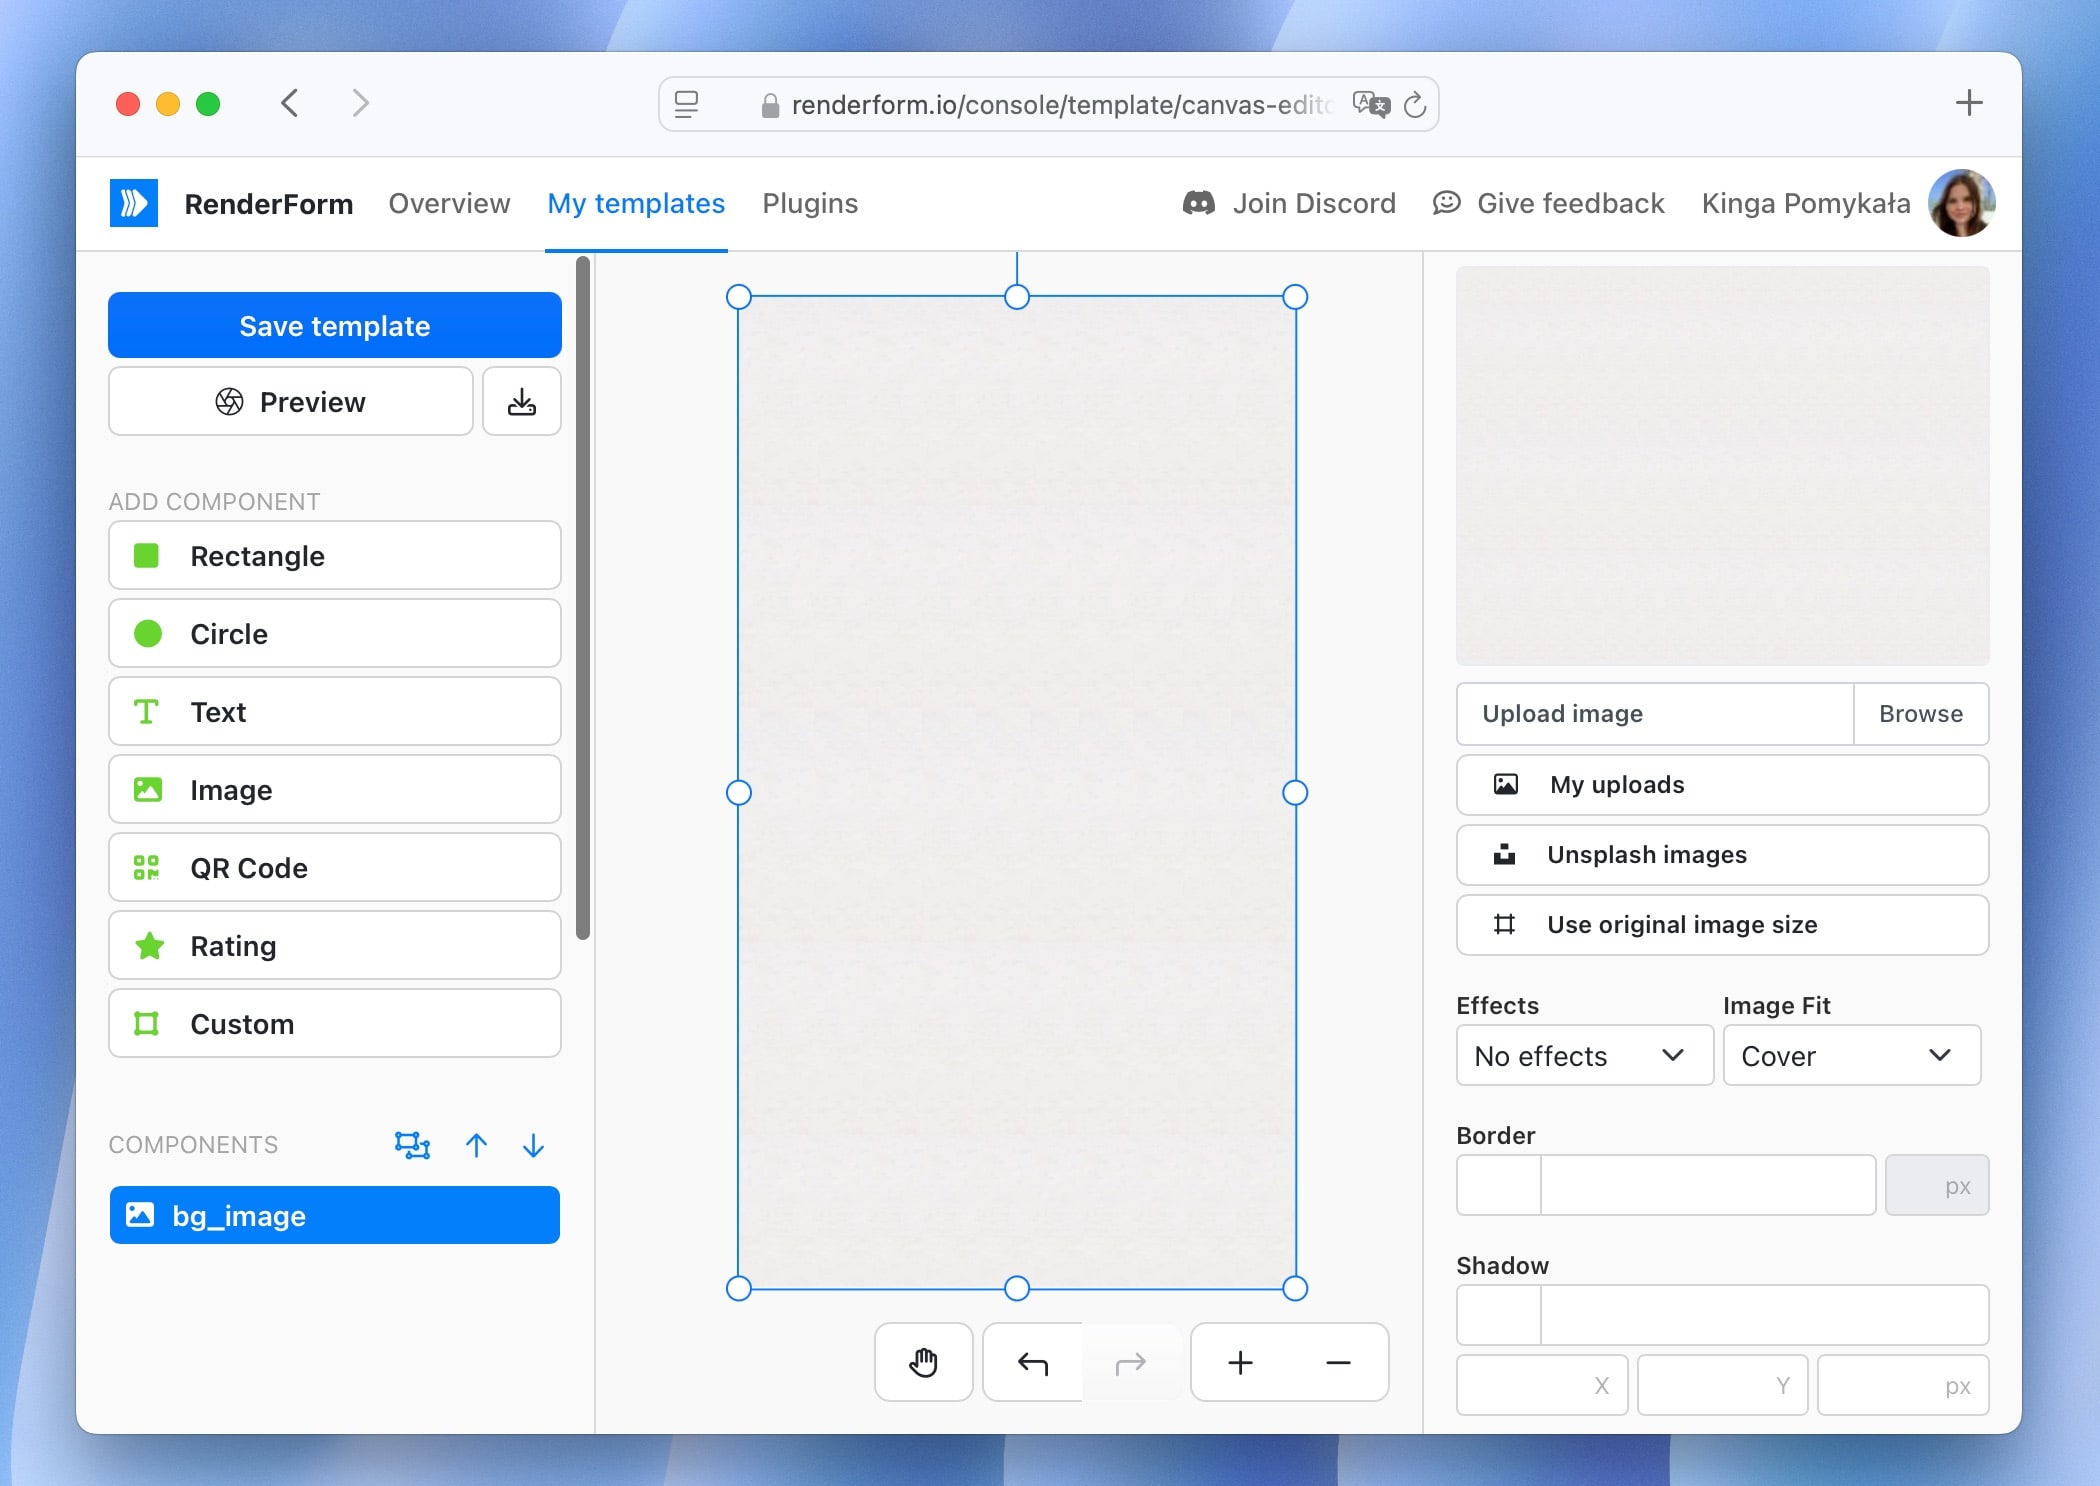
Once ready, lock the background layer to prevent accidental changes while editing other elements.
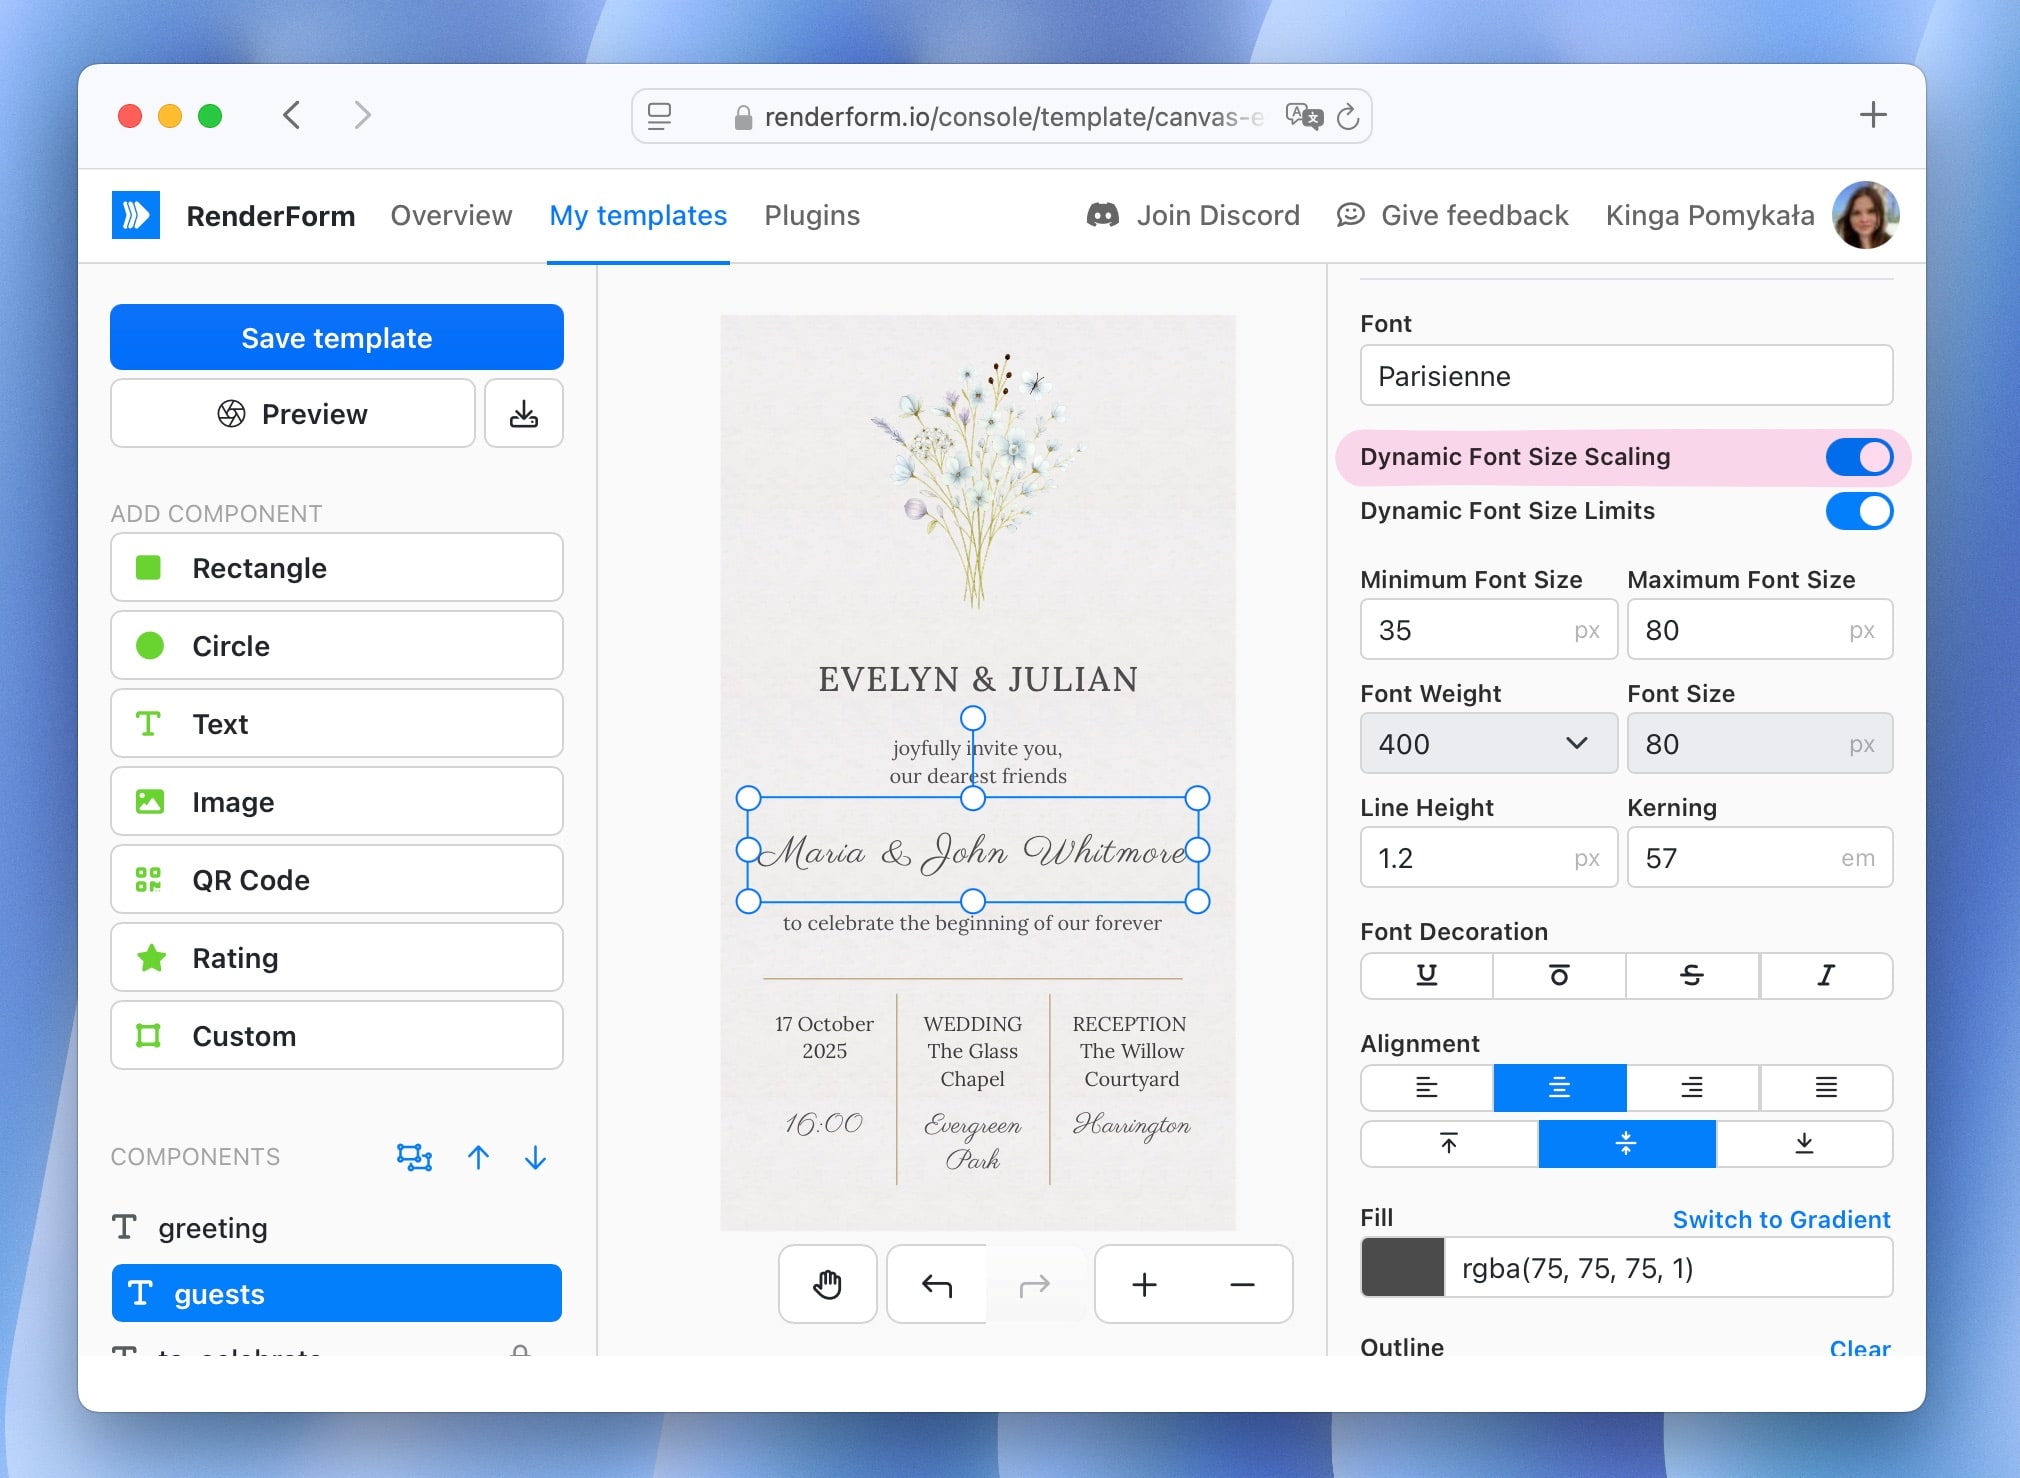
- Add text elements for the couple's names, date, time, and location. I used a combination of Lora for body text and Parisienne for guest names and key highlights.
- Add decorative elements like floral designs, lines, or icons. I included a floral header design (generated by ChatGPT) to give it a soft, romantic feel.
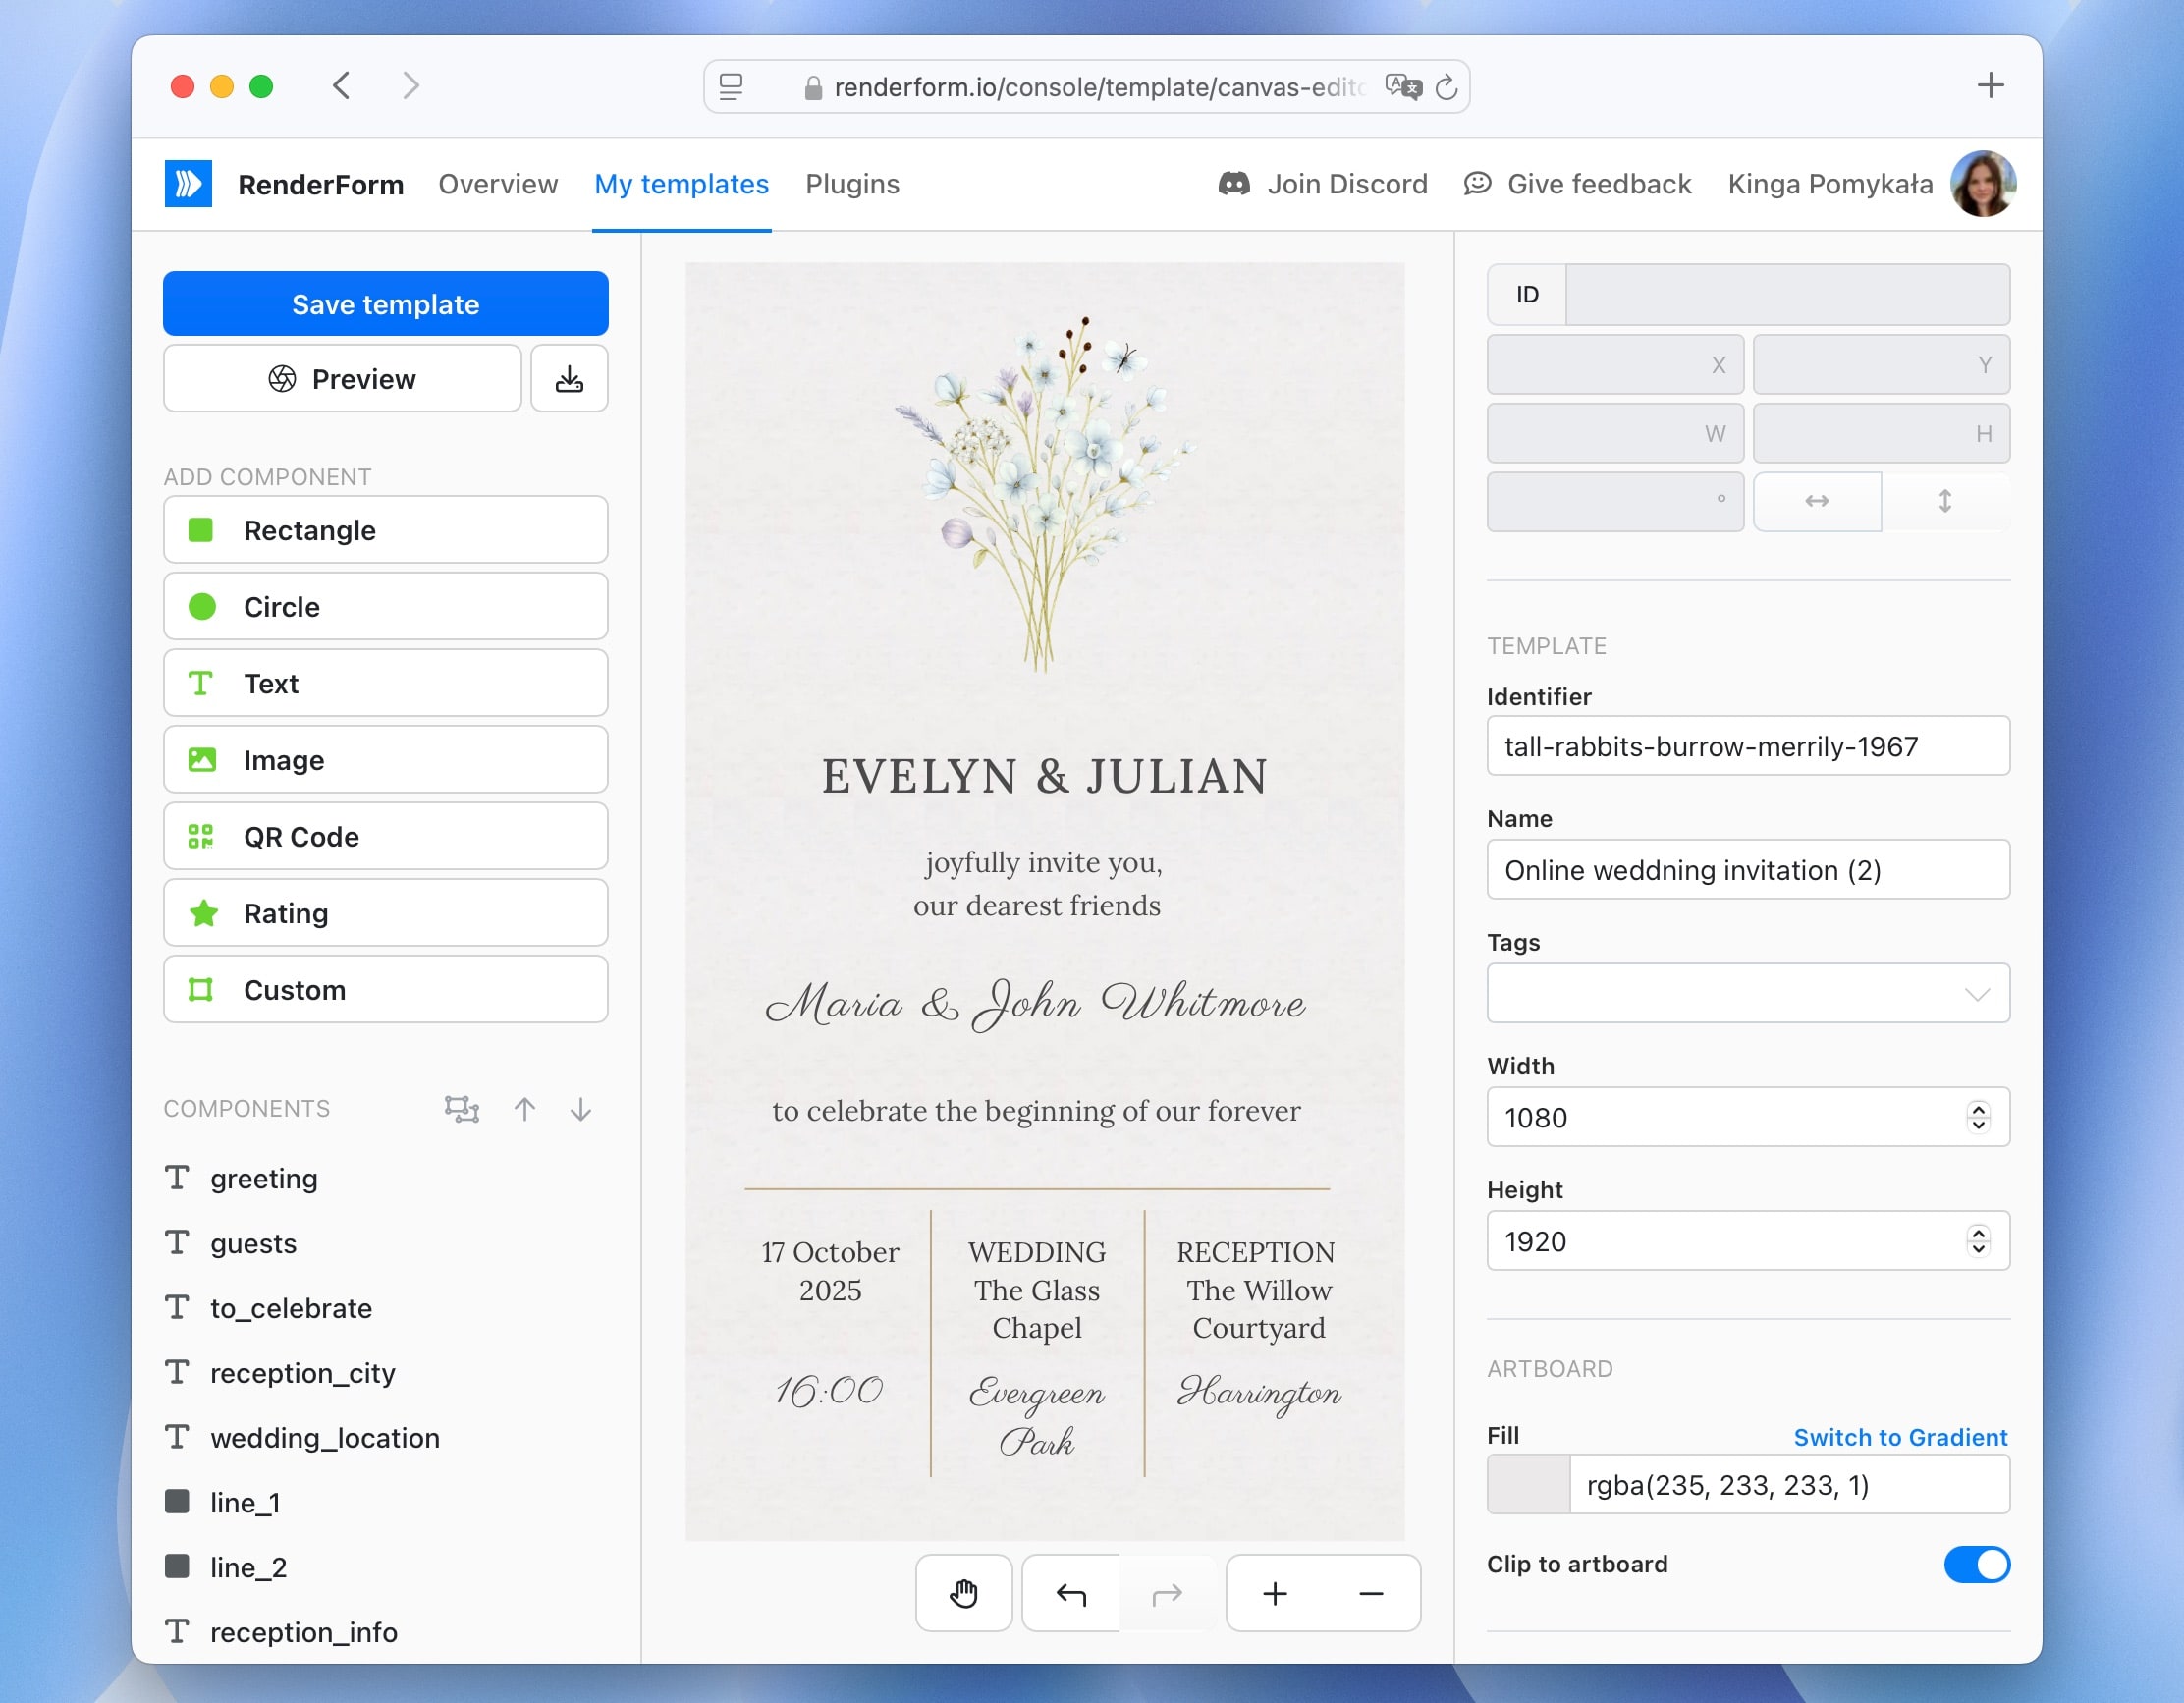
It's a simple yet elegant design that sets the right tone for a wedding.
Prepare your template for personalization
Next, identify the parts of your invitation that should change for each guest. In my case, I chose the guest name and greeting line.
To do this:
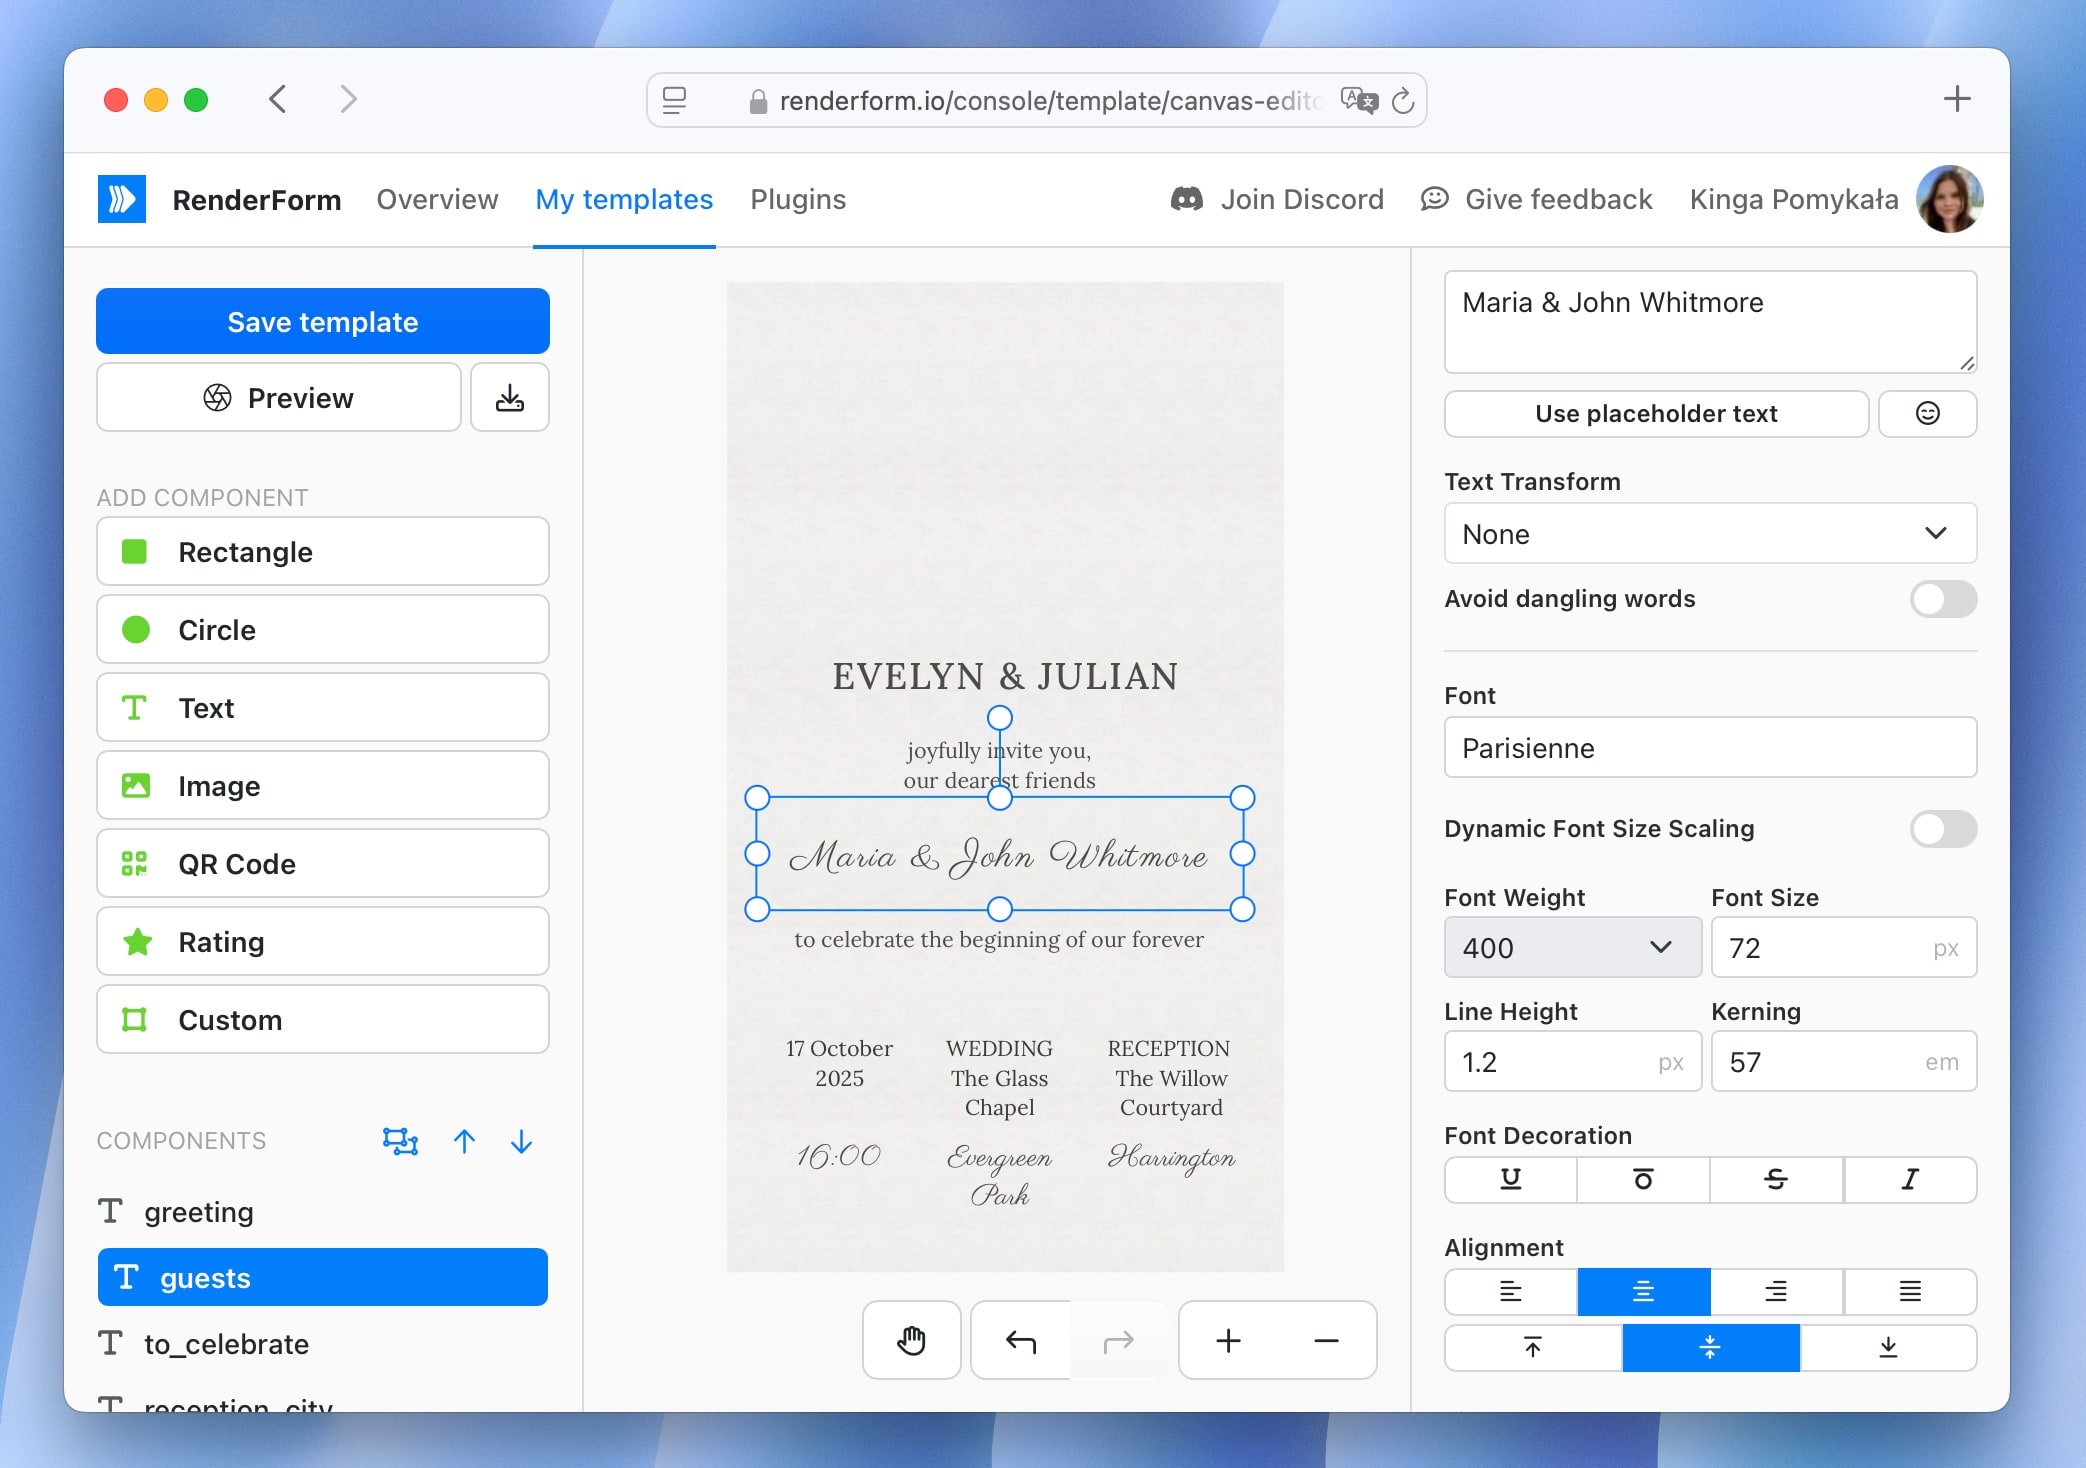
- Click on each editable element in your template.
- Set its ID in the right sidebar — e.g.,
guestsfor the name,greetingfor the greeting line.
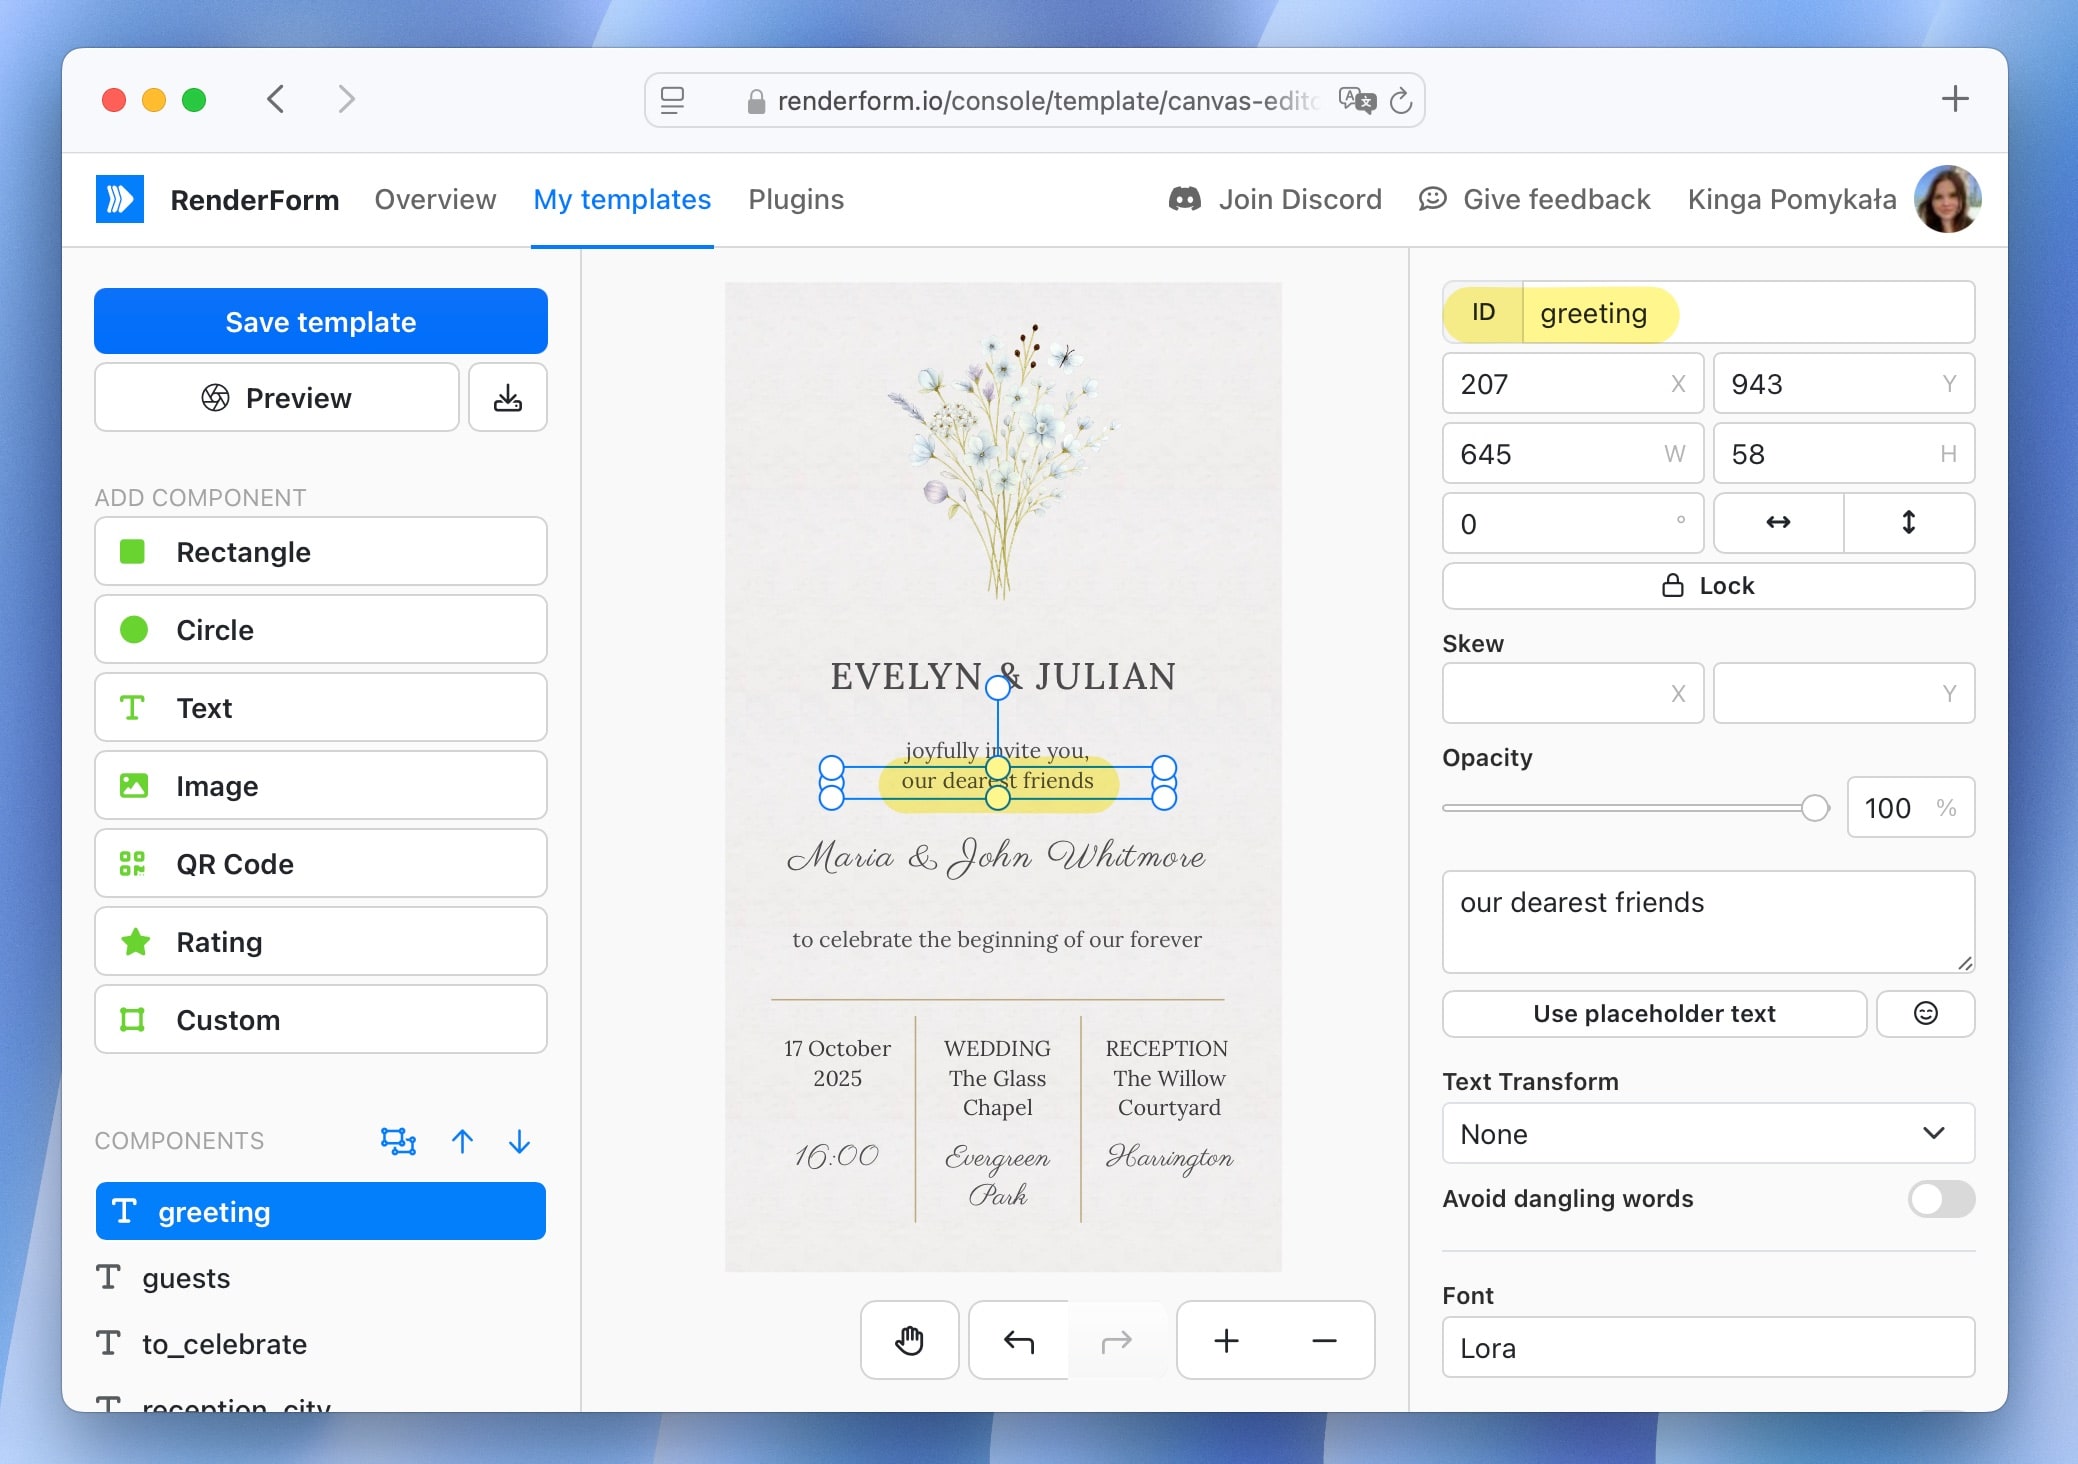
It makes it easier to identify the elements when you are personalizing the template later.
Tip: Lock all static elements to avoid accidental edits while generating your personalized images.
Make sure to enable Dynamic font size scaling for your personalized text elements. This ensures that longer guest names or greetings will still fit neatly within your design.
Prepare your guest list
Now that you have your template ready, it's time to prepare your guest list with their names and any other personalized information you want to include in the invitation.
Create a spreadsheet with columns for the fields you want to personalize. In my example, I created a simple file with the following columns:
_fileName(to specify the file name for each invitation)guests.text(to specify the names of the invited guests)greeting.text(to specify the greeting line)
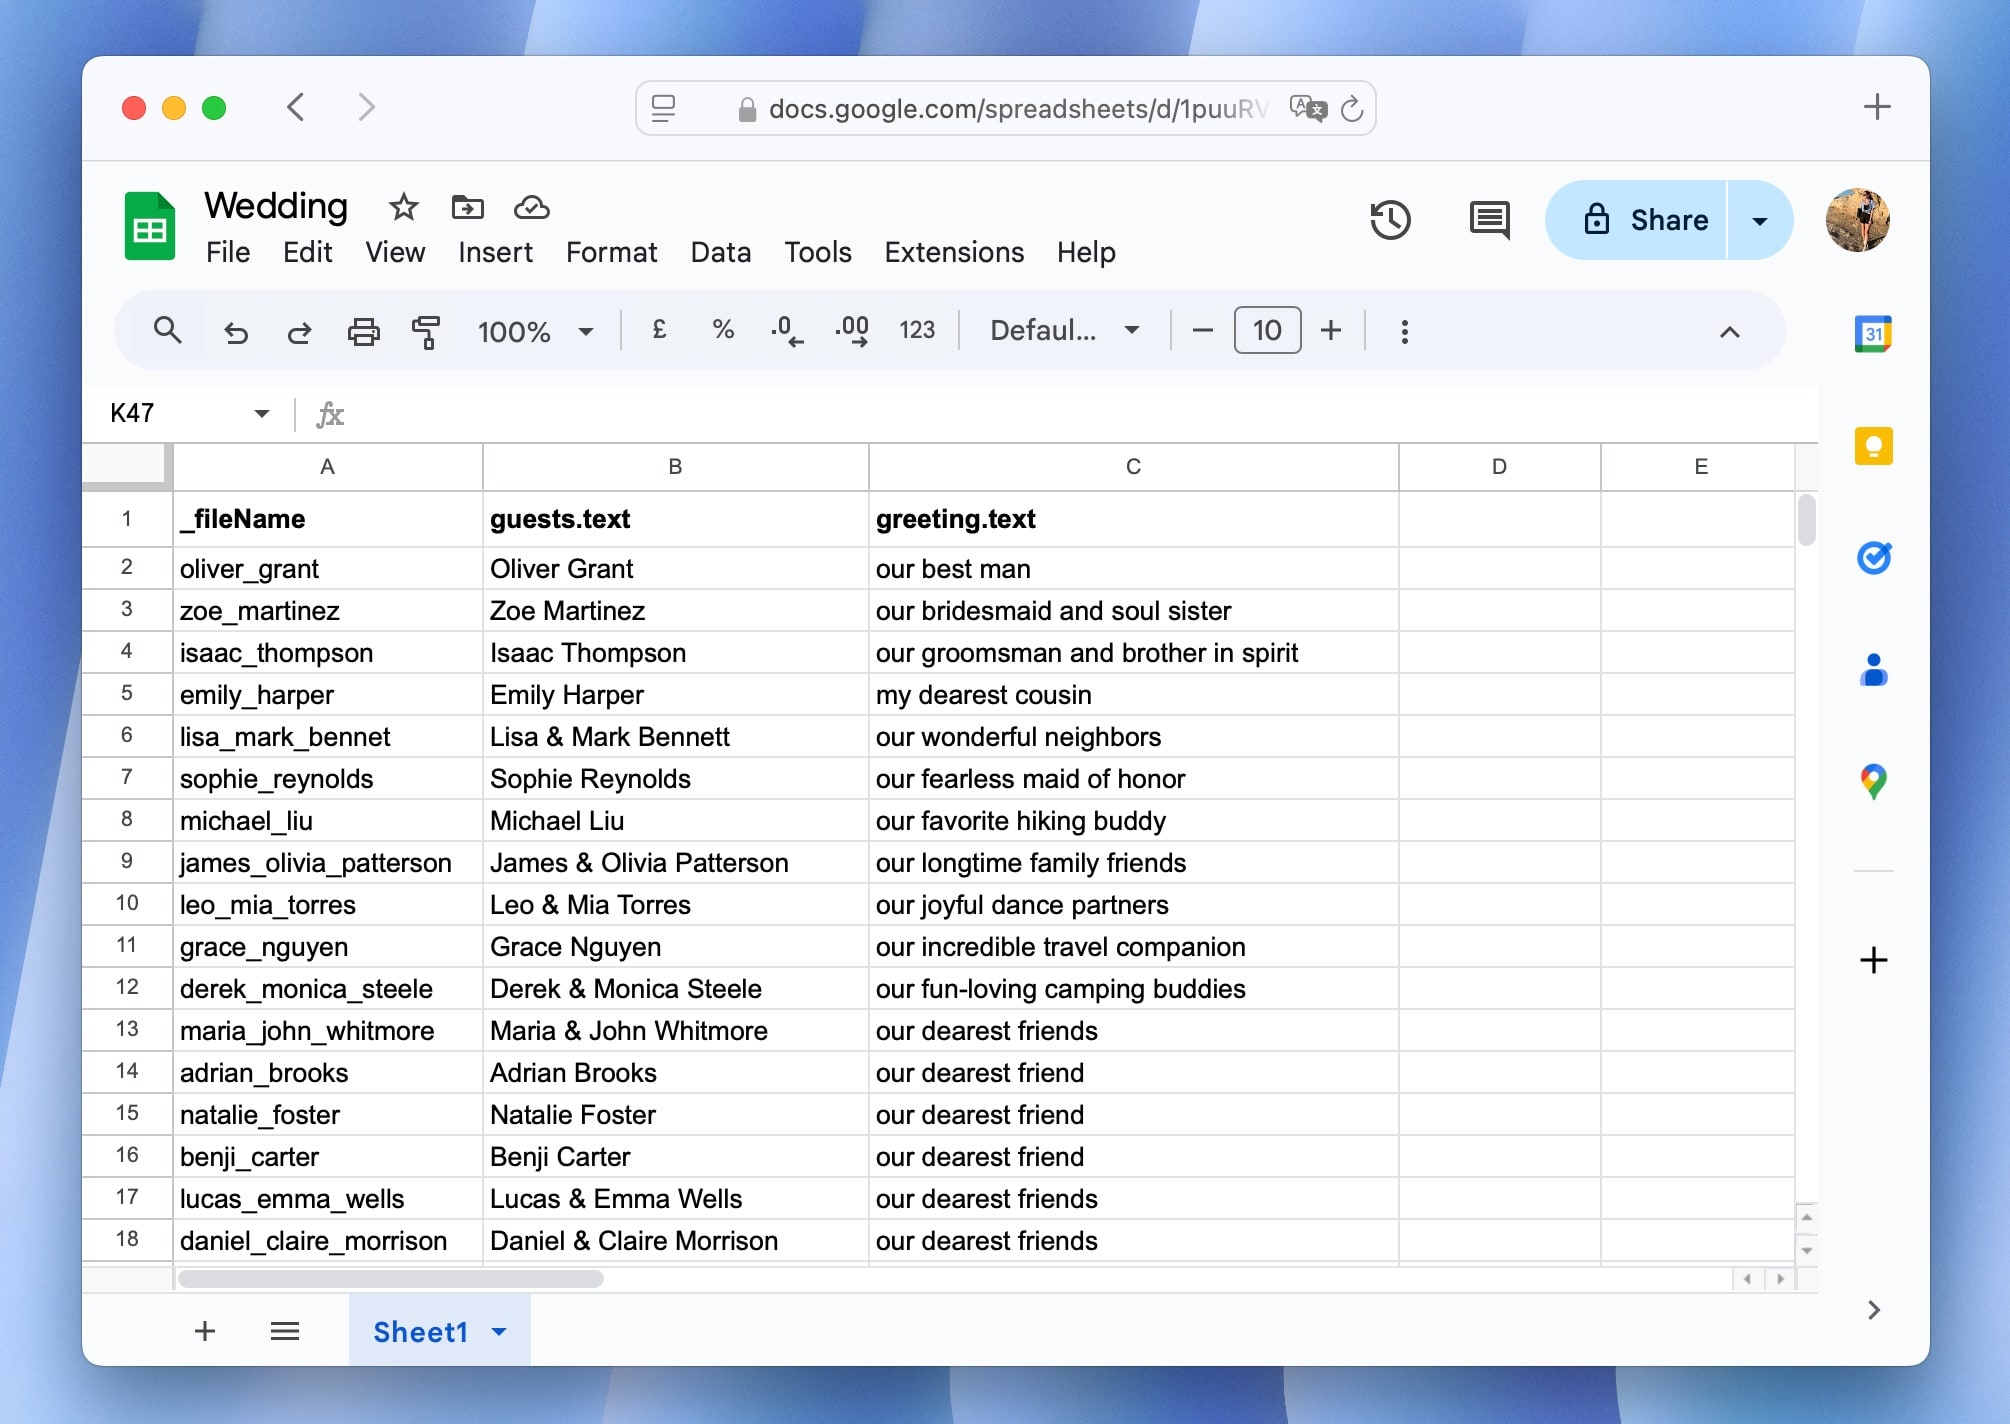
Once ready, export the file as an Excel spreadsheet (.xlsx). Make sure to save it in a location where you can easily access it later.
Be sure that column headers match the component IDs and properties from your template (e.g., guests.text).
Generate personalized invitations
Now that you have your template and guest list ready, you can generate personalized invitations for each guest.
-
Go to Plugins and select the Spreadsheet option.
-
Choose your wedding invitation template and upload the guest list file you created earlier.
-
Confirm all data is mapped correctly and click on Render.
RenderForm will generate personalized invitations for each guest based on the template and the data from your spreadsheet.
Generating online wedding invitations
After rendering, review the generated images to ensure everything looks perfect, then click Export to download the images.
Send your invitations
With your personalized invitations ready, it's time to share them with your guests!
You can send them manually via email, WhatsApp or Messenger, Instagram or other social media platforms.
Or, take it a step further and automate the sending using tools like:
- Mailchimp or ConvertKit for email campaigns
- Zapier or Make (Integromat) for connecting RenderForm with Google Sheets, email services, and messaging APIs
- CRM or RSVP tools to track responses and updates
This way, you can create, personalize, and send hundreds of beautiful invitations — all within minutes, and without writing a single line of code.
Final thoughts
Online wedding invitations offer the perfect balance of style, efficiency, and personalization. With RenderForm, you can create beautiful designs that feel intimate and unique for every guest — all while saving time, money, and paper.
Whether you are sending them via email, social media, or embedded in your wedding website, RenderForm makes the process smooth and delightful.


