Image Generation with Airtable Extension

Airtable is a powerful no-code platform for building collaborative apps that let you customize workflows, streamline teamwork, and deliver ambitious outcomes—without writing a single line of code. While it’s best known for its spreadsheet-style data management, Airtable also supports a wide range of integrations and scripting tools that can help automate even the most complex workflows.
In this guide, you’ll learn how to automate image generation using Airtable, which is especially useful when creating many visual assets based on similar content structures. Rather than editing images one by one, you can automatically generate them in bulk using a combination of RenderForm and Airtable.
If you're comfortable with JavaScript, check out our Airtable Script to gain full control over image and PDF rendering. You can also try it out hands-on using this sample Airtable base for image generation.
Create Your Image Template
Before diving into the Airtable setup, you'll first need to prepare your image template using RenderForm. Your template acts as a visual blueprint—each editable element (like a text box or image placeholder) can be dynamically updated through Airtable.
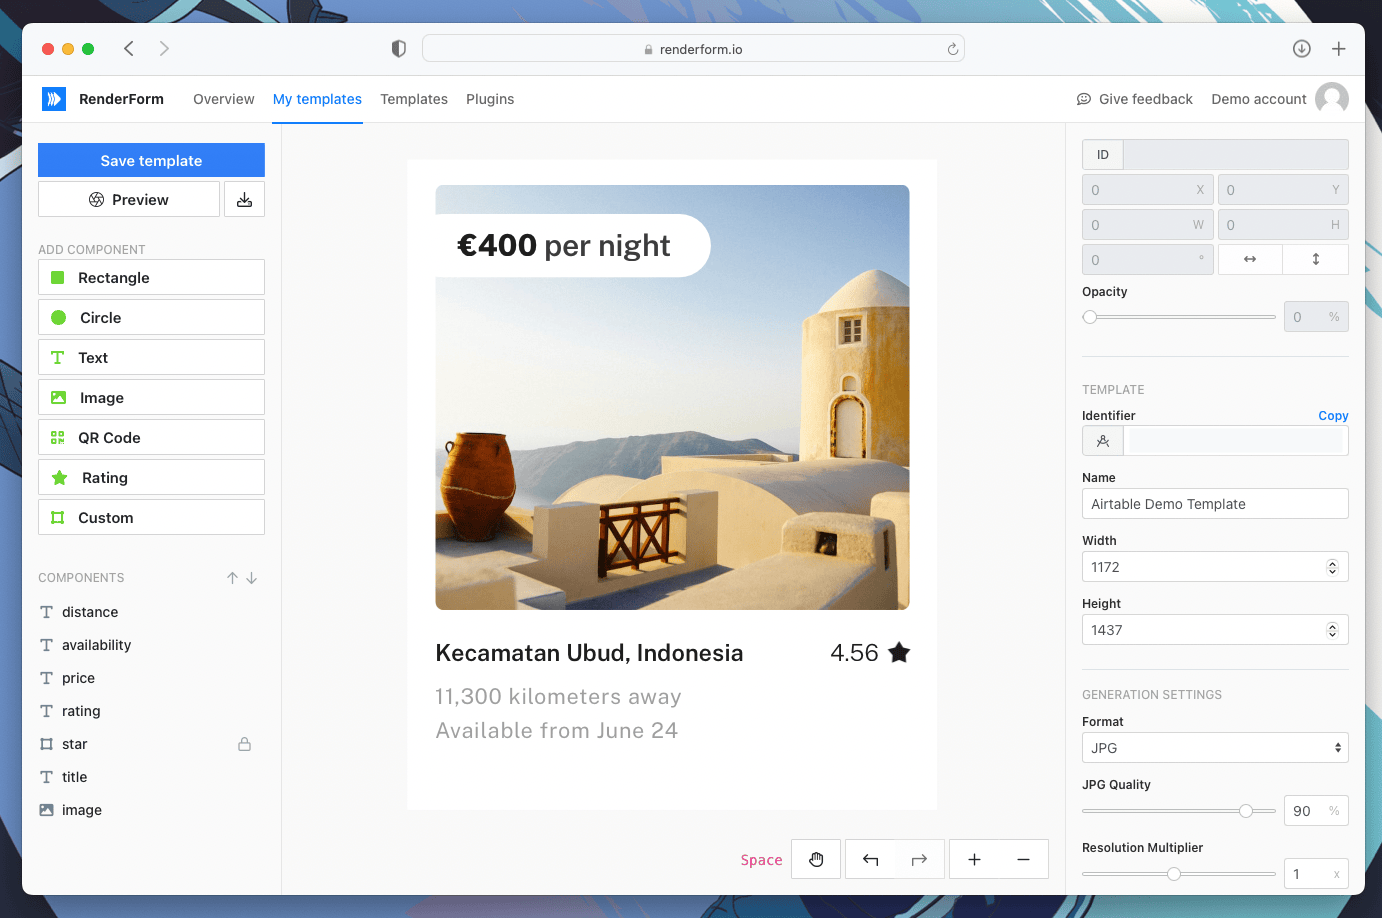
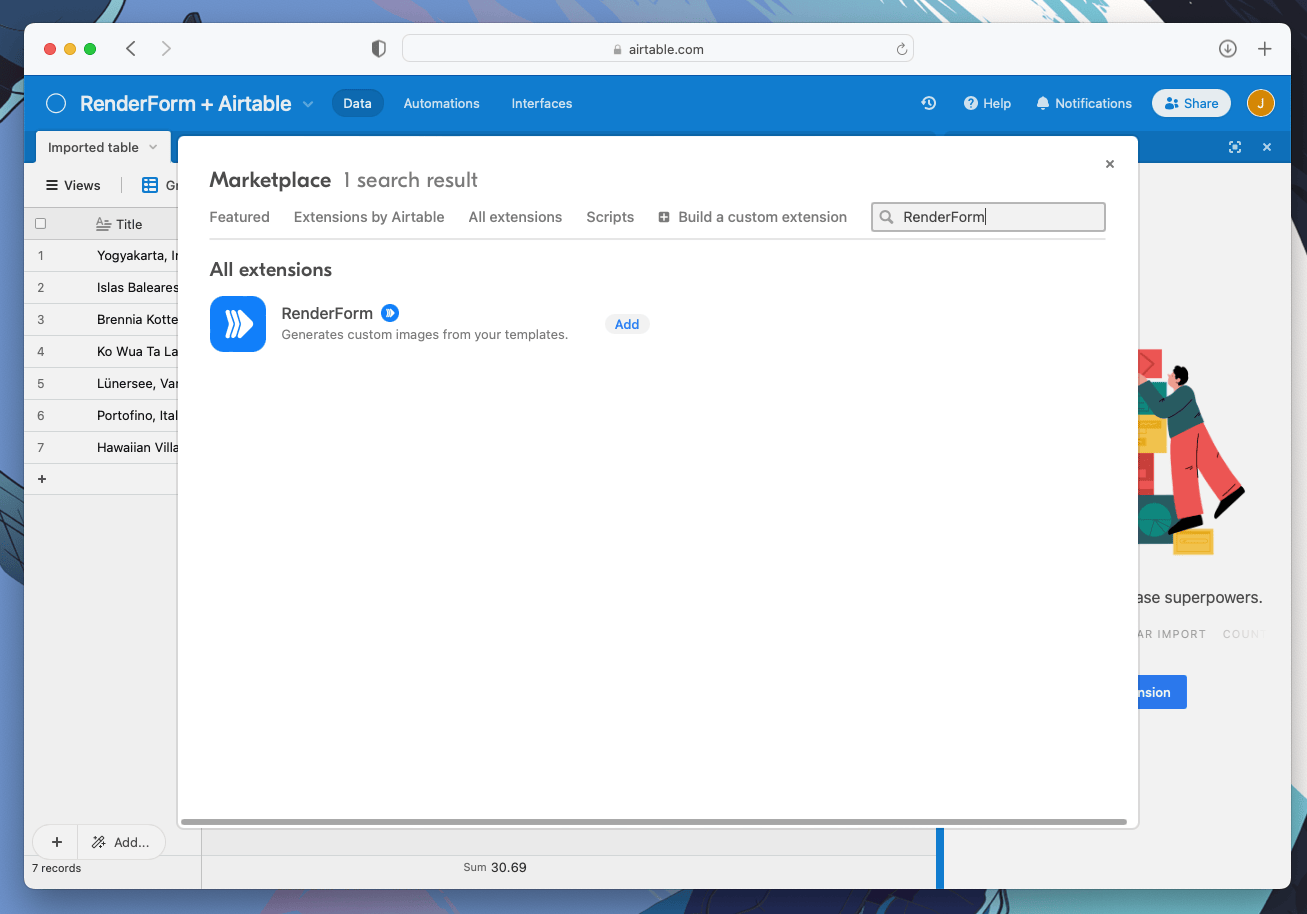
Step 1: Add the RenderForm Extension
Open your Airtable base and navigate to the Extensions panel in the top-right corner. Click the 'Add an extension' button and search for 'RenderForm'. Select it, click 'Add', and confirm the installation to proceed.
You can now close the full-screen introduction window to begin configuring the extension.
Step 2: Configure the RenderForm Extension
After installing the extension, the next step is to connect your RenderForm account. Copy your API Key from the RenderForm API Console and paste it into the Airtable extension settings.
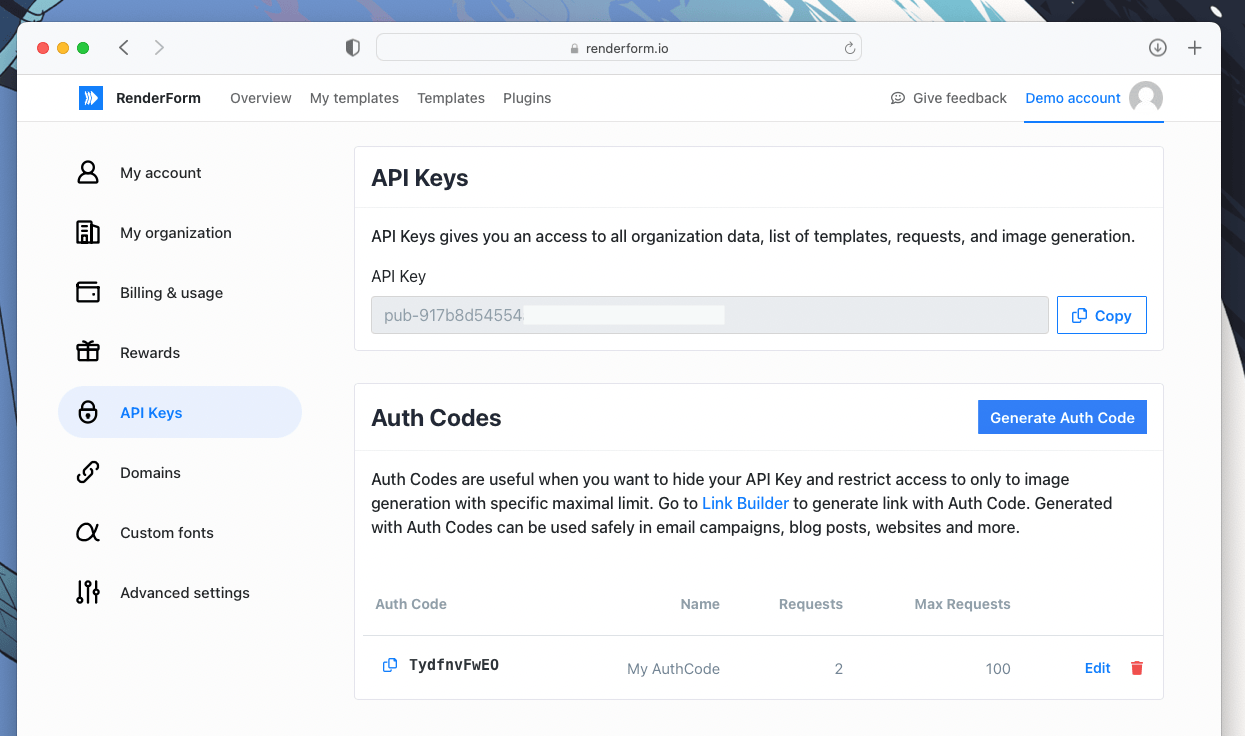
Click the small cog icon in the extension panel, paste your API Key, and hit 'Done'.
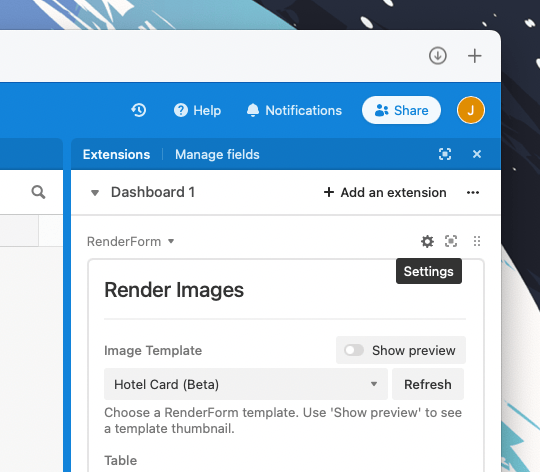
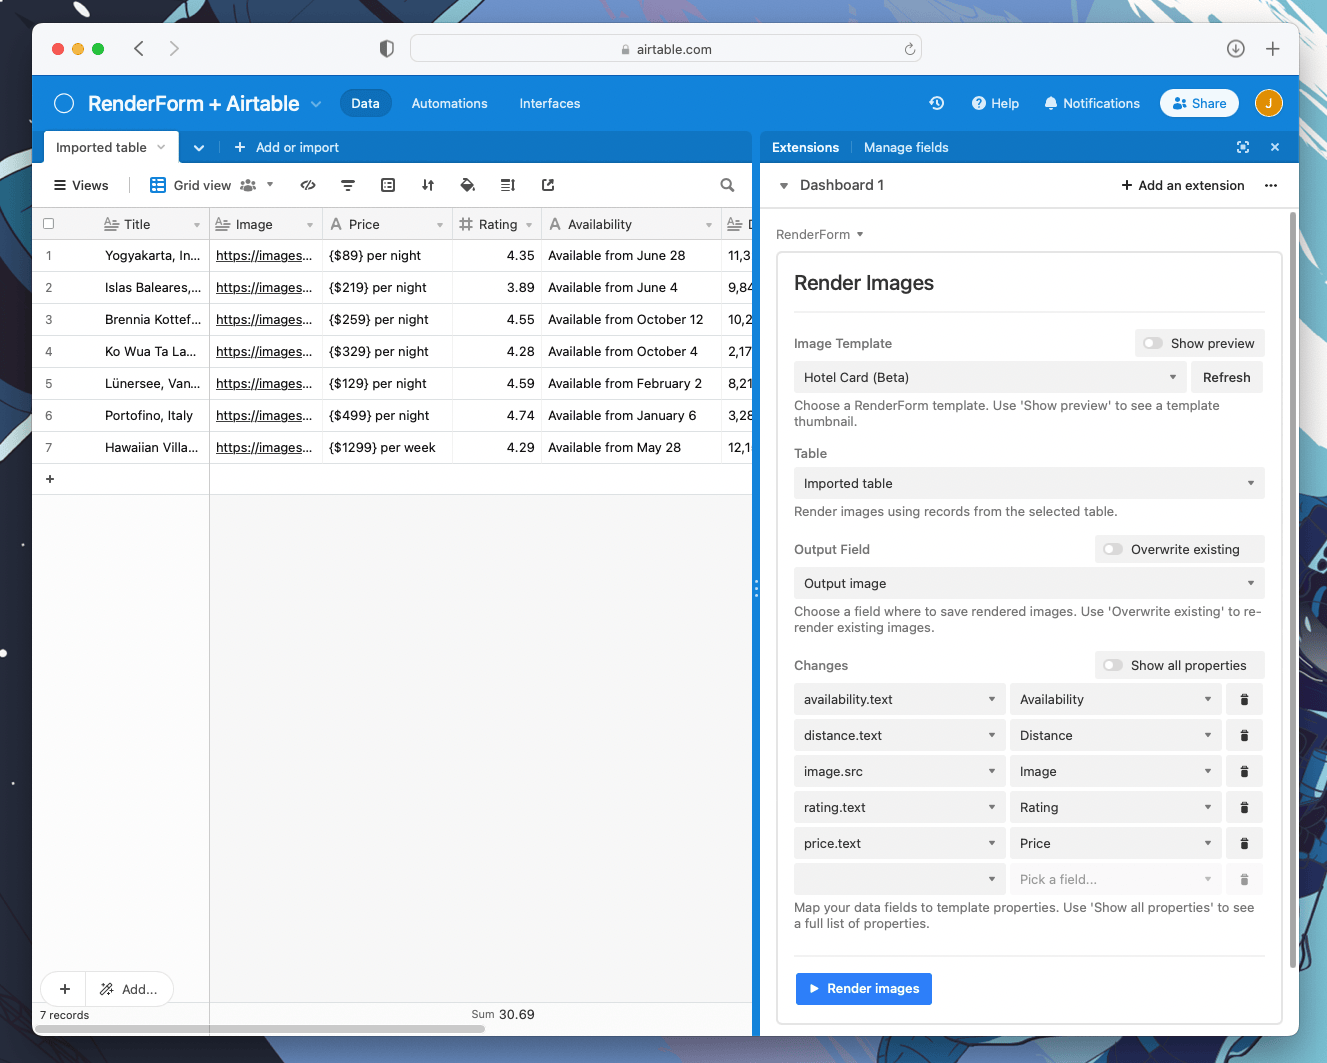
Once connected, you’ll be prompted to configure the extension by choosing the following:
- Image Template – Select the template you created in RenderForm.
- Table – Choose the Airtable table that contains the data for your images.
- Output Field – Select or create a field where the generated image URLs will be stored.
The Changes section lets you map specific fields from Airtable to components in your template—for example, linking a 'Hotel Name' column to a text field in the image.
Step 3: Generate Your Images
With everything set up, it’s time to generate your images. Simply click the 'Render' button in the extension panel. RenderForm will process your records and automatically populate the output field with links to the generated images.
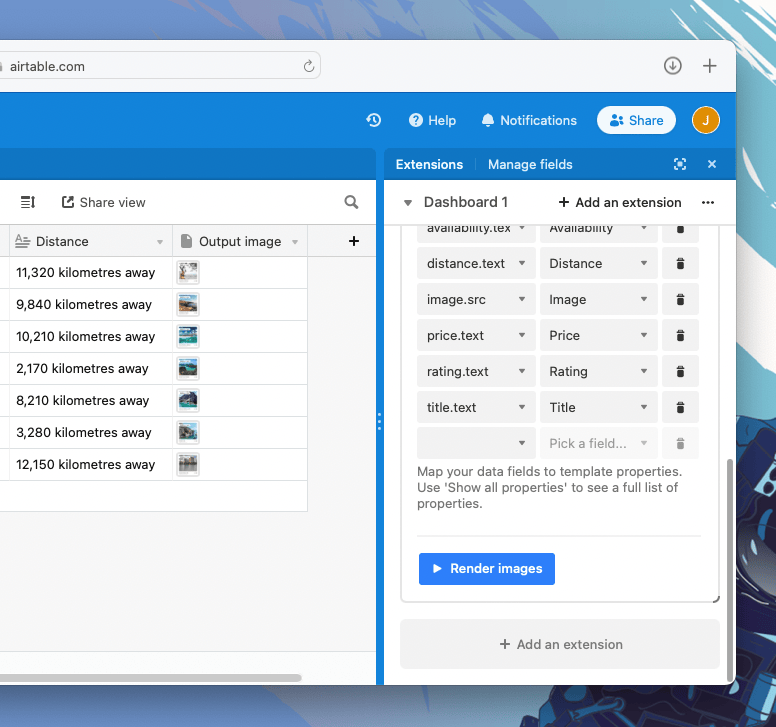
For easier viewing, you can switch to a 'Gallery' view in Airtable to browse through your image set in a visual layout.

Troubleshooting Tips
If you run into issues during image generation, here are a few common troubleshooting steps:
- Insufficient credits: Make sure your RenderForm account has enough credits. Check your usage in the RenderForm dashboard.
- Invalid API Key: Double-check that you've copied and pasted the correct API Key from RenderForm.
- Invalid or incomplete data: If the script fails unexpectedly, the issue may be with the data in your table. Try excluding fields one by one to isolate and fix the problem.
You can also open the script editor’s console logs to view detailed error messages for each failed render attempt.
By integrating RenderForm with Airtable, you unlock a scalable way to generate branded visuals, marketing assets, or even personalized user content—without leaving your Airtable workspace. Whether you're working solo or collaborating across teams, this workflow can save countless hours and bring consistency to your creative output.


