Send Personalized E-mail from React Application
Benefits of personalizing email content are that they are more likely to be opened by recipients, recipients are more likely to read them in full, and they are often shared with other people - because they show up as more personal emails. Personalized e-mails are not new, but it is time to take those personalized e-mails to the next level. One of the newest technologies that can be used for this purpose is image generation. In this article I will show you how to send an e-mail with personalized image to your customer once he makes some action in your application or website. I will use Make.com (Integromat) to take advantage from no-code automations.
Create Integromat webhook
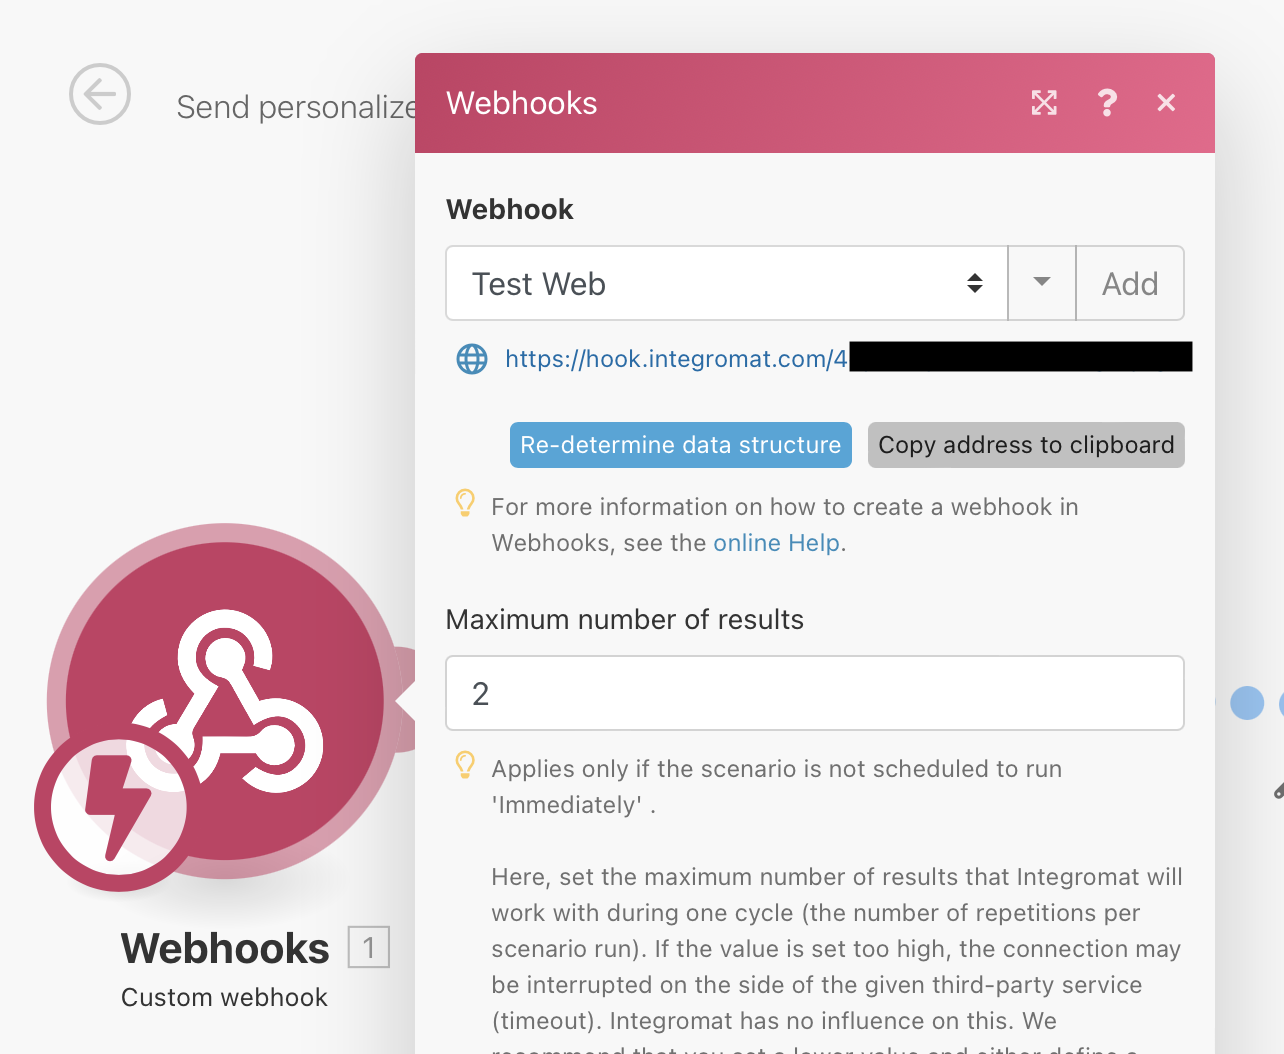
I started from creating a scenario in Integromat and adding a webhook module. The module generates an unique webhook URL where I can send my requests from server or from frontend application. The CORS won't be a problem here because Integromat accepts requests from frontend applications.
Send request on click
Let's go to the code part! I started from creating a simple <a href=""/> tag in my React application.
It looks pretty standard I added href attribute with link to some article and custom onClick method.
<a href="https://renderform.io/blog/posts/multi-language-image-variants/"
   target="_blank"
   onClick={onLearnMoreClick}
   className="btn btn-link d-flex align-items-baseline">
    <span>Learn how to quickly generate multi-language images</span>
    <i className="far fa-arrow-right ms-2"/>
</a>
The onLearnMoreClick method will be invoked once somebody clicks the link. The onLearnMoreClick will send a
POST request to endpoint generated by Make.com (Integromat). I used axios but you can use
any other library to do this. If you don't want to use any library check Fetch API.
const onLearnMoreClick = () => {
axios("https://hook.integromat.com/your-webook-url",
  {
    method: "POST",
    data: {
      firstName: account.firstName,
      email: account.email
    }
  });
}
We are passing two values which we will need in next steps:
firstName- user first name,email- user e-mail to send him personalized e-mail.
Edit image template
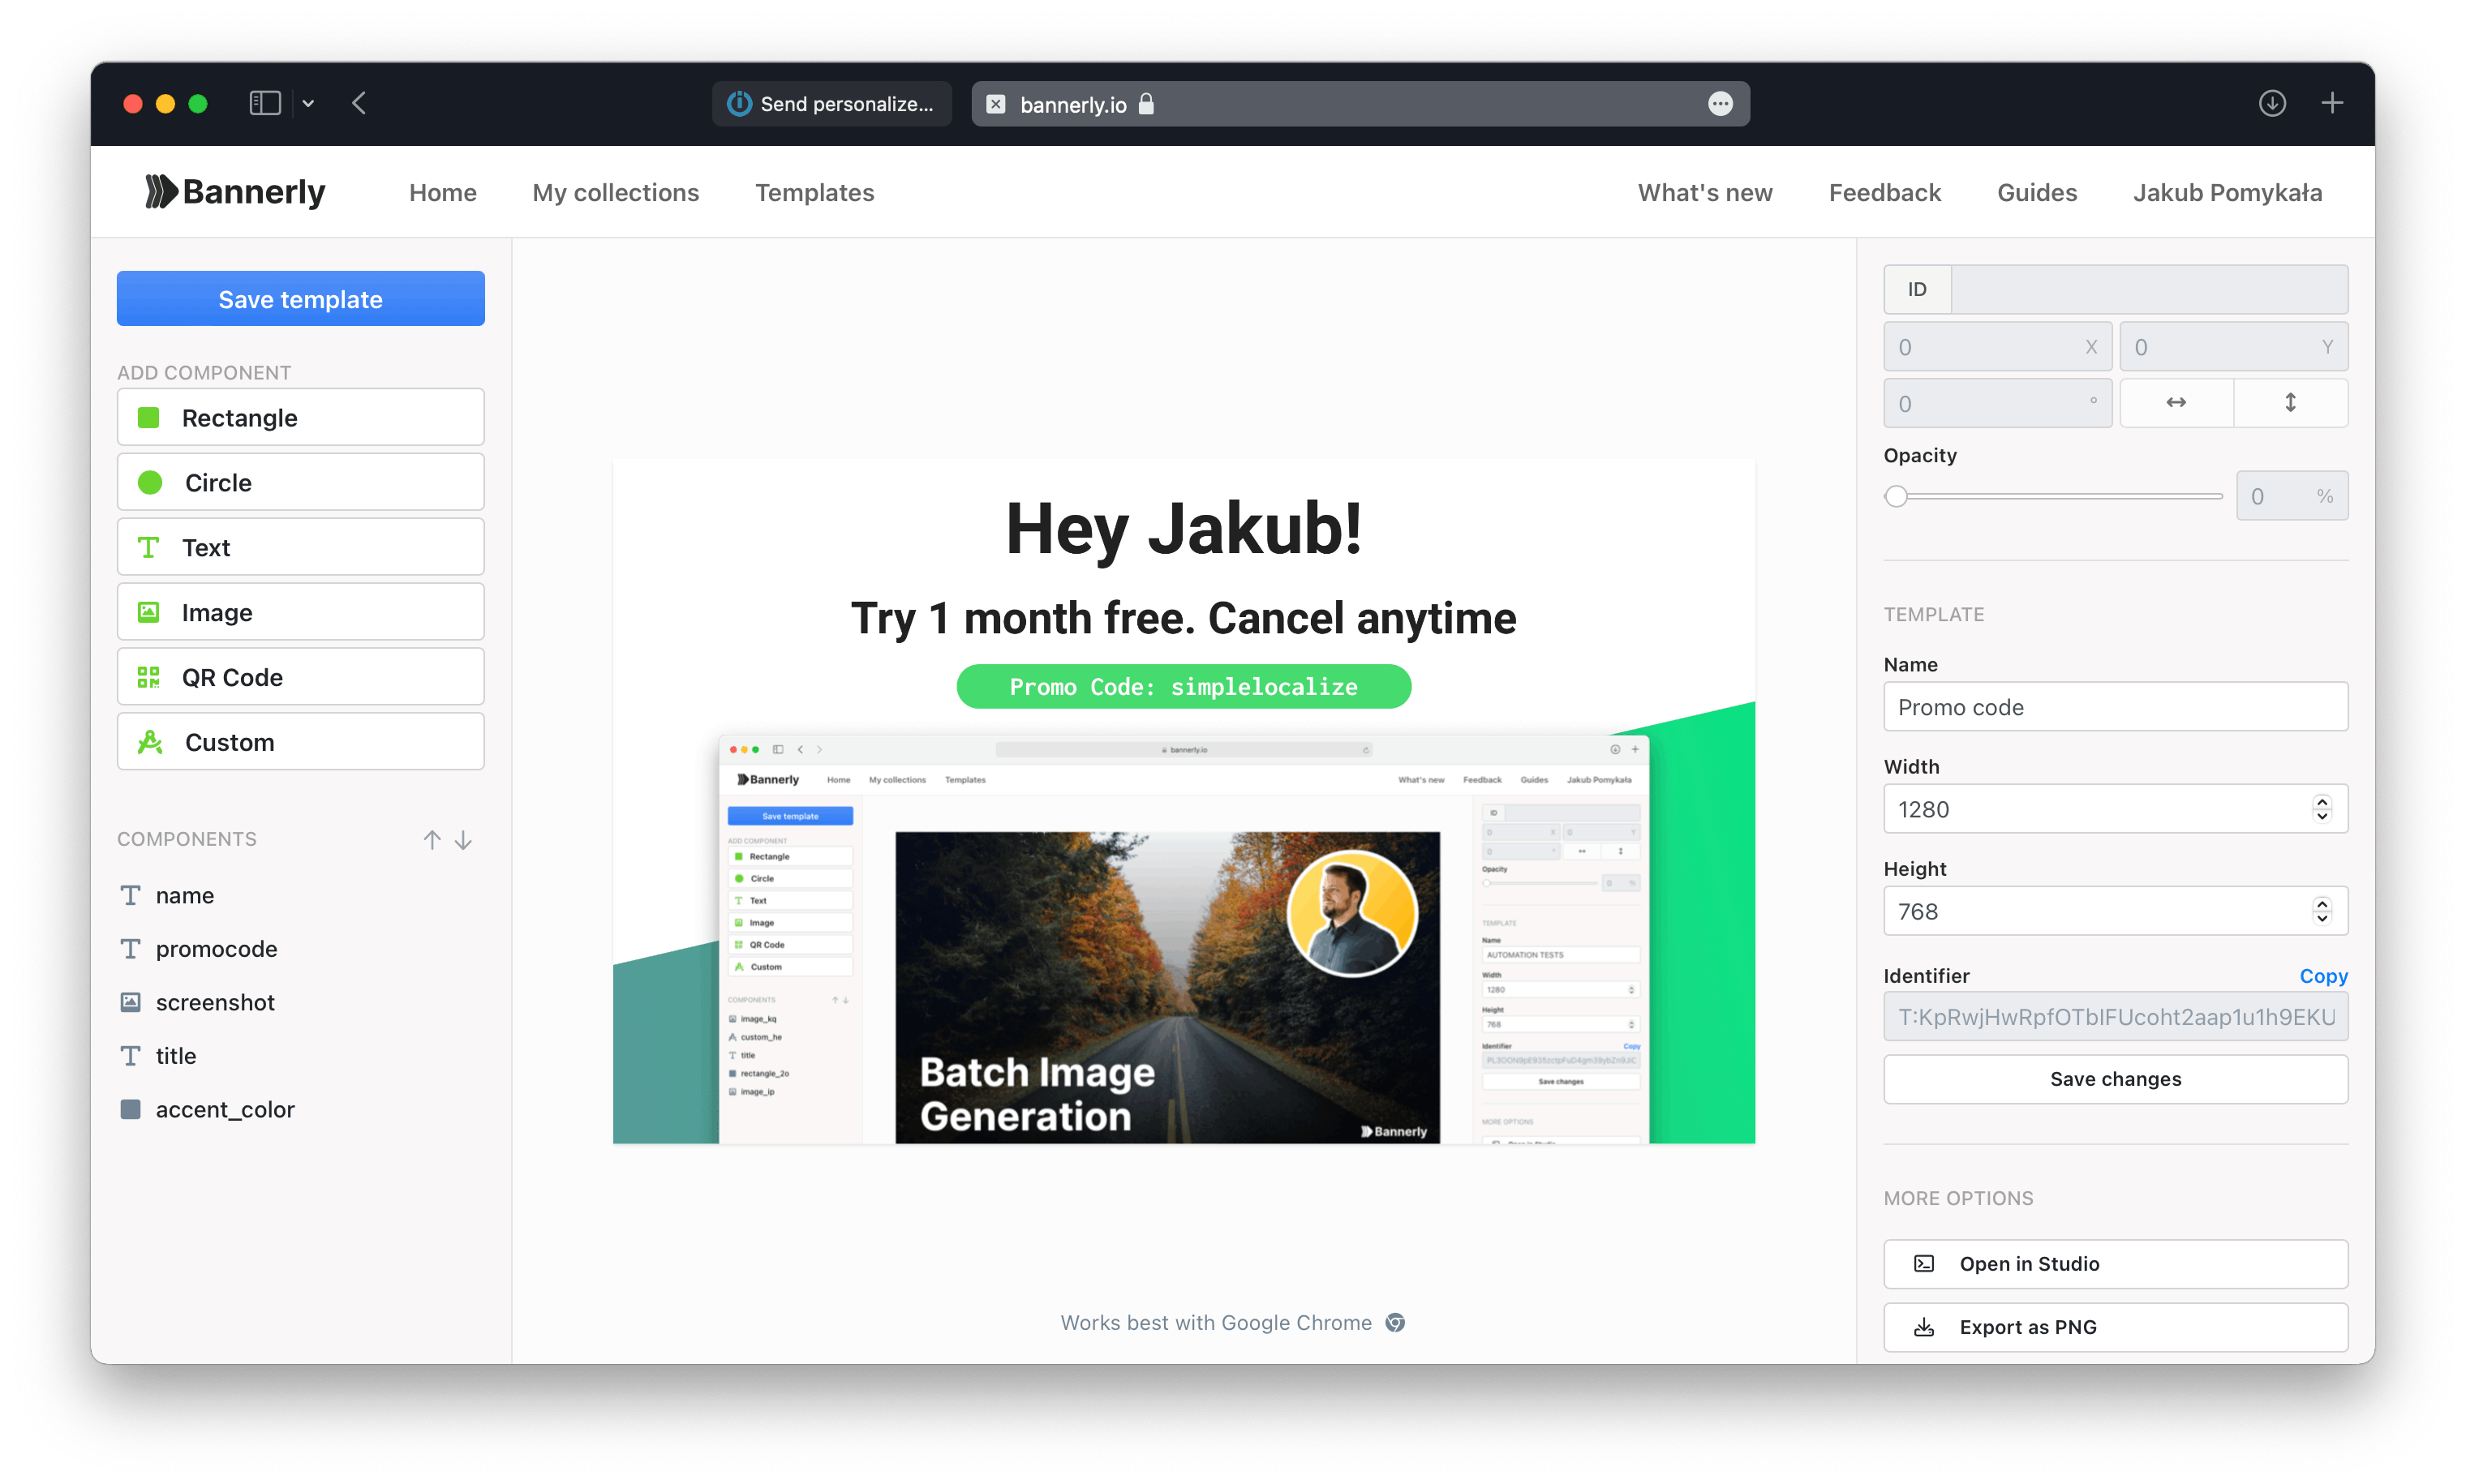
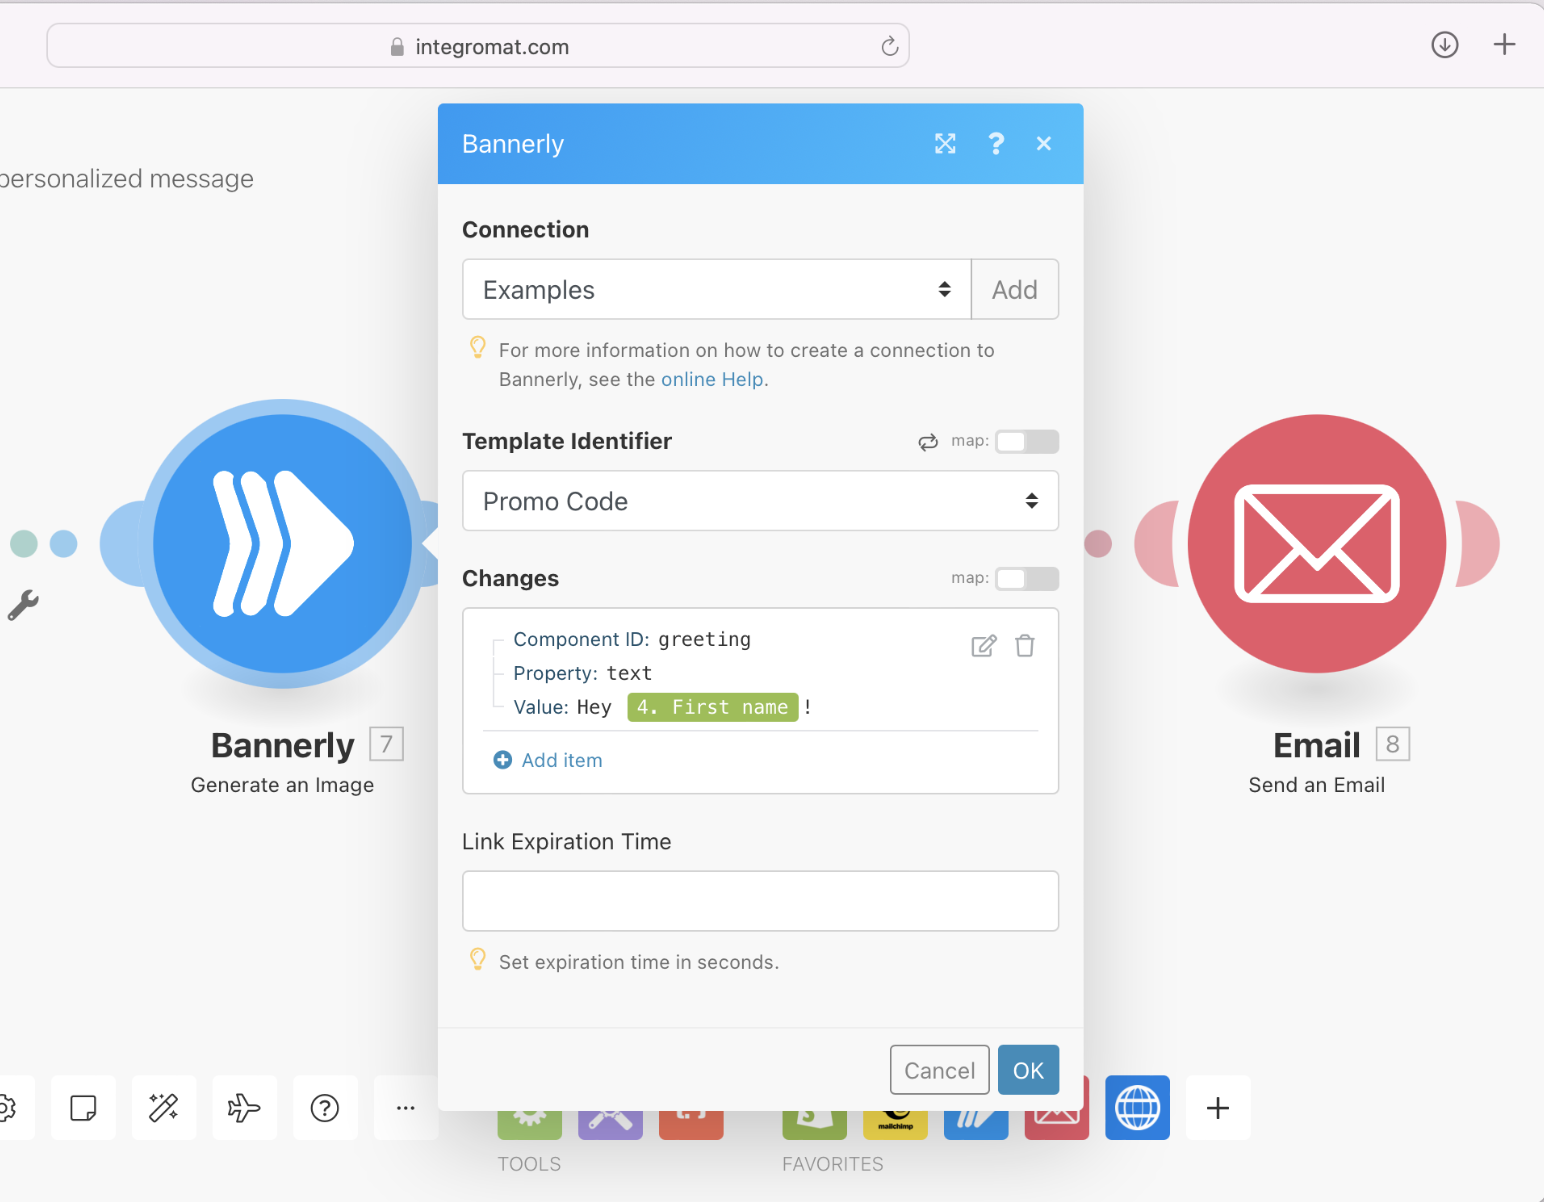
I used existing template from RenderForm template library. However, if you want, you can create your own template using template editor in RenderForm. We will edit the top component with 'Hey Jakub!' text, and we use Integromat to replace the text for every webhook request.
Configure Integromat scenario
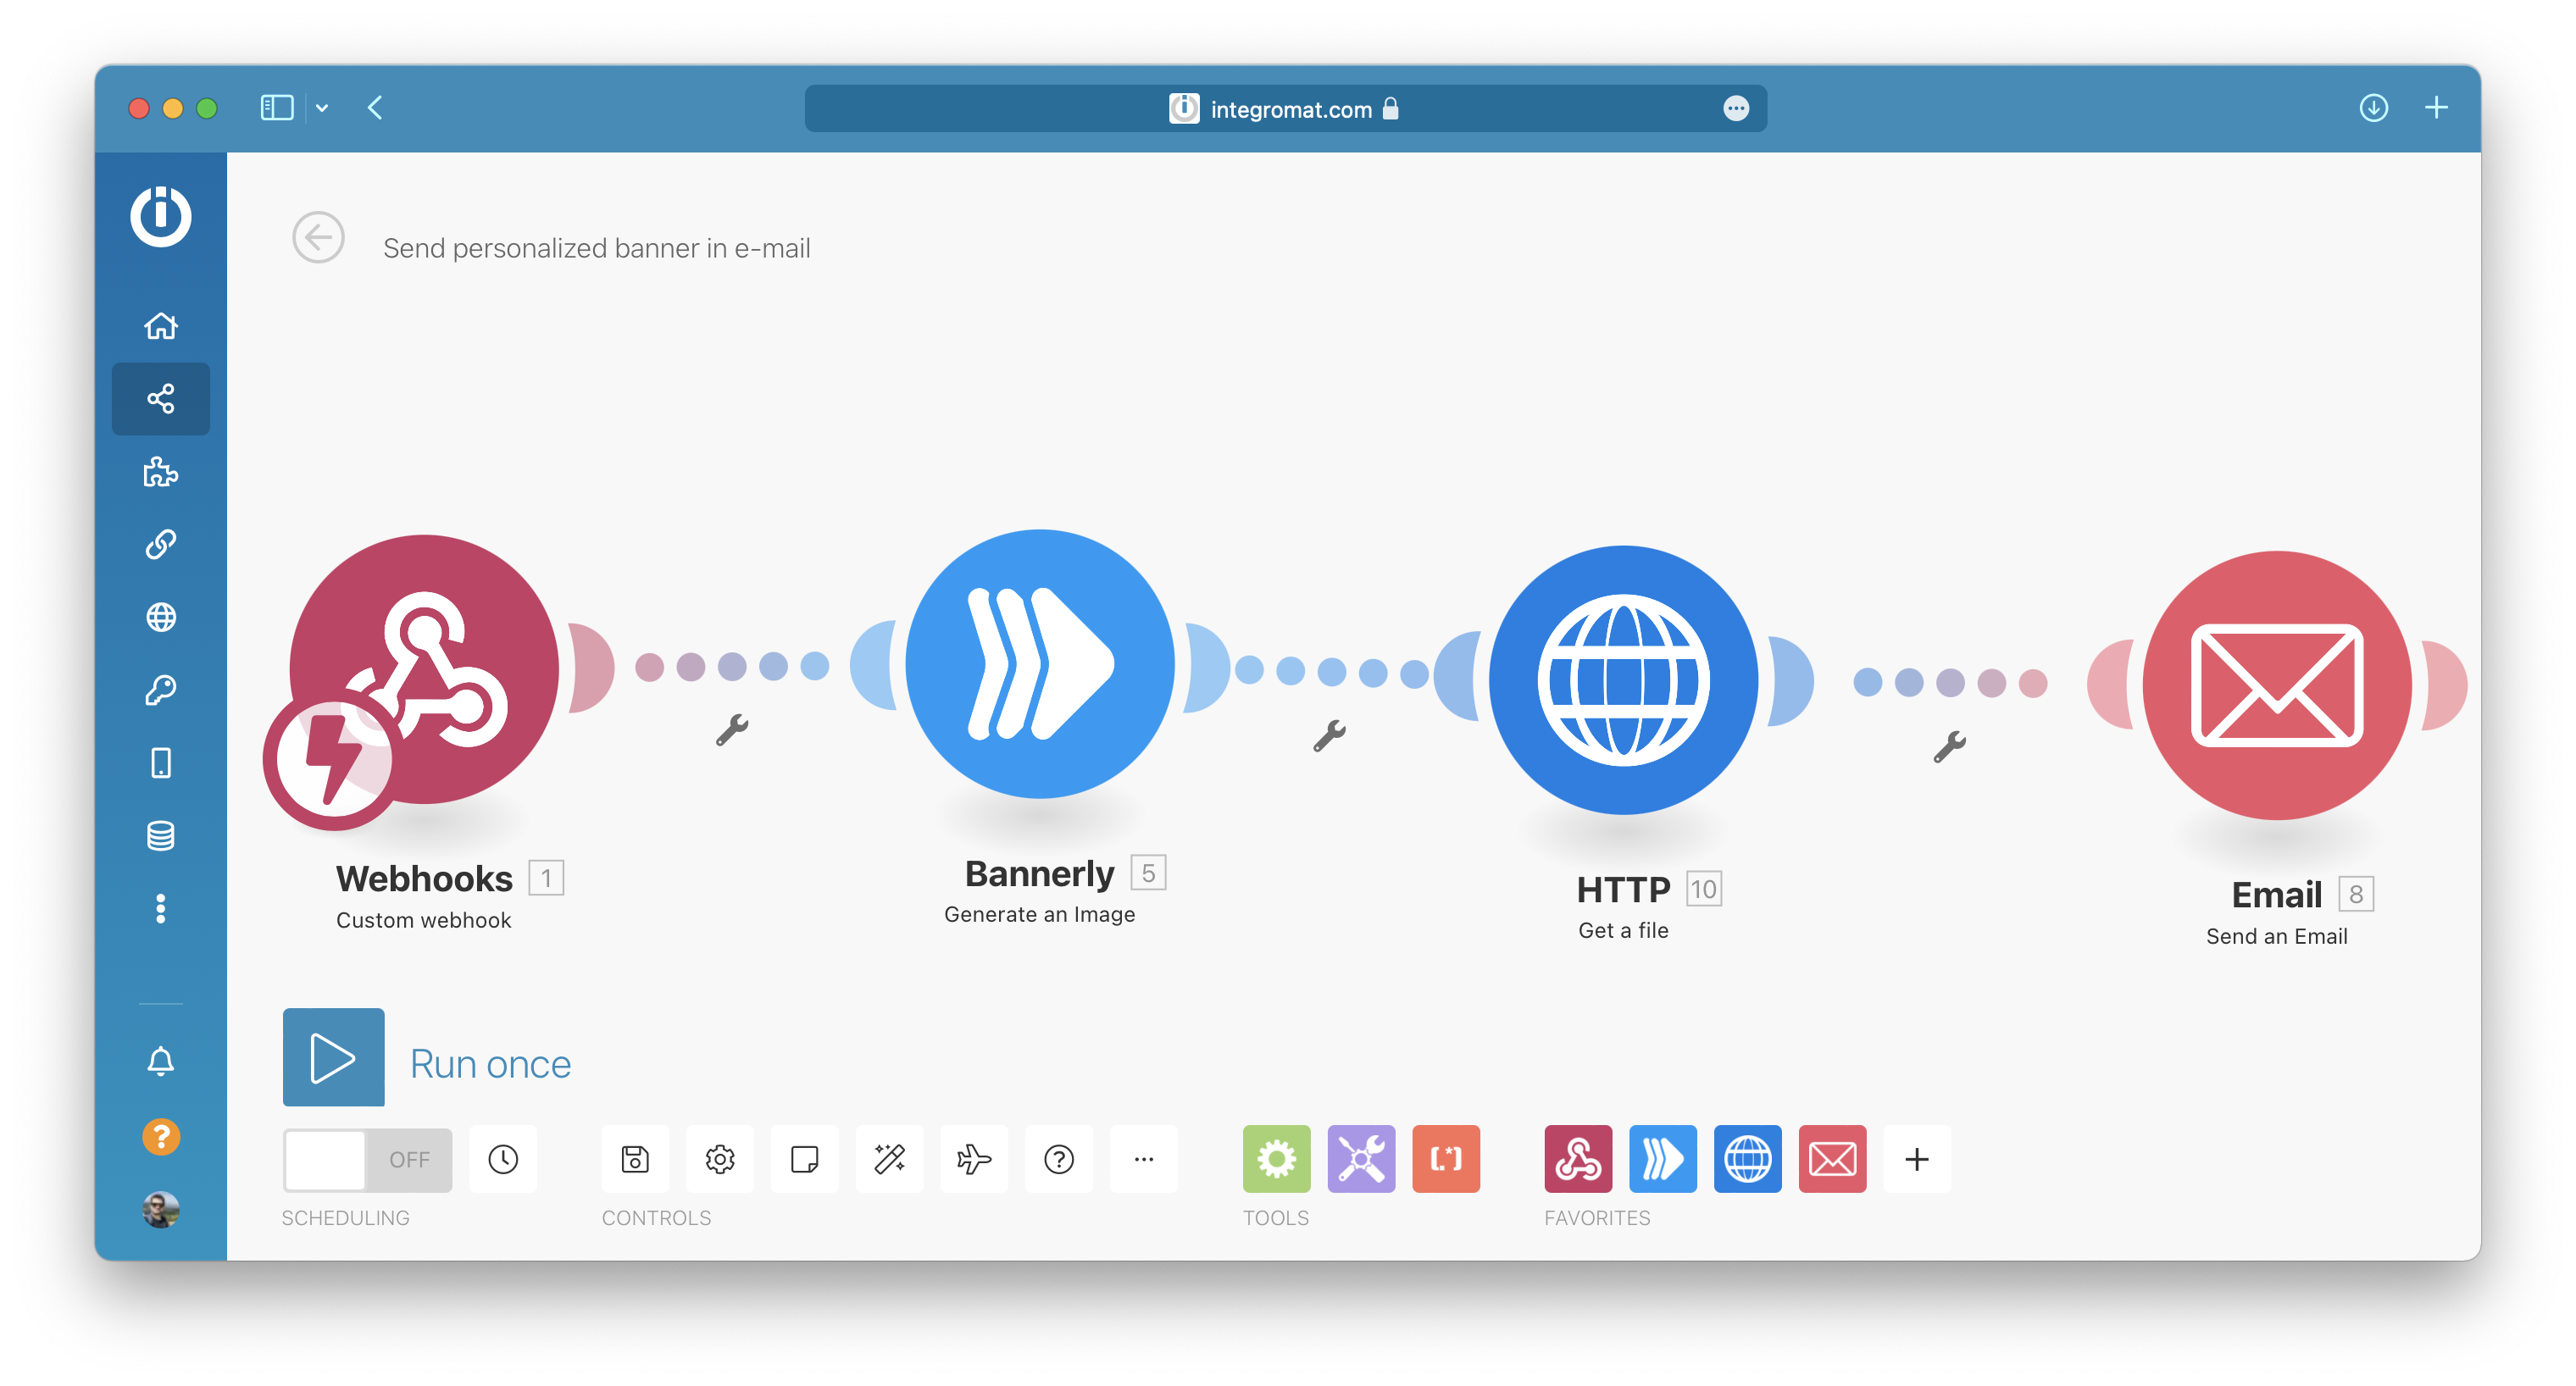
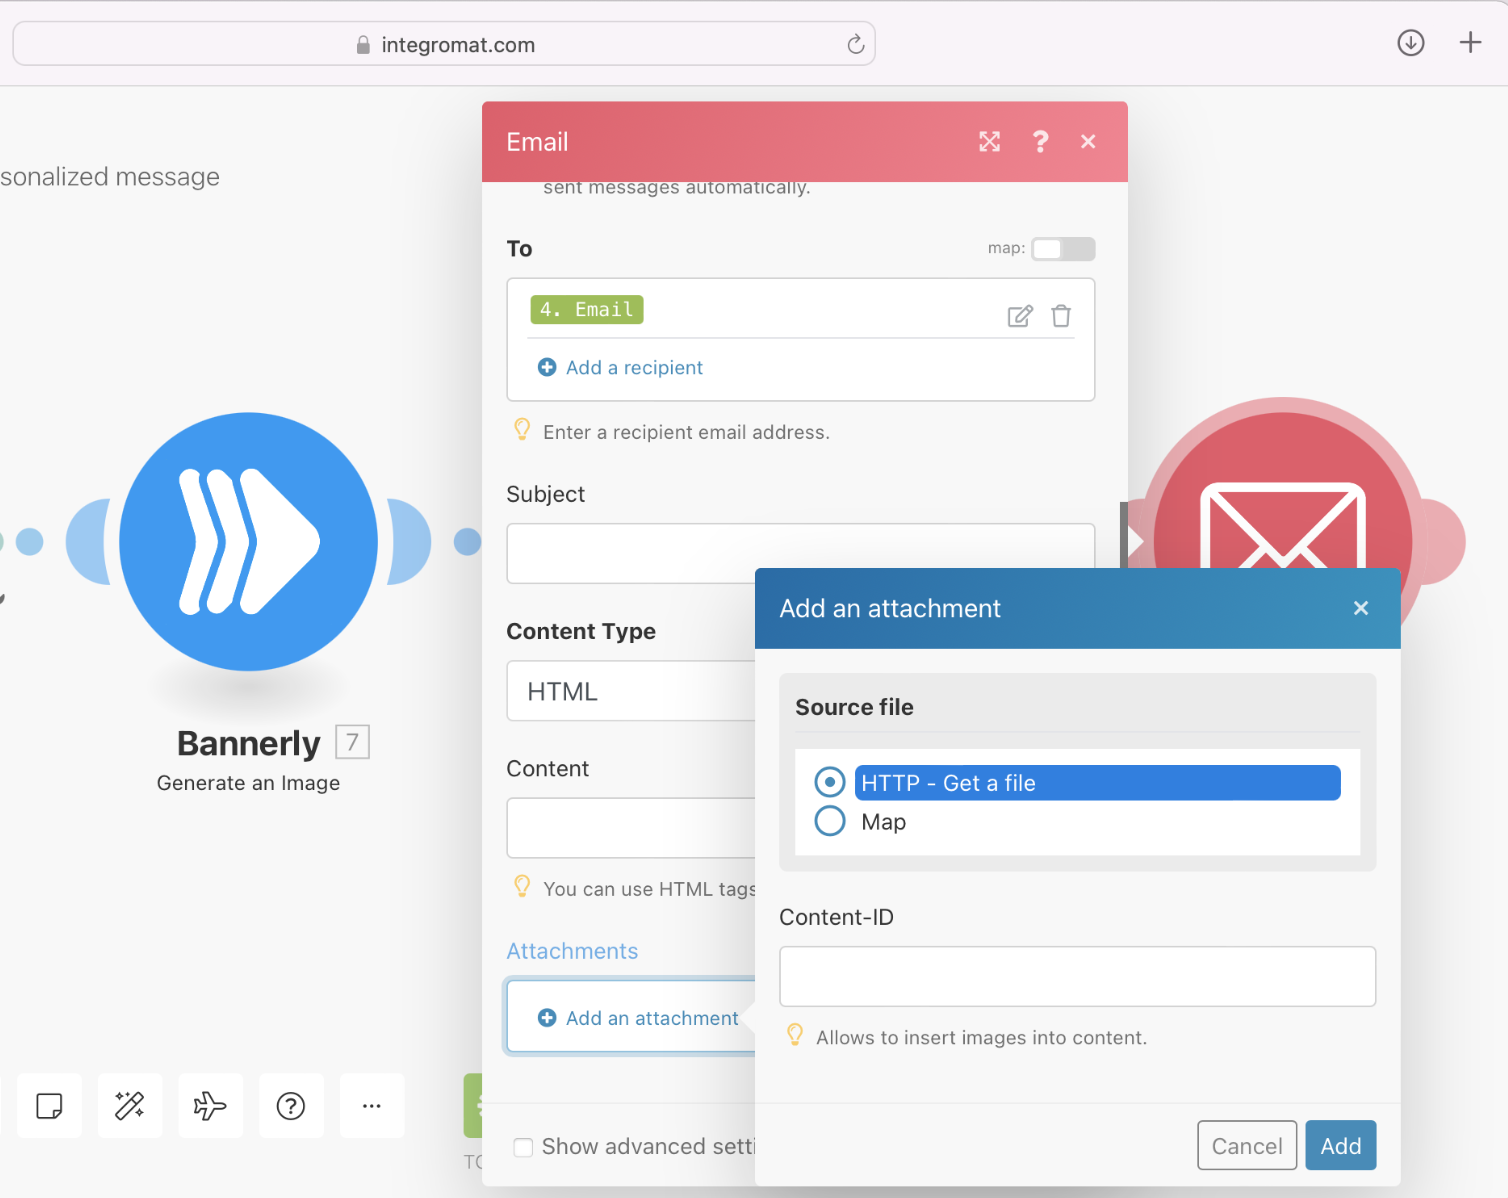
Below you see a whole Integromat scenario where I connected everything together. The scenario is self-explanatory, we have 4 modules:
- Webhooks module - receive requests from application
- RenderForm - generate image based on data from request
- HTTP - download the image from RenderForm
- Email - send e-mail to a customer
HTTP module is only for downloading image from received URL from RenderForm module.
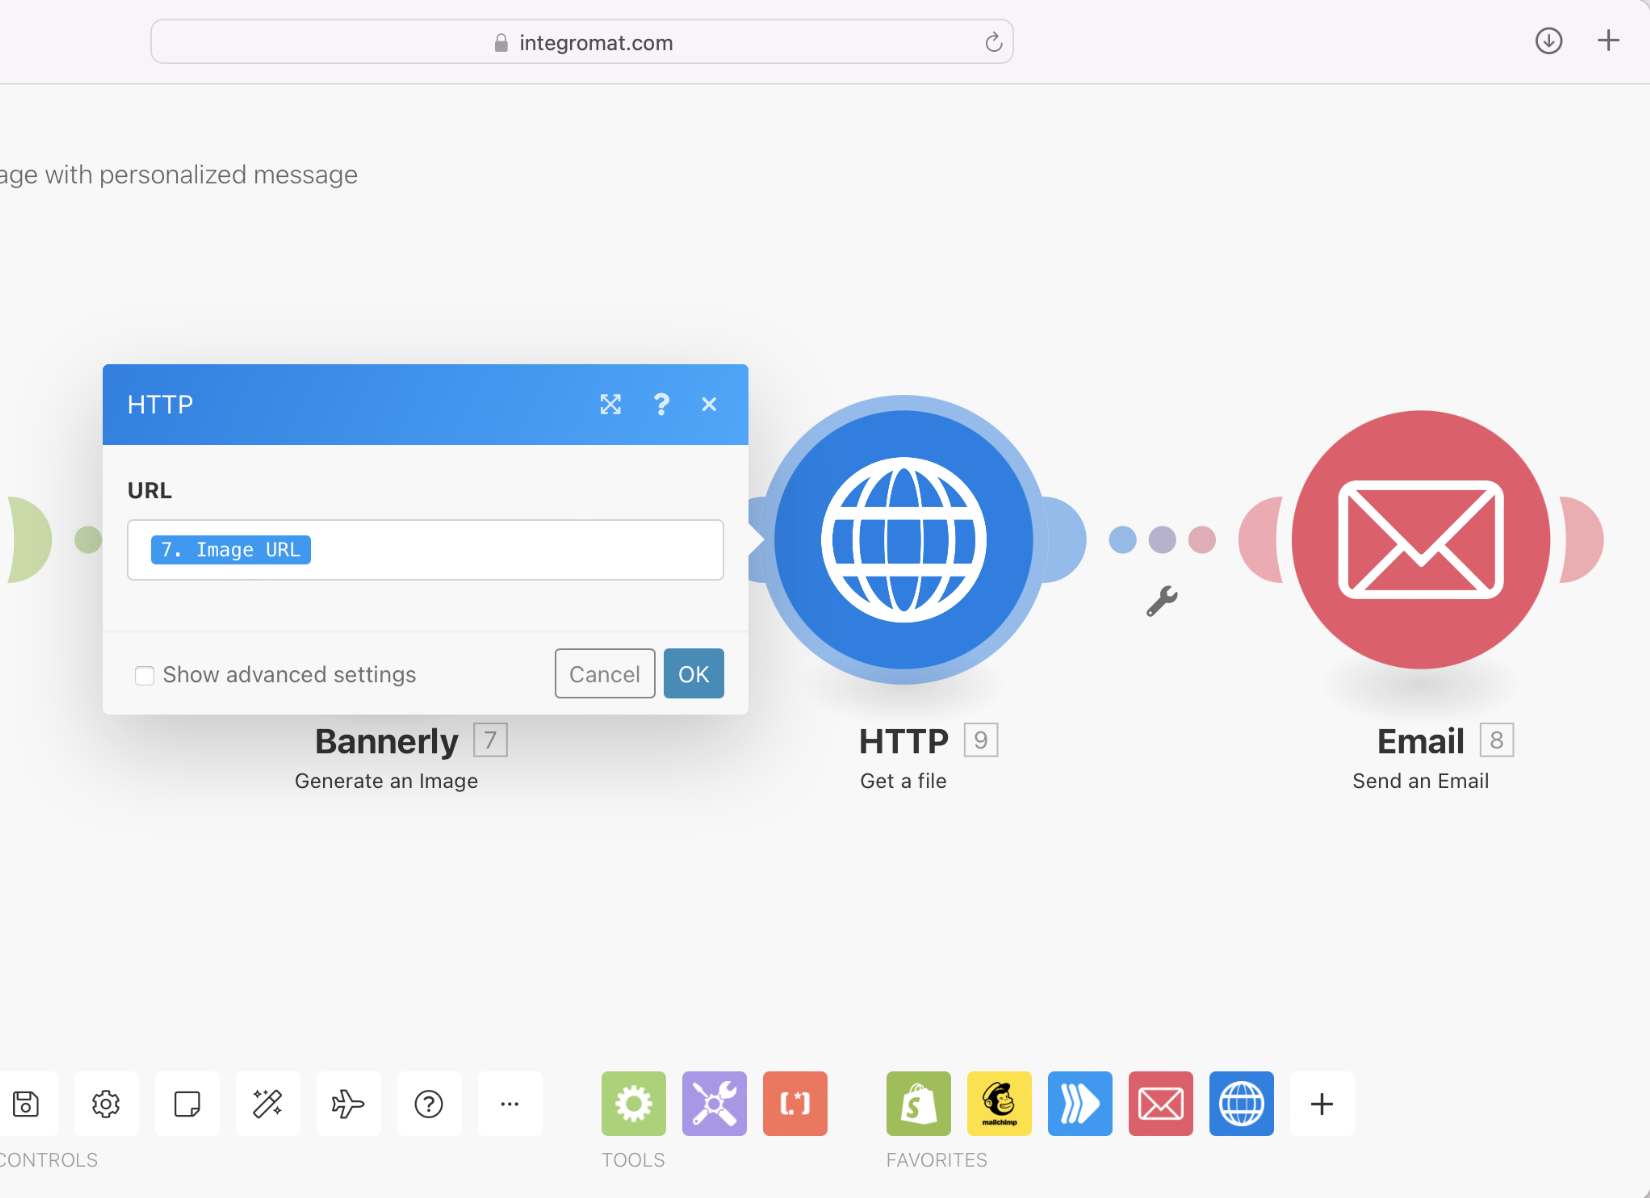
Thanks to the HTTP module we can add the image itself instead just the URL.
Test
Click 'Run once' button in created Integromat scenario and then click link to open the article from which we created in the first section. Now the request from our frontend application should be sent Integromat Webhook module, after that data will be passed to RenderForm module where a new image will be generated. RenderForm will take your template and replace title on the image and return a link with ready to download image. Next, HTTP module will download the image generated by RenderForm module and add it as an attachment in the last step. In E-mail module we composed a simple e-mail message which we sent to the user who clicked the link!
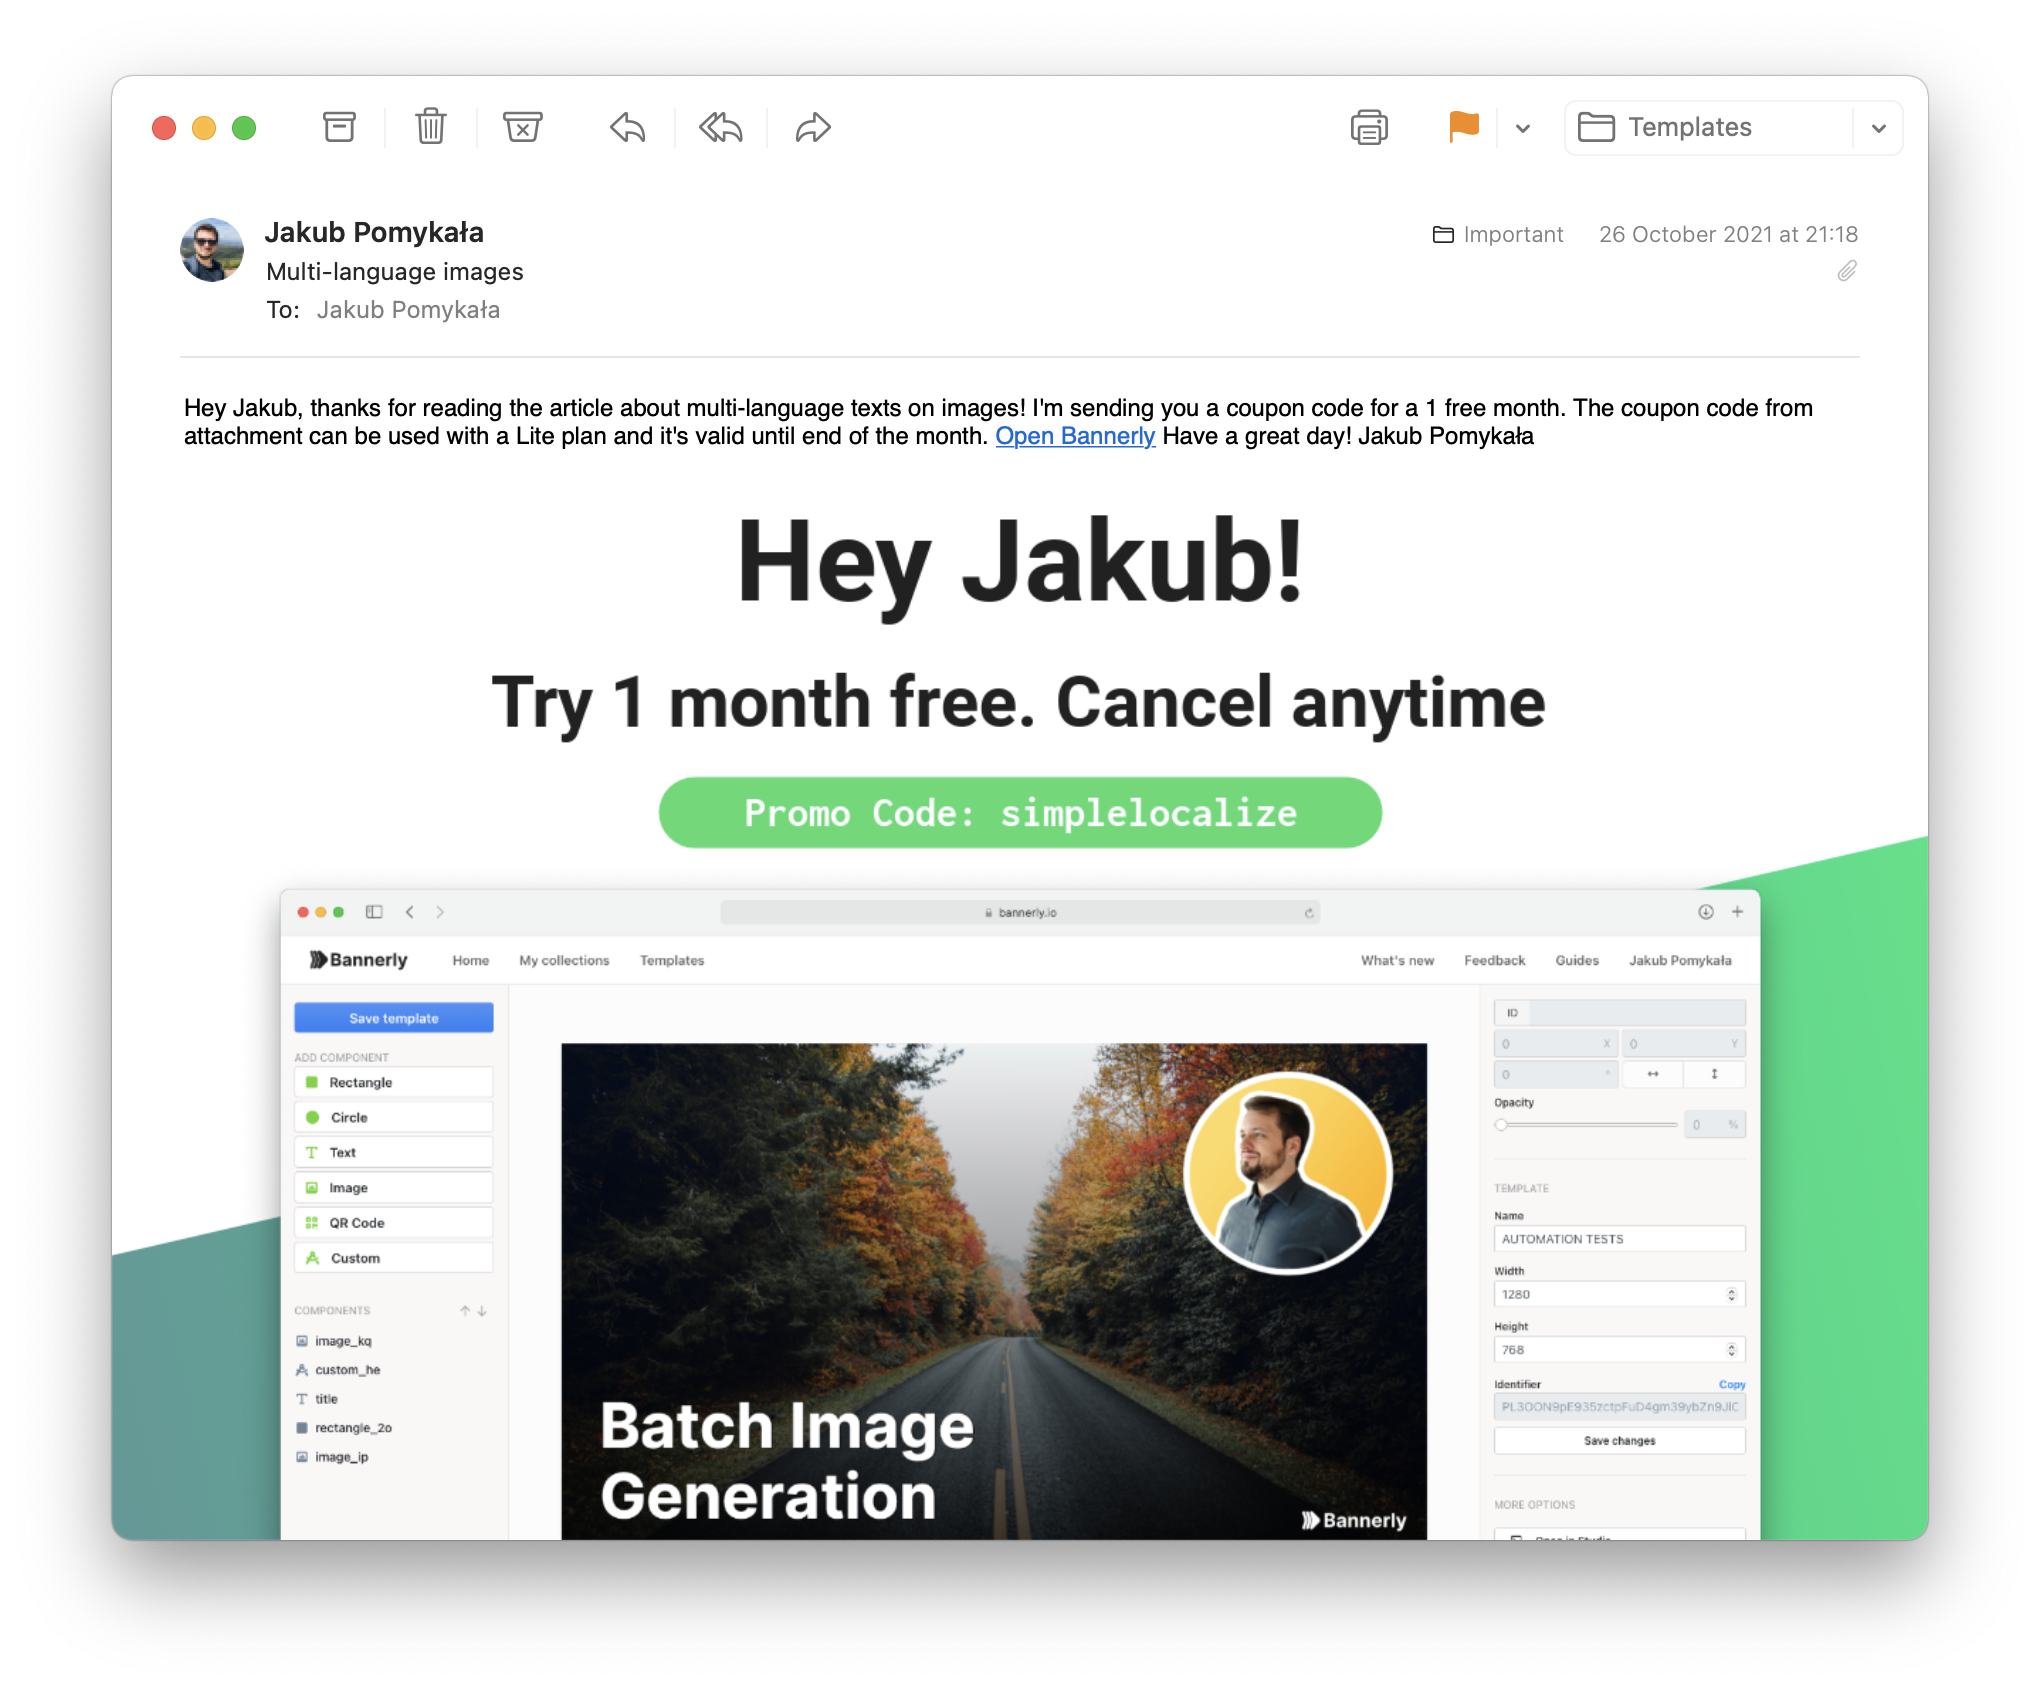
Presented Integromat scenario is just a simple example what you can do with batch image generation. Possibilities are unlimited! Your flows can be much more complex, you could generate an image for every occasion with RenderForm, for example you could add user avatar to make it more engaging. Image that your customer gets a personalized image with his name and profile image! Have fun with RenderForm!
