# RenderForm
> RenderForm is an API and no-code service for generating images, PDFs and videos from templates. You design a template once in a browser editor, then render thousands of variants by sending data through the REST API, Zapier, Make, Google Sheets, Airtable, WordPress, an MCP server or a CSV upload. Typical uses: bulk social media graphics, certificates, dynamic Open Graph images, personalized email images, product banners, invoices and reports.
Key facts:
- Free account: 50 renders, no credit card, template editor included. Paid: subscriptions from $9/month (250 credits) or one-time credit packs; 1 credit = 1 image or PDF. Unused credits roll over while subscribed.
- Output formats: PNG, JPG, WebP, PDF, MP4/WebM video (video templates use the HTML editor).
- Template features: dynamic text, images, QR codes with logos, charts, lists, custom fonts, multi-language variants, signed requests for public URLs.
- API: `POST https://api.renderform.io/api/v2/render` with header `X-API-KEY`; also a GET image URL form (`https://get.renderform.io/img/{template}.jpg?apiKey=...`) and webhooks for async renders.
- Support: https://renderform.io/docs/general/support
## Product pages
- [Home](https://renderform.io/): Generate images, PDFs and videos from templates through an API, Zapier, Make, Google Sheets, Airtable or a spreadsheet upload
- [Bulk image generation](https://renderform.io/bulk-image-generation): Create hundreds of images from one template and a CSV/spreadsheet
- [Certificate generator](https://renderform.io/certificate-generator): Generate personalized certificates in bulk from a template
- [HTML to image](https://renderform.io/convert-html-to-image): Render HTML/CSS templates into PNG, JPG or PDF
- [PDF generation](https://renderform.io/pdf-generation): Generate PDF documents (invoices, reports, certificates) from dynamic data
- [Image generation API](https://renderform.io/image-generation-api): REST API for rendering images from templates with dynamic text, images and QR codes
- [Automatic social images](https://renderform.io/automatic-social-image-generation): Generate Open Graph and social media images automatically
- [Dynamic OG images](https://renderform.io/dynamic-og-images): Serve dynamic Open Graph images for every page of a website
- [Image automation](https://renderform.io/image-automation): Automate image creation in no-code workflows
- [Social media image generation](https://renderform.io/social-media-image-generation): Templates and automation for social media posts
- [Real estate image generation](https://renderform.io/real-estate-image-generation): Property banners generated from listing data
- [AI images with perfect texts](https://renderform.io/ai-images-with-perfect-texts): Combine AI-generated backgrounds with crisp, editable text layers
- [Image variants](https://renderform.io/image-variants): Generate multi-language and multi-size variants of one design
- [Template editor](https://renderform.io/template-editor): Drag-and-drop editor for image, PDF and video templates
- [Template gallery](https://renderform.io/templates): Ready-to-use templates for social media, certificates, ads and more
- [Pricing](https://renderform.io/pricing): Free account with 50 renders; paid plans from $9/month or one-time credit packs; 1 credit = 1 image or PDF
## Integrations
- [Zapier](https://renderform.io/blog/posts/image-generation-with-zapier)
- [Make (Integromat)](https://renderform.io/blog/posts/image-generation-with-make)
- [Google Sheets](https://renderform.io/blog/posts/image-generation-with-google-sheets)
- [Airtable](https://renderform.io/blog/posts/image-generation-with-airtable)
- [Airtable extension](https://renderform.io/blog/posts/image-generation-with-airtable-extension)
- [WordPress plugin](https://renderform.io/blog/posts/image-generation-with-wordpress-plugin)
- [Integrately](https://renderform.io/blog/posts/image-generation-with-integrately)
- [MCP server (Claude, Cursor)](https://renderform.io/blog/posts/render-images-with-mcp)
- [CSV / spreadsheet upload](https://renderform.io/blog/posts/how-to-create-many-images-from-spreadsheet)
## Free tools
- [Twitter/X card preview tool](https://renderform.io/tools/twitter-card-preview-tool): Preview how a link renders on X, LinkedIn, Facebook and Slack
- [iMessage link preview tool](https://renderform.io/tools/imessage-link-preview-tool): Preview how a link renders in iMessage
- [Open Graph debugger](https://renderform.io/tools/og-debugger): Inspect Open Graph and Twitter meta tags of any URL
- [Icon generator](https://renderform.io/tools/icon-generator): Generate app and favicon icon sets
- [Image optimization tool](https://renderform.io/tools/image-optimization-tool): Compress and resize images in the browser
## Documentation
### General
- [Introduction](https://renderform.io/docs): RenderForm is a simple and user-friendly toolset of design tools that lets you create beautiful banners to advertise your business.
- [Template editor](https://renderform.io/docs/general/template-editor): RenderForm is an easy way to create engaging banners. You don't have to be a designer or developer to make eye-catching images for social media, blogs, or your website
- [Template editor (HTML)](https://renderform.io/docs/general/html-template-editor): Create custom images using HTML/CSS templates with RenderForm. Design unique layouts, add text and images, and generate dynamic visuals without being a designer.
- [Template properties](https://renderform.io/docs/general/template-properties): Template properties are properties of all components used in the template created in template editor. Use them to change how your components look like.
- [Video templates](https://renderform.io/docs/general/video-templates): Create animated video templates in the RenderForm Advanced Editor and generate MP4 or WebM videos from them with your own texts, images and video clips via the API.
- [Embedded editor](https://renderform.io/docs/general/embedded-editor): Embedded Editor is a drag & drop web-based editor for creating engaging banners. It allows you to create templates that can be reused later.
- [AI Images](https://renderform.io/docs/general/ai-images): Generate AI images on the fly using text prompts. Use the ai: prefix in image source properties to create unique images powered by OpenAI.
- [QR code formats](https://renderform.io/docs/general/qr-codes): Add QR codes with logo to any kind of images. Use no-code automations to scale, generate thousands of images with QR codes in seconds.
- [Custom fonts](https://renderform.io/docs/general/custom-fonts): Load custom fonts into your banner designs. Create and scale your visuals with custom fonts for free!
- [Signed requests](https://renderform.io/docs/general/signed-requests): Signed requests allow you to generate images with dynamic content. You can use it to create social media banners, article covers, or any other image with dynamic content.
- [MCP Server](https://renderform.io/docs/general/mcp): Connect RenderForm to AI assistants like Claude Desktop, Cursor, and Windsurf using the Model Context Protocol (MCP) to generate images, PDFs, and screenshots via natural language.
- [Support](https://renderform.io/docs/general/support): Contact us in case of any trouble, feedback, suggestion or integration question. We are here for you!
### REST API
- [Get started](https://renderform.io/docs/api/get-started): Use API to create and generate images based on templates or take screenshots. Authorize your requests with 'X-API-KEY' header.
- [Render image](https://renderform.io/docs/api/render-image): Try out batch image generation tool. Generate images using API based on your template created in RenderForm Template Editor.
- [Render video](https://renderform.io/docs/api/render-video): Generate MP4 or WebM videos using the RenderForm API based on a video template created in the Advanced Editor. Asynchronous rendering with polling and webhooks.
- [Get template](https://renderform.io/docs/api/get-template): Retrieve detailed information about a specific template using its identifier with the RenderForm API. Access template metadata and customize your content
- [List templates](https://renderform.io/docs/api/list-templates): Retrieve a list of all your templates created in RenderForm’s template editor, including metadata and preview links. Easily manage your template library.
- [Manage templates](https://renderform.io/docs/api/modify-templates): Manage your templates directly through the API
- [List results](https://renderform.io/docs/api/list-results): Retrieve a list of all your rendered images, PDFs, and other paid requests with metadata. Easily track and manage your generated content with this API endpoint.
- [Usage](https://renderform.io/docs/api/credits-usage): Check your organization's credit usage, upload storage, and plan details using the RenderForm API.
- [Take screenshot](https://renderform.io/docs/api/take-screenshots): Use the RenderForm API to take screenshots of any website. Automatically save the image and receive a link for easy access. Perfect for automation and integration.
- [Webhooks](https://renderform.io/docs/api/webhooks): Create a webhook for image generation. Get a notification when your image is ready to download. Simple setup and zero configuration required.
## Optional
- [Blog](https://renderform.io/blog): tutorials on image automation, no-code workflows and social media image sizes
- [Tutorials on automation](https://renderform.io/blog/tags/automation)
- [Terms of service](https://renderform.io/legal/terms-of-service)
- [Privacy policy](https://renderform.io/legal/privacy-policy)
- [Full documentation in one file](https://renderform.io/llms-full.txt)
---
# Introduction
Source: https://renderform.io/docs
**RenderForm is a simple and user-friendly automation & design tool** that lets you create templates and create images based on that with custom images, texts, QR codes, and more.
It doesn't matter if you are a marketing professional, graphic designer, web developer, or just looking for a way to promote your blog, RenderForm can help you
with sketching and automating your design creation.
Happy designing!
### Guides
See the guides below to learn how to use RenderForm.
---
# Template editor
Source: https://renderform.io/docs/general/template-editor
RenderForm is an easy way to create engaging banners using a drag & drop web-based editor. We put great effort to make it very easy to use. RenderForm focuses on templates' creation,
which allows you to reuse those templates later for other purposes. It allows you to quickly generate banners with different,
texts and images keeping style of your blog or business.

## Basics
### Toolset and component list
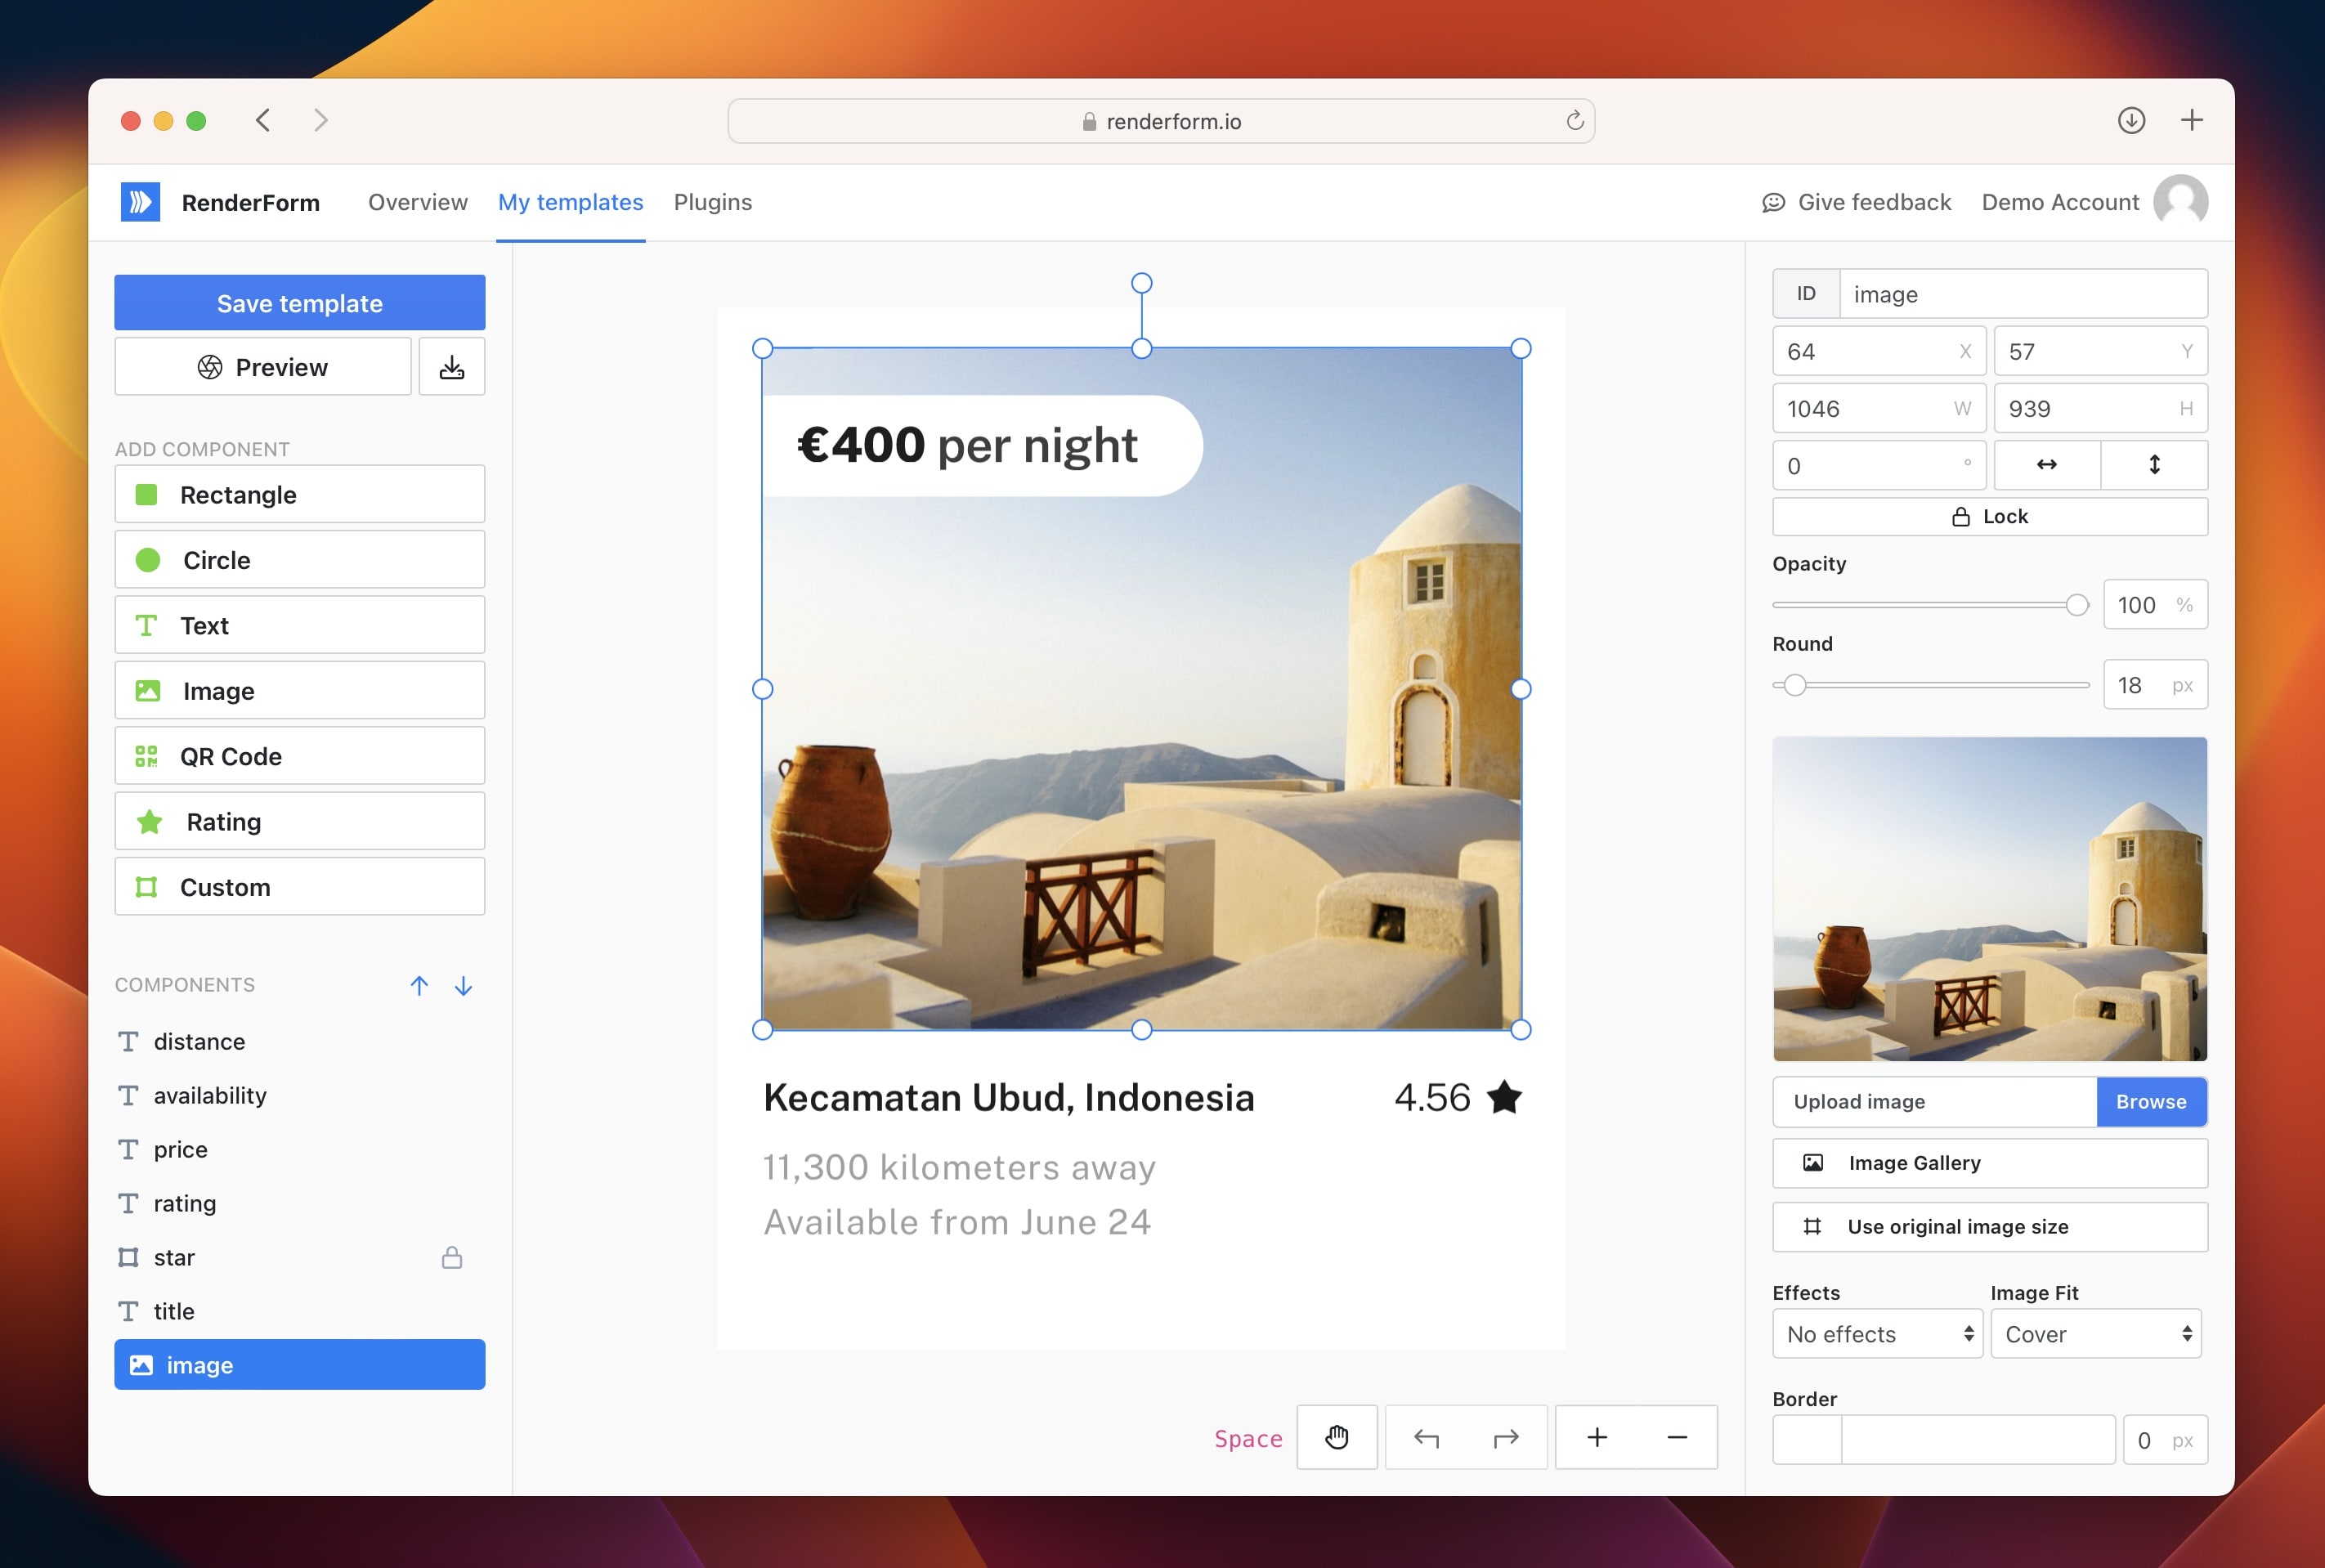
On the left side there is your toolset. There you will find the list of all available components, components used in your template, and an option to save your template.
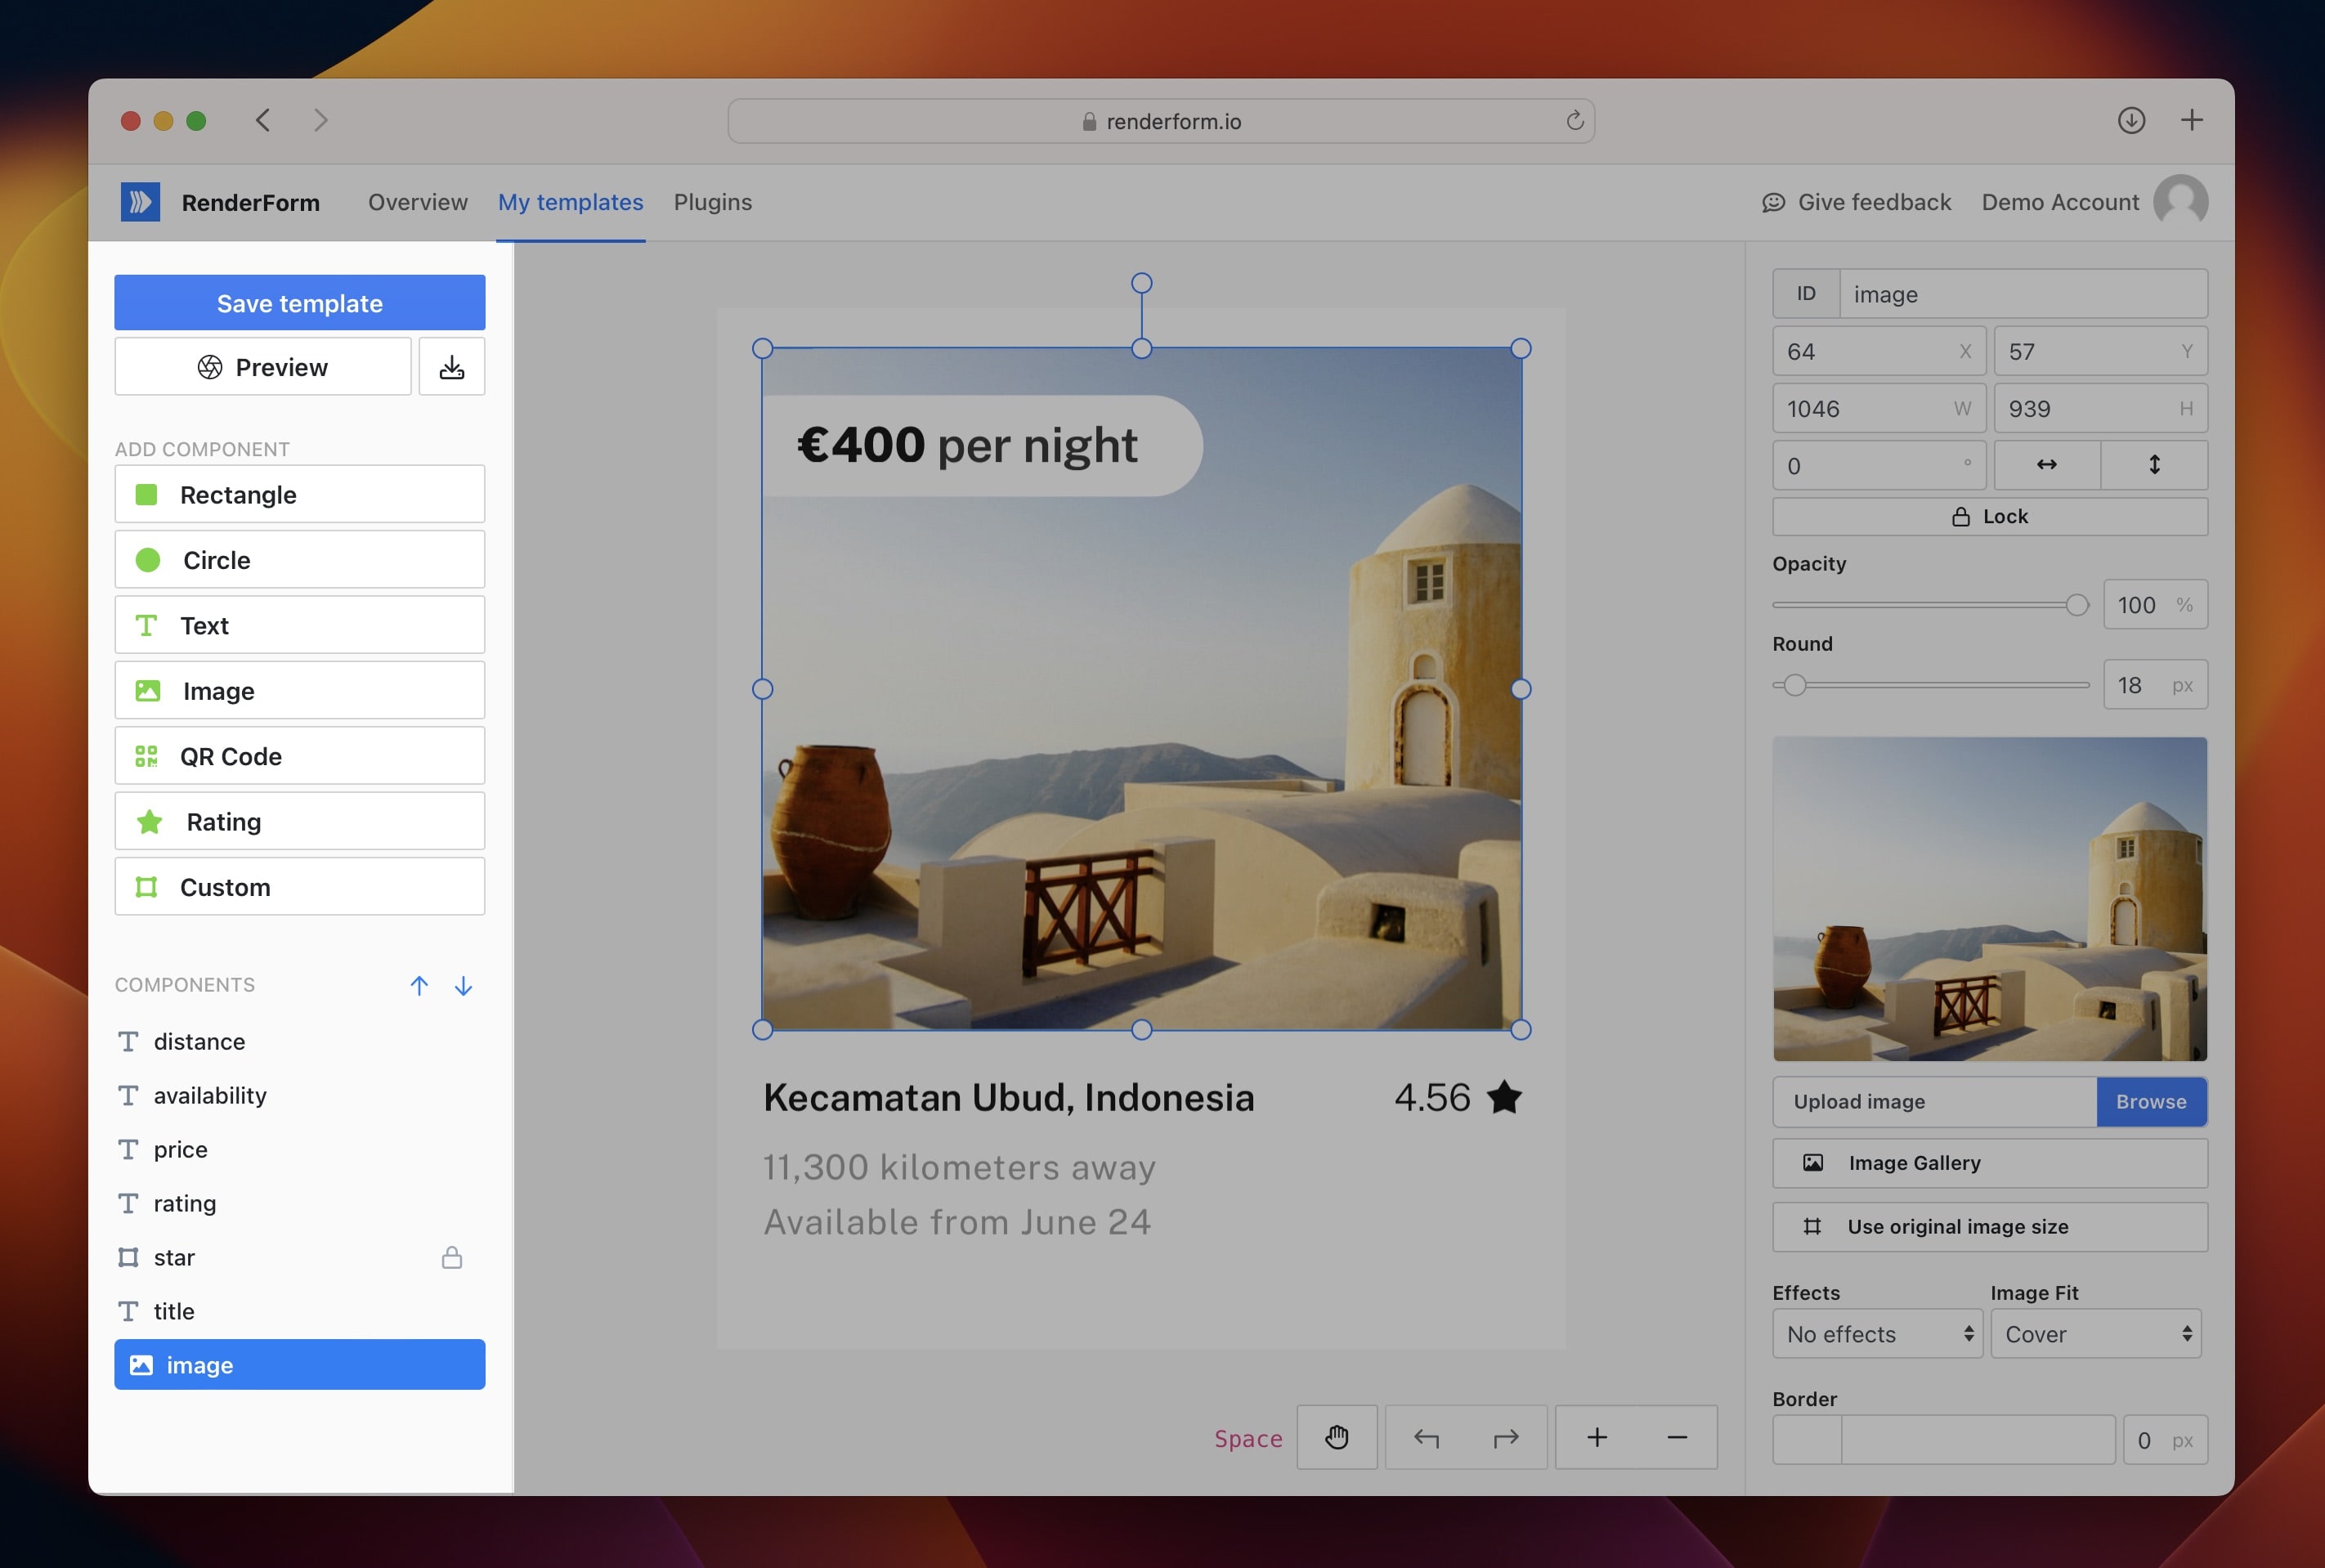
Blue arrows next to the components list allow you to bring a component forward or backward on canvas.
### Canvas
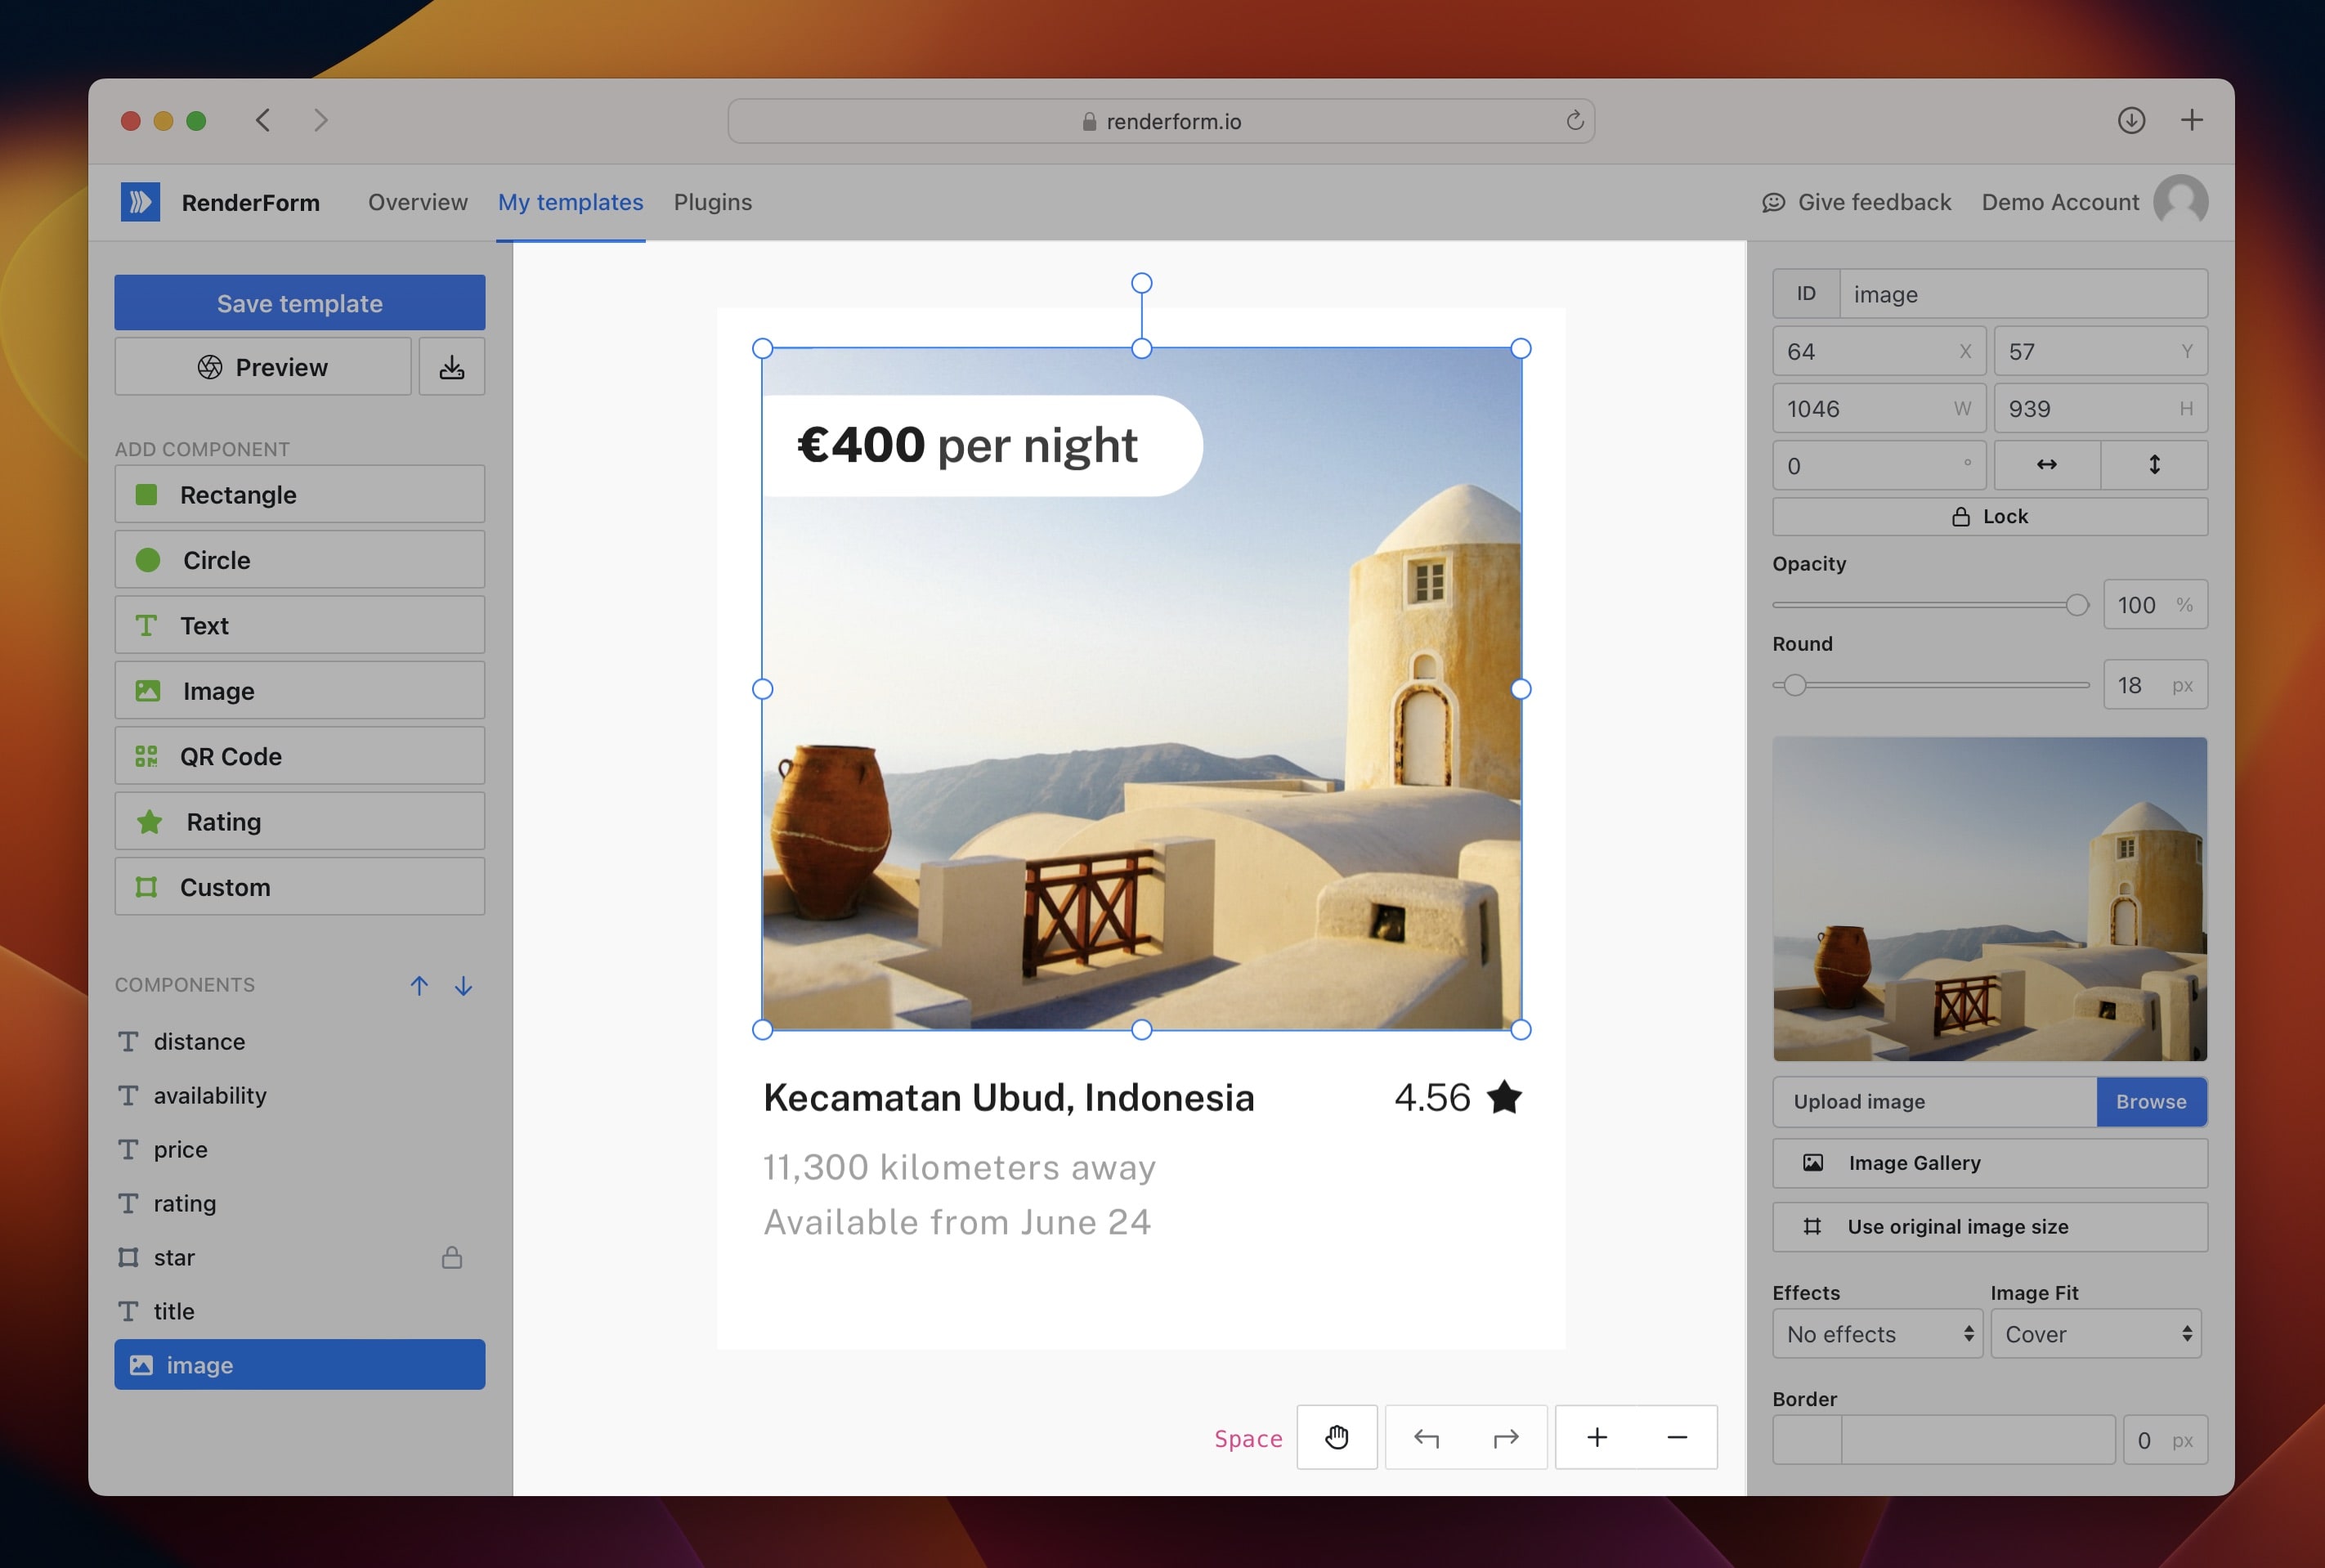
The most important part of the editor is its center, the canvas on which you can create and edit your templates.
### Inspector
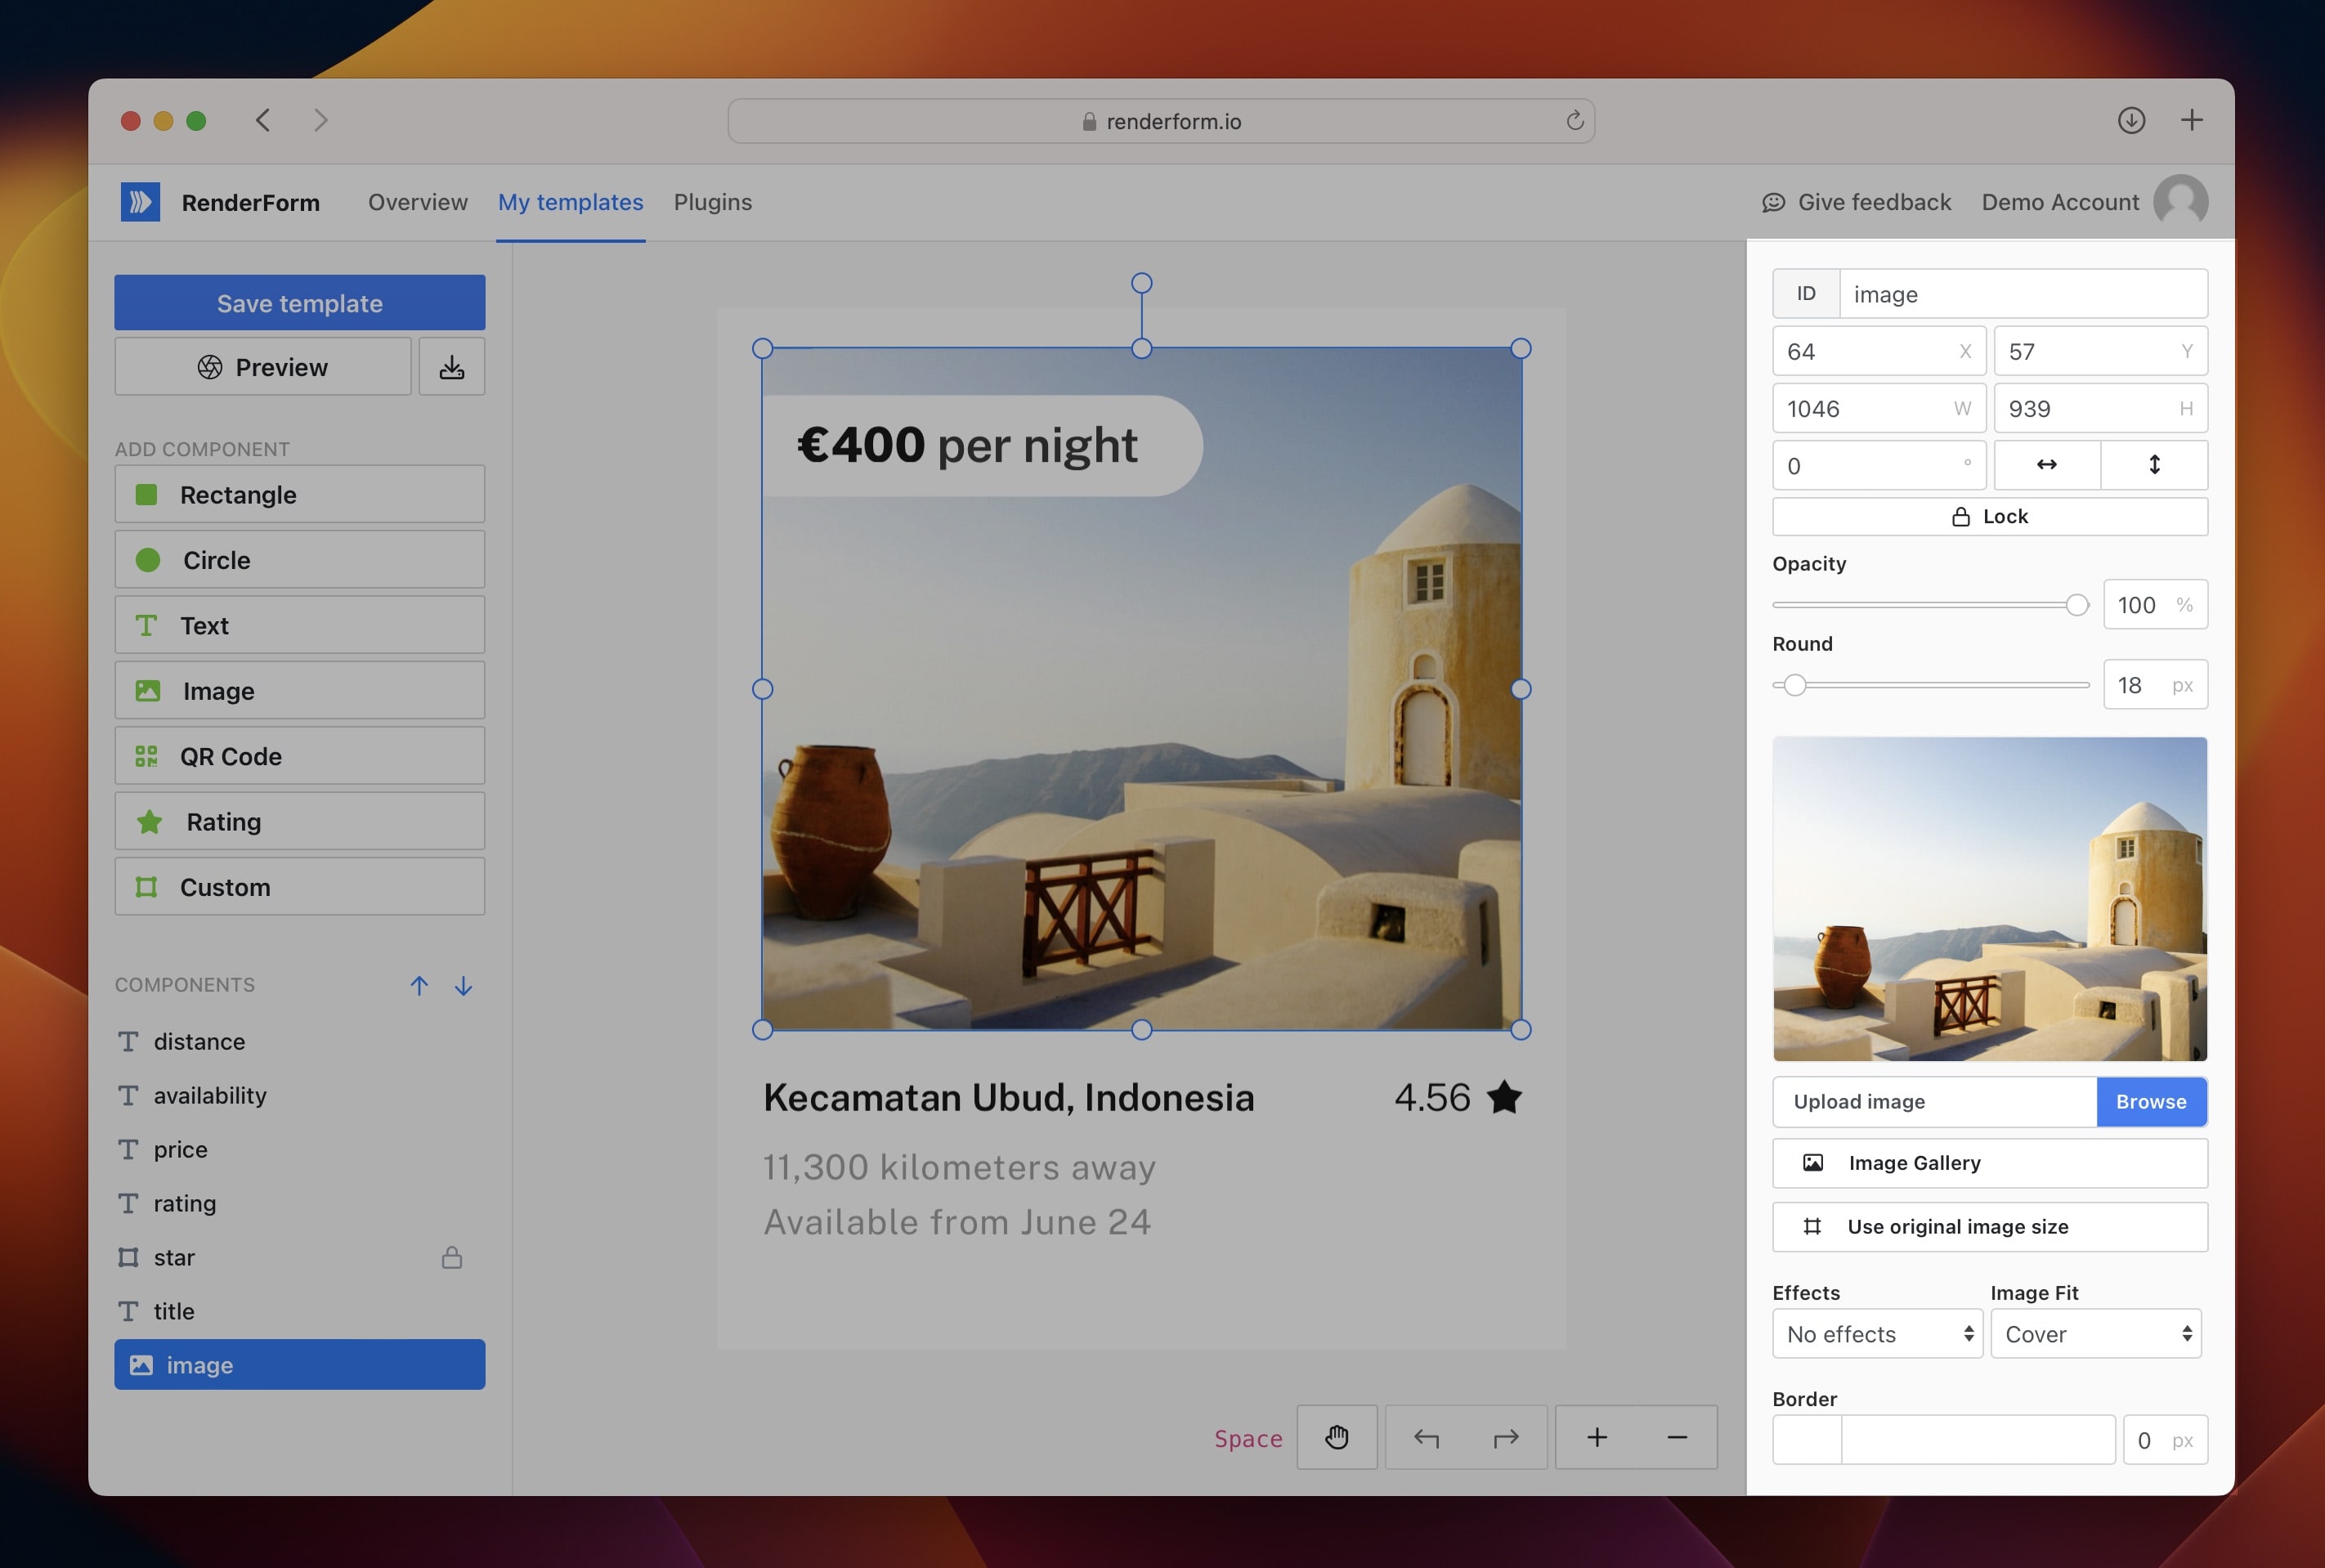
On the right side there is Inspector. It adjusts for you depending on the selected element of your template. For example, if you click on the image, you will see an option to change image and image styling. When you select text, you will be able to change text and text styling.
## Video templates
The Advanced Editor can also produce short animated clips. Pick the **Video** tab when creating a template to get a timeline,
per-element timing and Enter/Loop/Exit animation presets. See [Video templates](https://renderform.io/docs/general/video-templates/) to learn more.
Play with the designer, you can't break it, it's in the cloud! We will take care of everything!
---
# Template editor (HTML)
Source: https://renderform.io/docs/general/html-template-editor
HTML Editor is an advanced way of creating engaging images, banners, charts and more!
You don't have to be a designer, but you need to know HTML and CSS basics
to create a layout for your images.
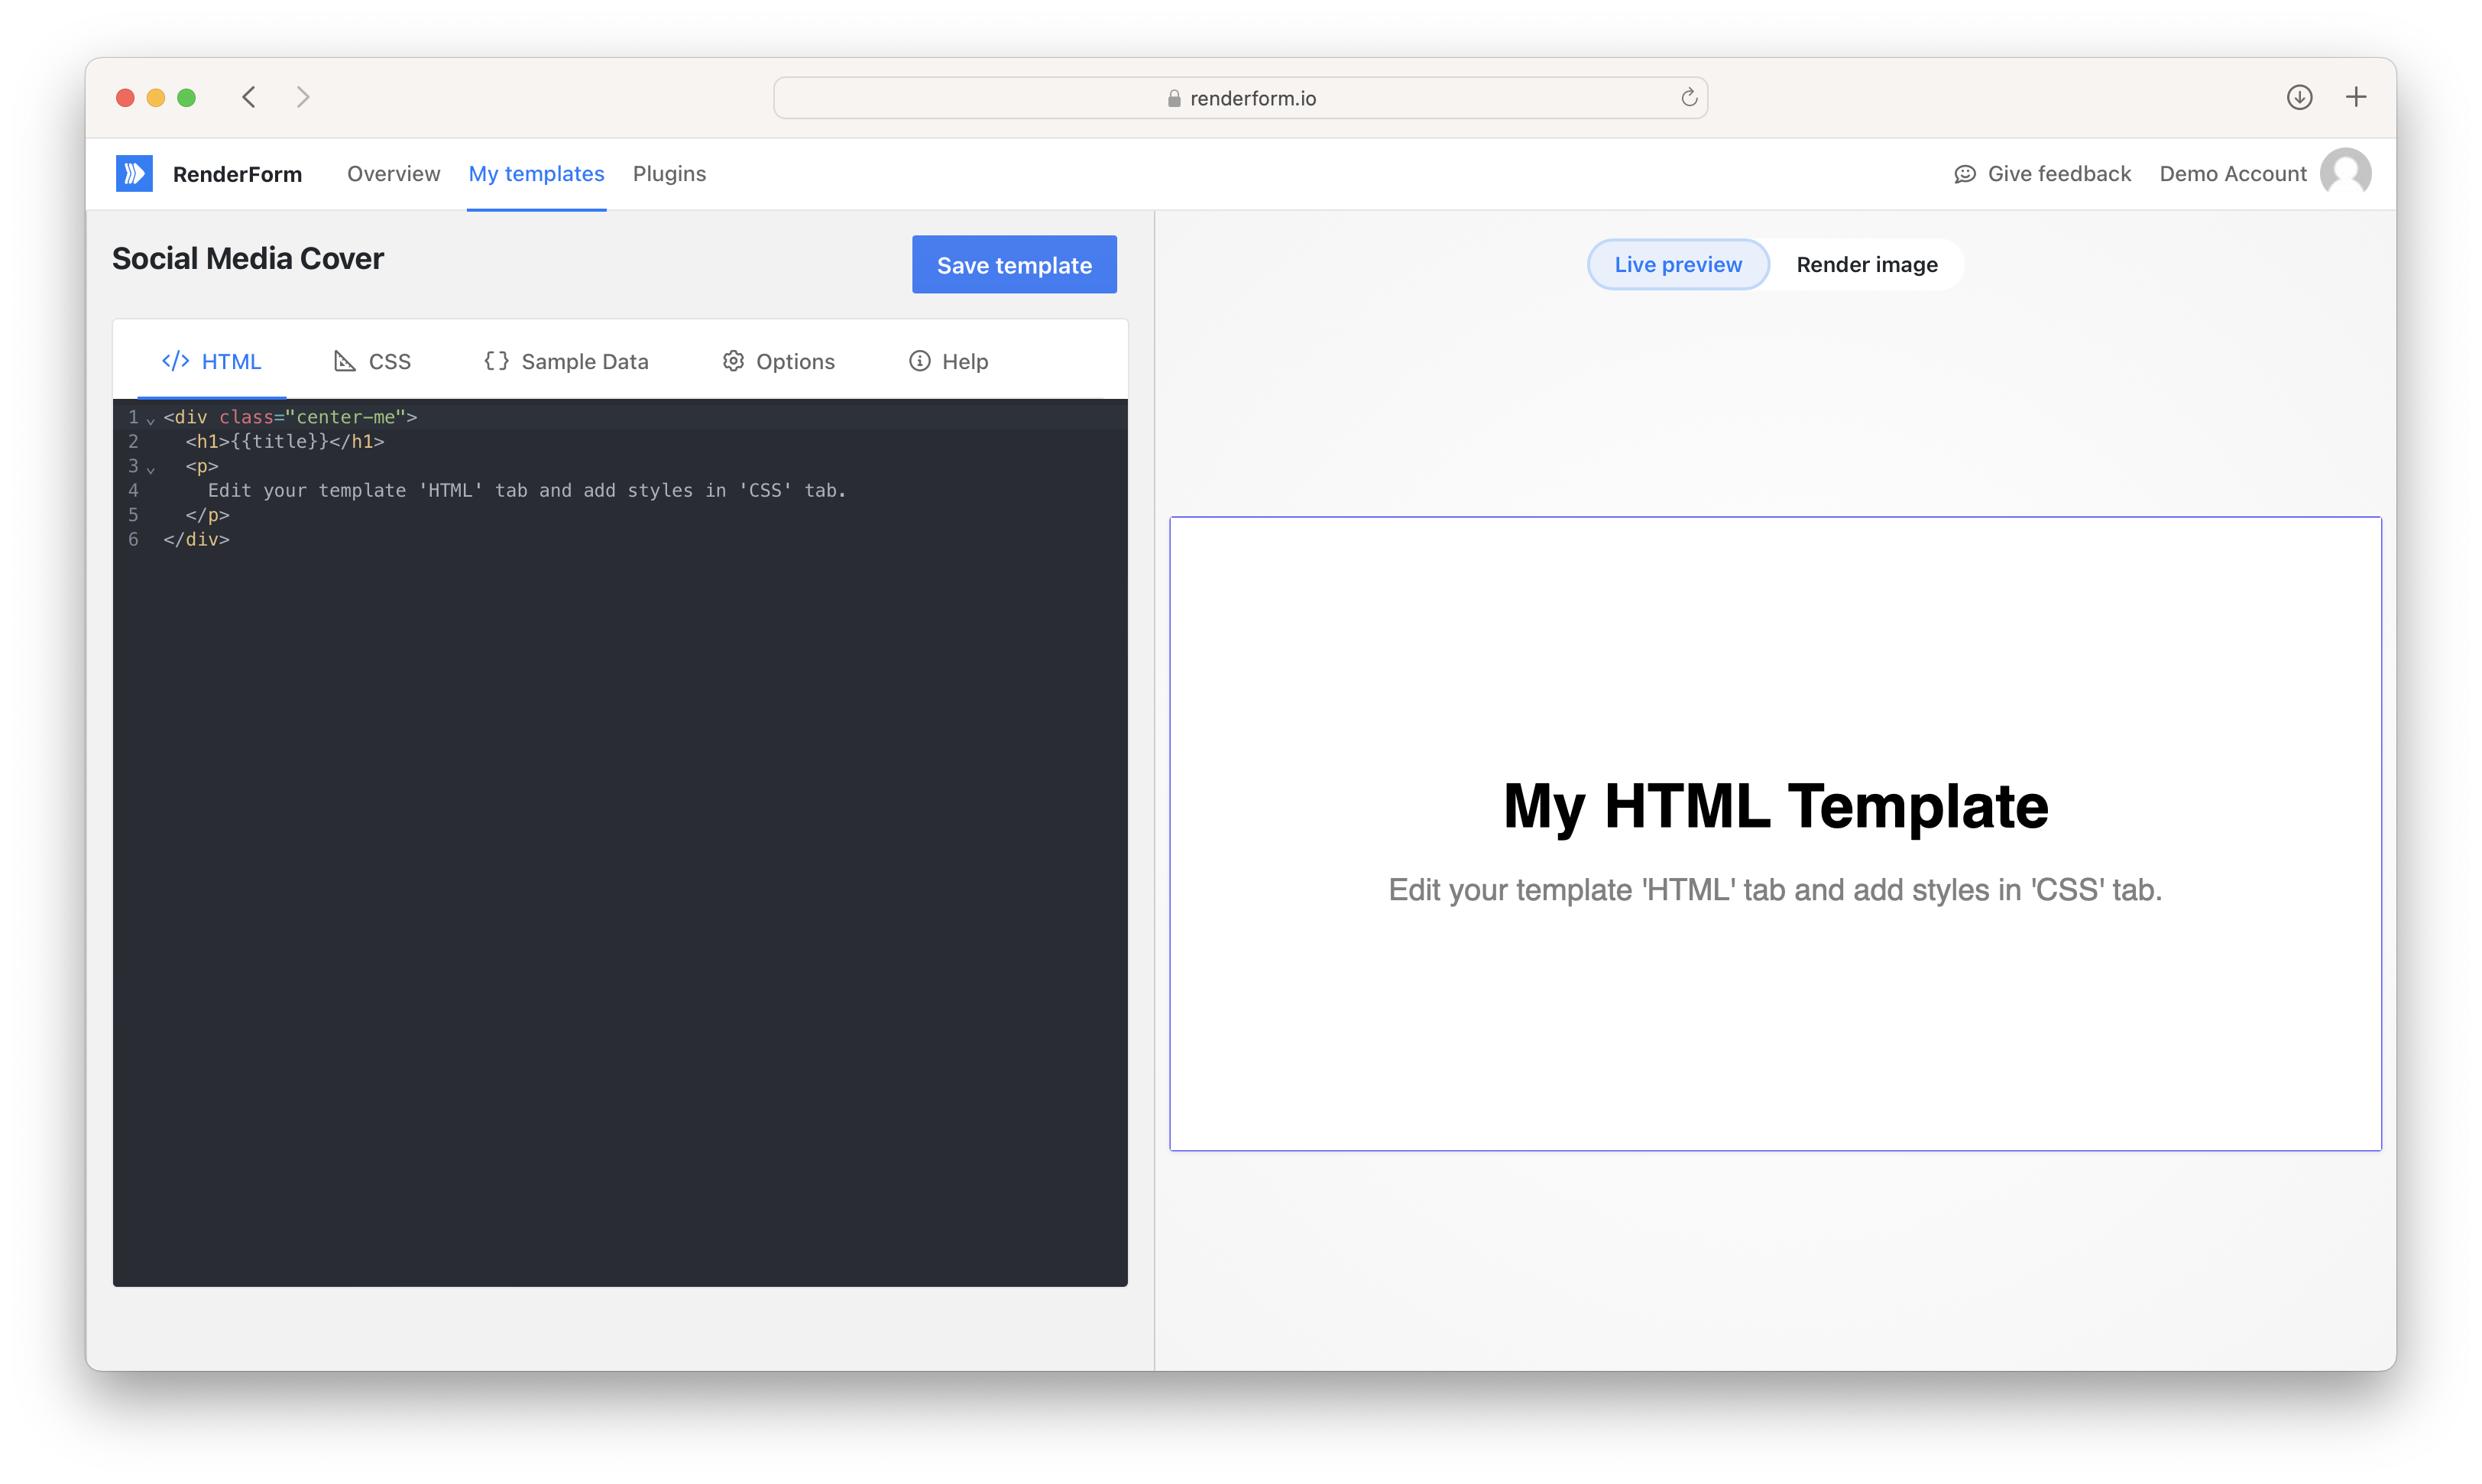
## Usage
Use merge tags in HTML or CSS tab with the following format `{{yourMergeTagName}}` and add the tag to JSON in the **Sample data** tab;
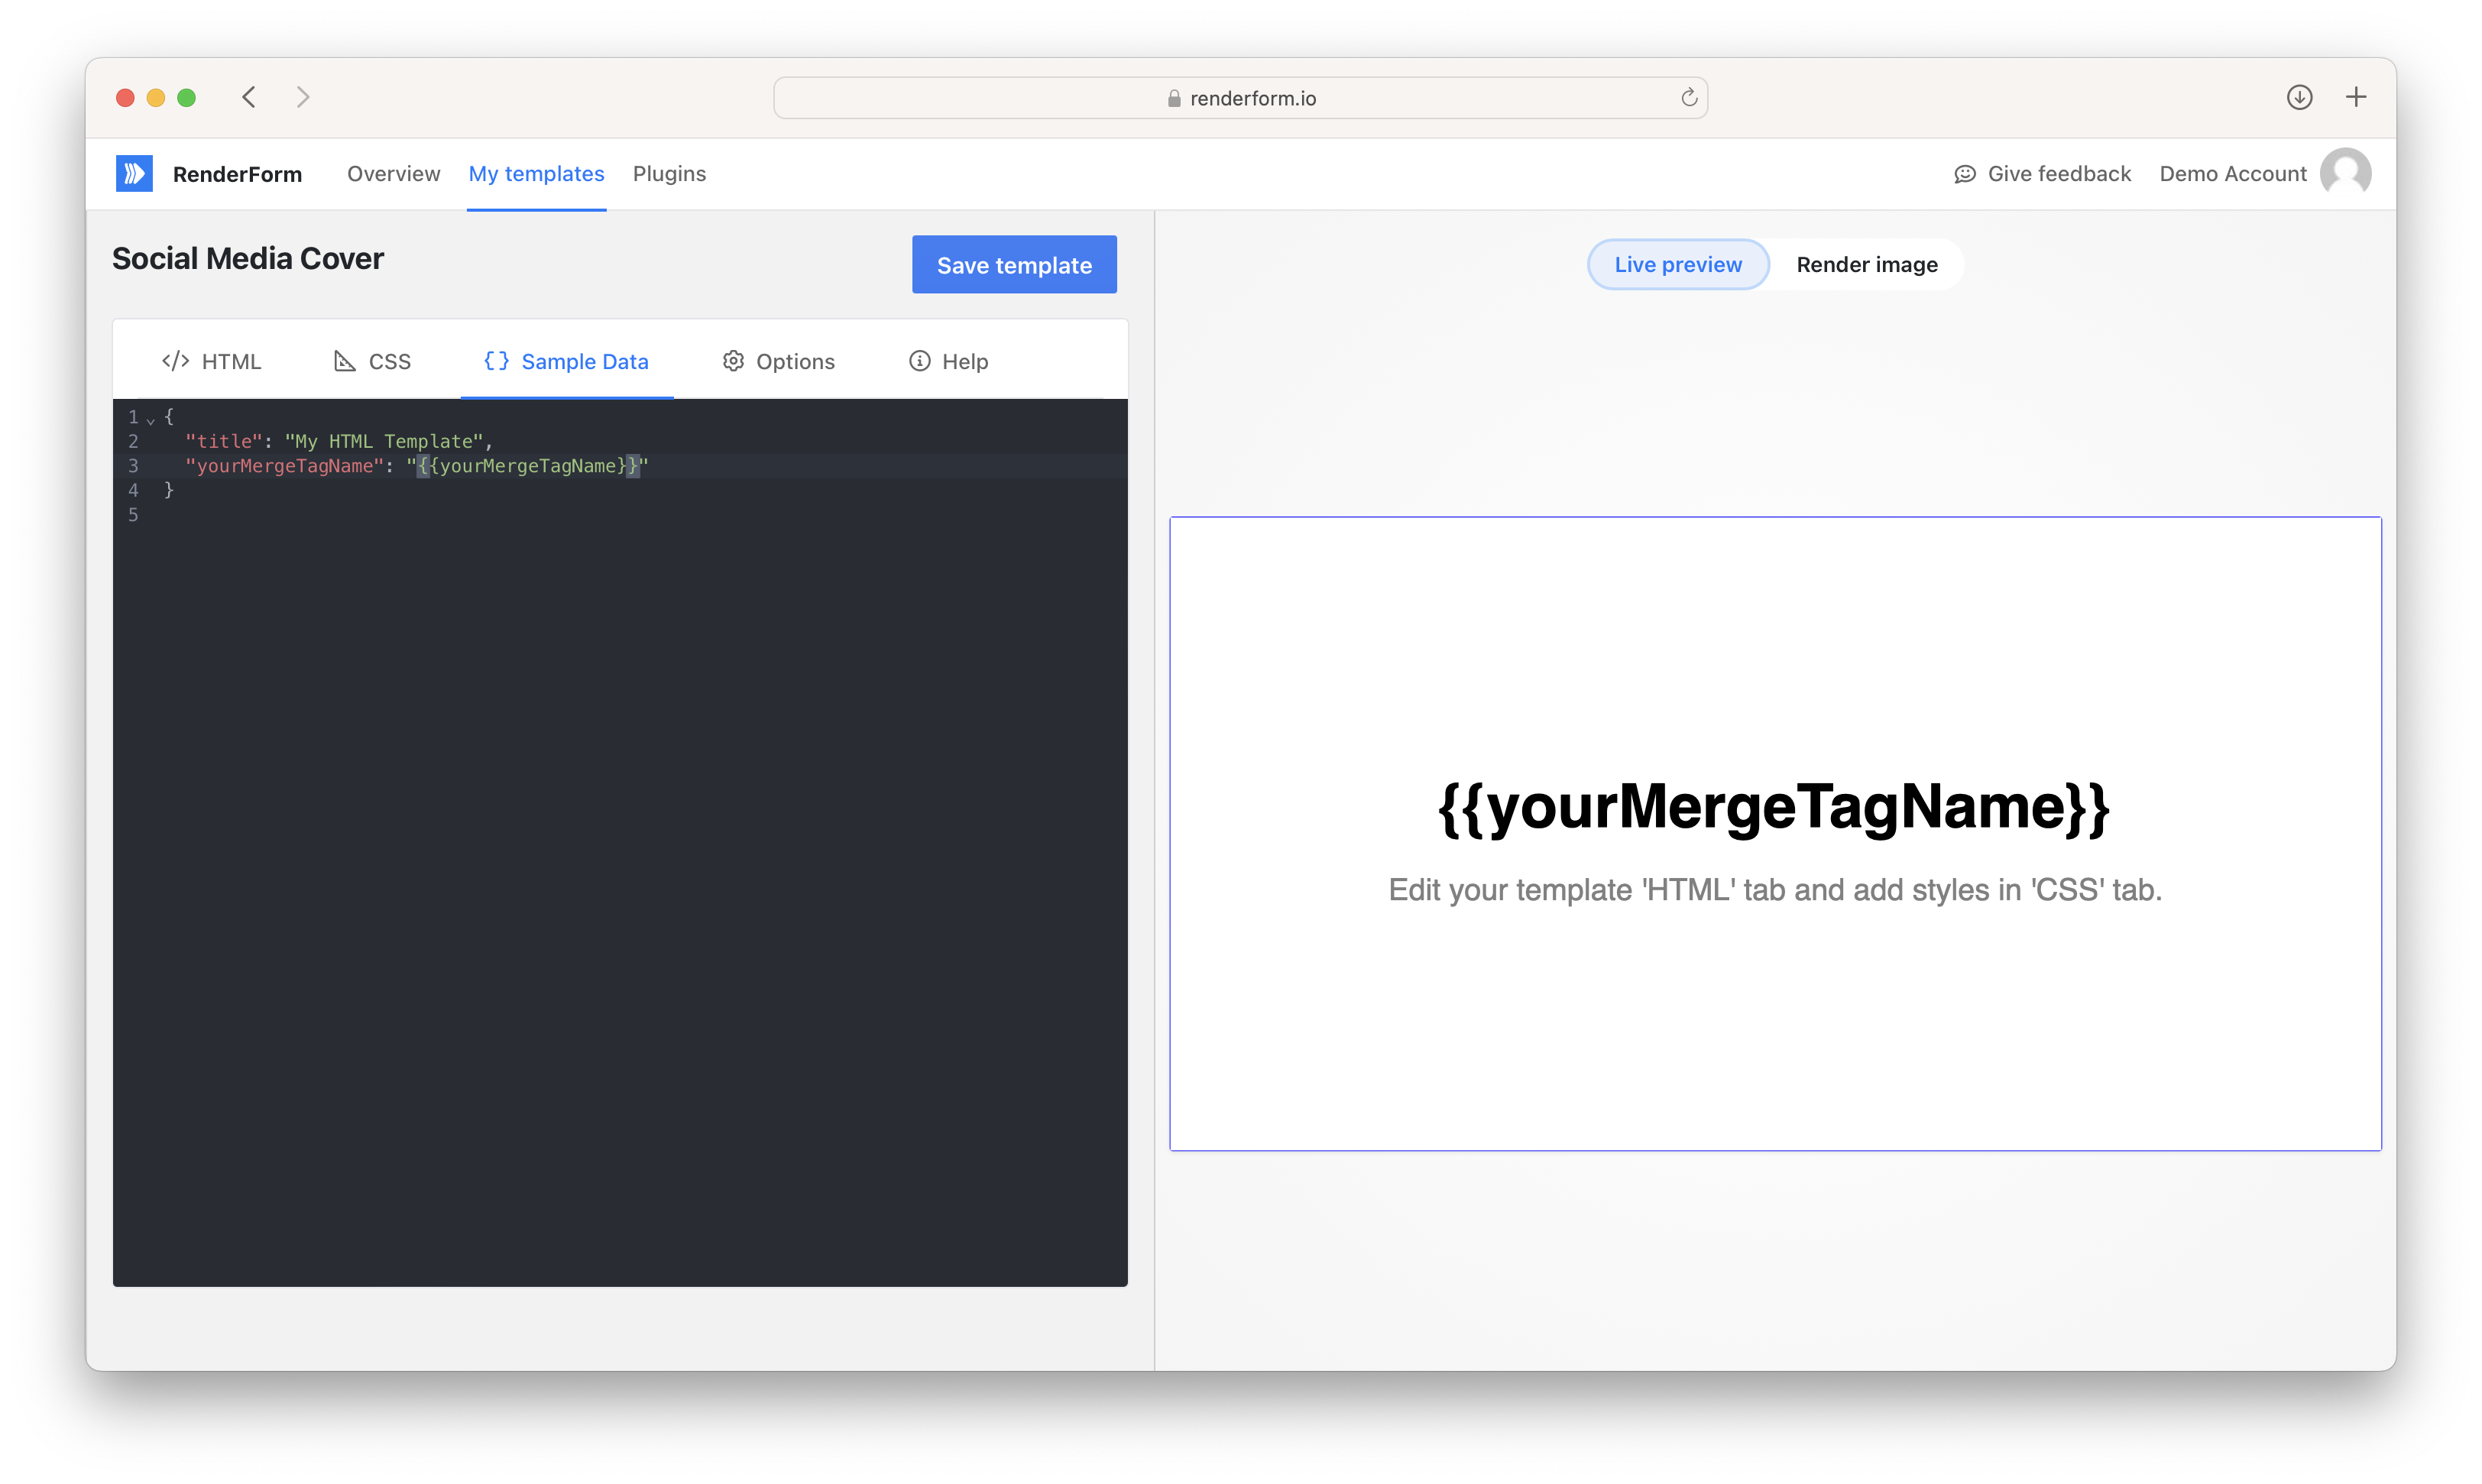
Click **Render Image** on the right side to render the image and see the output. RenderForm will merge your HTML template and CSS file with Sample Data JSON.
## Rendering lists
HTML templates are processed using [Handlebars](https://handlebarsjs.com/), which means you can use built-in helpers like `{{#each}}` to iterate over arrays and render multiple HTML elements.
### Example: Rendering an array as individual elements
If your **Sample data** JSON contains an array:
```json
{
"pills": ["discount", "free shipping", "new arrival"]
}
```
You can use the `{{#each}}` helper in your HTML template to render each item as a separate element:
```html
{{#each pills}}
{{this}}
{{/each}}
```
This will output:
```html
discount
free shipping
new arrival
```
> Without `{{#each}}`, using `{{pills}}` directly would render the array as a comma-separated string: `discount,free shipping,new arrival`.
### Example: Rendering an array of objects
You can also iterate over an array of objects. Given the following sample data:
```json
{
"features": [
{ "icon": "✅", "label": "Free shipping" },
{ "icon": "⭐", "label": "Top rated" }
]
}
```
Use the `{{#each}}` helper to access each object's properties:
```html
{{#each features}}
{{this.icon}} {{this.label}}
{{/each}}
```
### Other useful Handlebars helpers
- `{{#if variable}}...{{/if}}` – conditionally render content
- `{{#unless variable}}...{{/unless}}` – render content if variable is falsy
- `{{@index}}` – access the current index inside `{{#each}}`
---
# Template properties
Source: https://renderform.io/docs/general/template-properties
Template properties are unique properties of all components
used in the template created in [template editor](https://renderform.io/docs/general/template-editor/).
You can see the list of all template properties in the **Preview** > **Live Preview** popup.
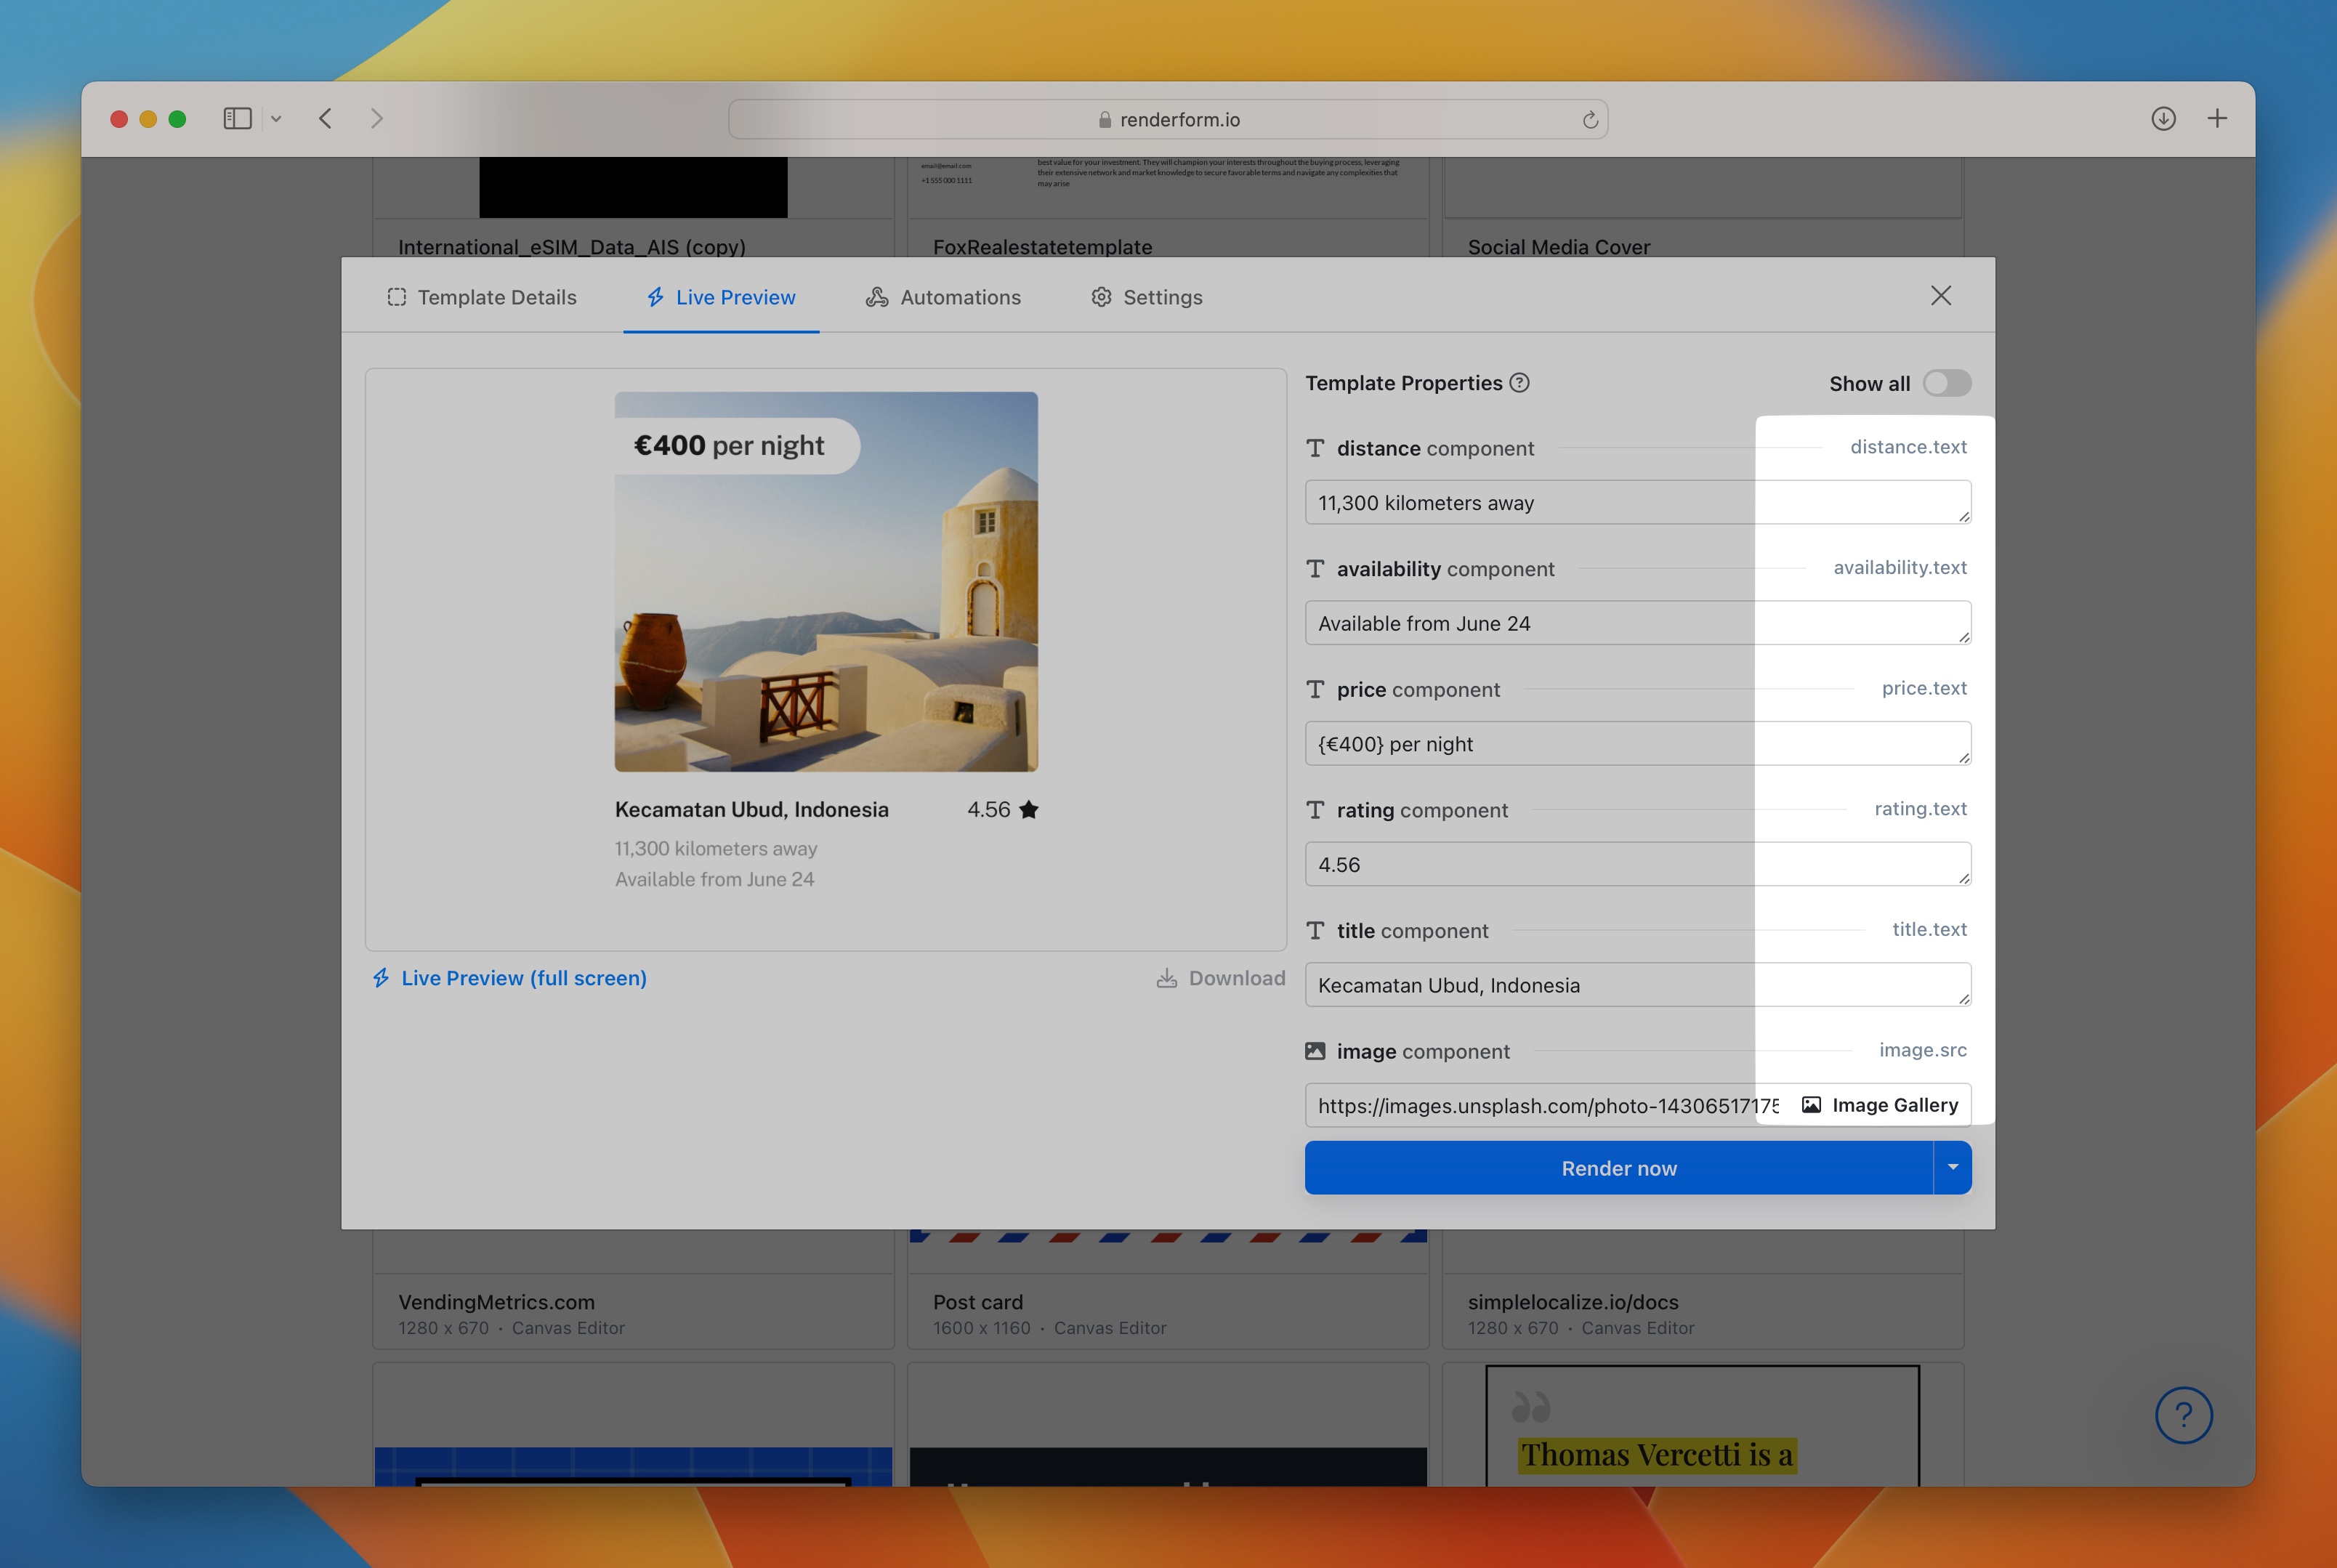
Template properties are the combination of component ids and component properties, for example:
- `my-image.src` - image component with id `my-image` and property `src`
- `my-image.width` - image component with id `my-image` and property `width`
- `my-text.text` - text component with id `my-text` and property `text`
## What is a component?
A component is an object that can be added to a template in [template editor](https://renderform.io/docs/general/template-editor/).
Every component can be modified using controls in the [Inspector](https://renderform.io/docs/general/template-editor/#inspector) or via integration like REST API, [Zapier](https://zapier.com) or [Make.com](https://make.com).
## What are template properties?
Template properties are unique properties of all components.
You can assign values to template properties to define how the component will look like, for example:
- `my-rect.color=rgba(255,255,255, 1)` - makes a component white,
- `my-rect.opacity=0.2` - makes a component nearly visible,
- `my-rect.opacity=0.0` - makes a component invisible,
- `my-rect.rotation=45` - rotates a component by 45 degrees,
- `my-text.text=Hello World` - changes text of the Text component,
- `my-image.src=https://example.com/my-image.png` - changes an image source of the Image component,
## Common component properties
These properties can be used with every component.
- `y` - y position in pixels
- `x` - x position in pixels
- `rotation` - rotation in degrees 0 - 360
- `opacity` - opacity, eg: `1`, `0`, `0.5`
## Render Component
The Render component is a unique type of component
which can be used to override template settings when you connect 3rd party integrations.
Use `_render` value as Component ID to adjust general render options,
for example: `_render.fileName=MyFile` to change the name of the rendered file.
Properties:
- `_render.downloadFileName` - custom file name for rendered file that is used for saving and downloading files,
file extension is added automatically, allowed characters: `a-z`, `A-Z`, `0-9`, `-`, `_`, `.`.
- `_render.fileName` - custom file name for rendered file, it is used in the link to the rendered file, eg.: `https://cdn.renderform.io/xyz/results/MY_FILE_NAME.jpg`,
file extension is added automatically,
allowed characters: `a-z`, `A-Z`, `0-9`, `-`, `_`, `.`.
## Colors and gradients
Colors can be defined in different formats:
- `rgb(255,255,255)` - white color,
- `rgba(255,255,255, 1)` - white color with full opacity,
- `#ffffff` - white color with full opacity,
- `linear-gradient(rgba(255,255,255, 1), rgba(0,0,0, 1))` - linear gradient from white to black, colors can be defined in any format,
- `radial-gradient(rgba(255,255,255, 1), rgba(0,0,0, 1))` - radial gradient from white to black, colors can be defined in any format.
## Rectangle Component
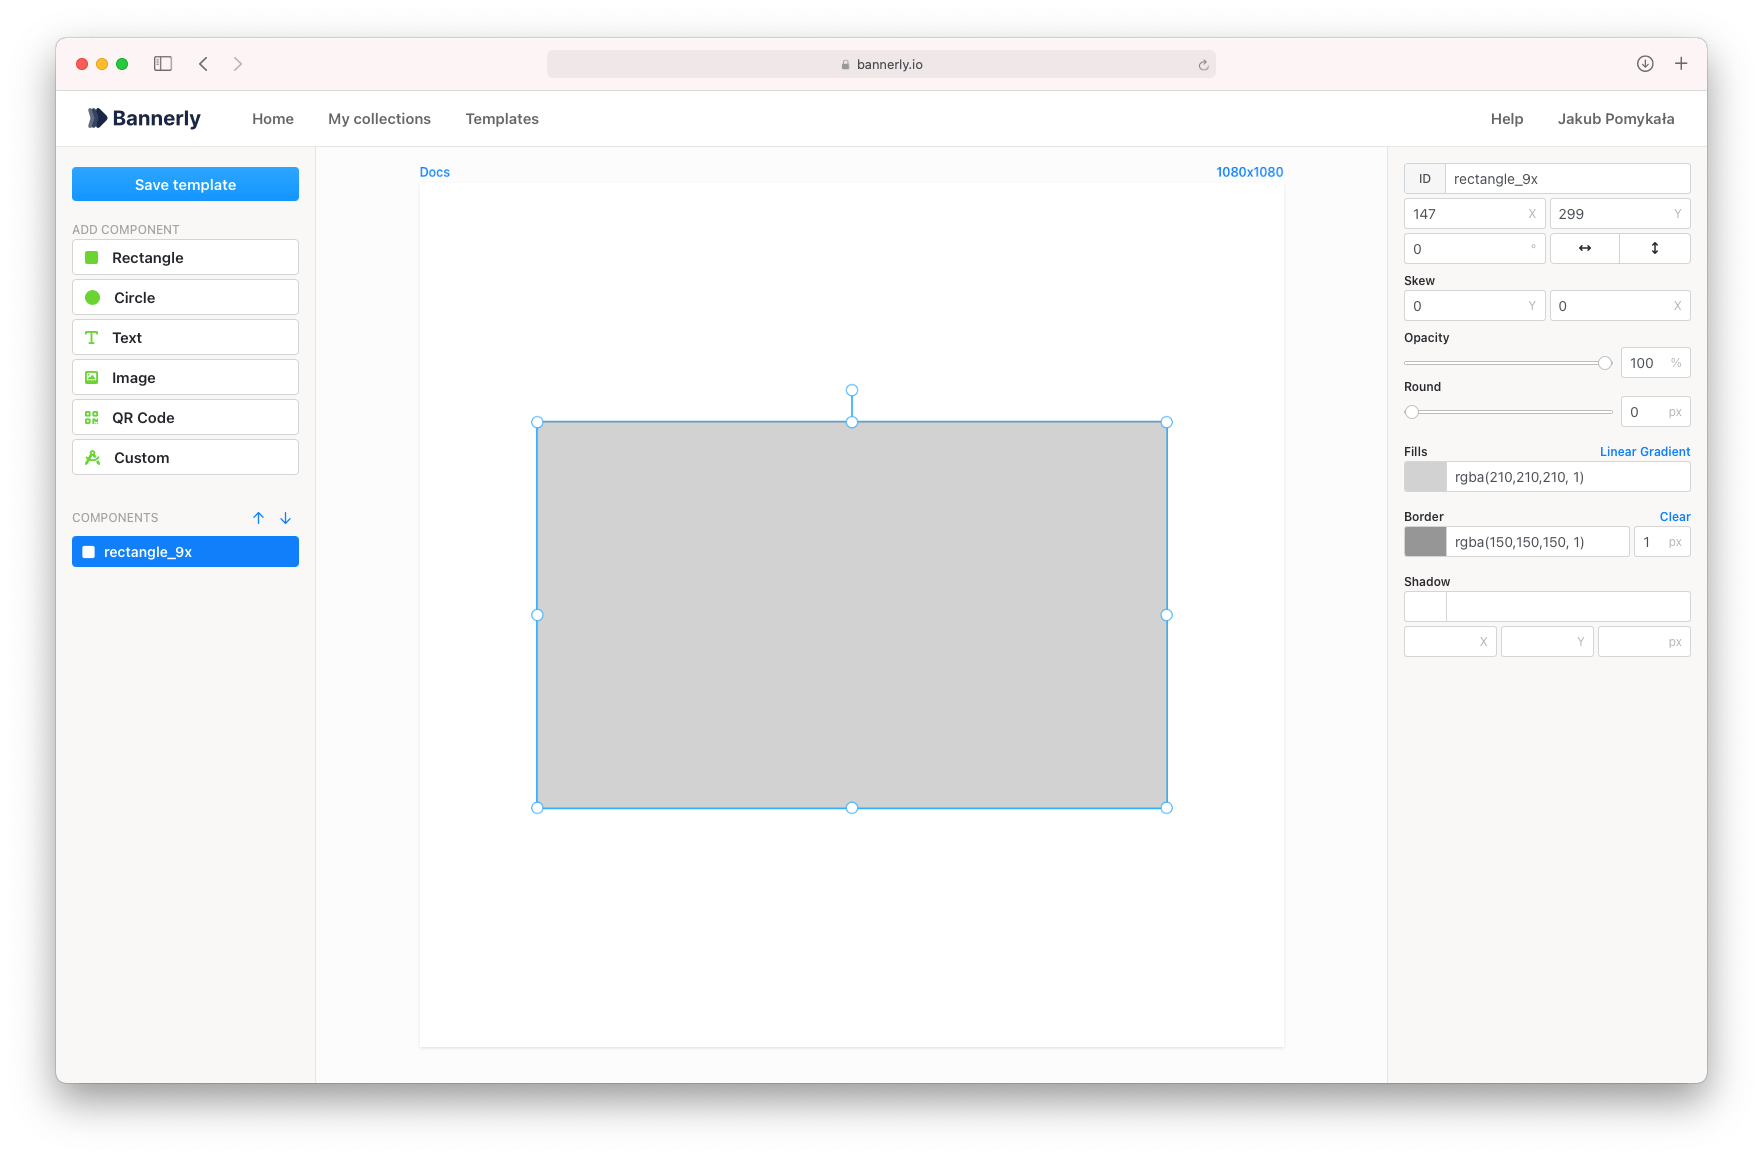
Properties:
- `color` - rectangle fill color (eg: `rgba(255,255,255, 1)`, `#efefef` or gradient `linear-gradient(rgba(255,255,255, 1), rgba(0,0,0, 1))`, `radial-gradient(rgba(255,255,255, 1), rgba(0,0,0, 1))`)
- `borderColor` - rectangle stroke color (eg: `rgba(255,255,255, 1)` or `#efefef`)
- `radius` - rectangle radius of all corners
## Circle Component
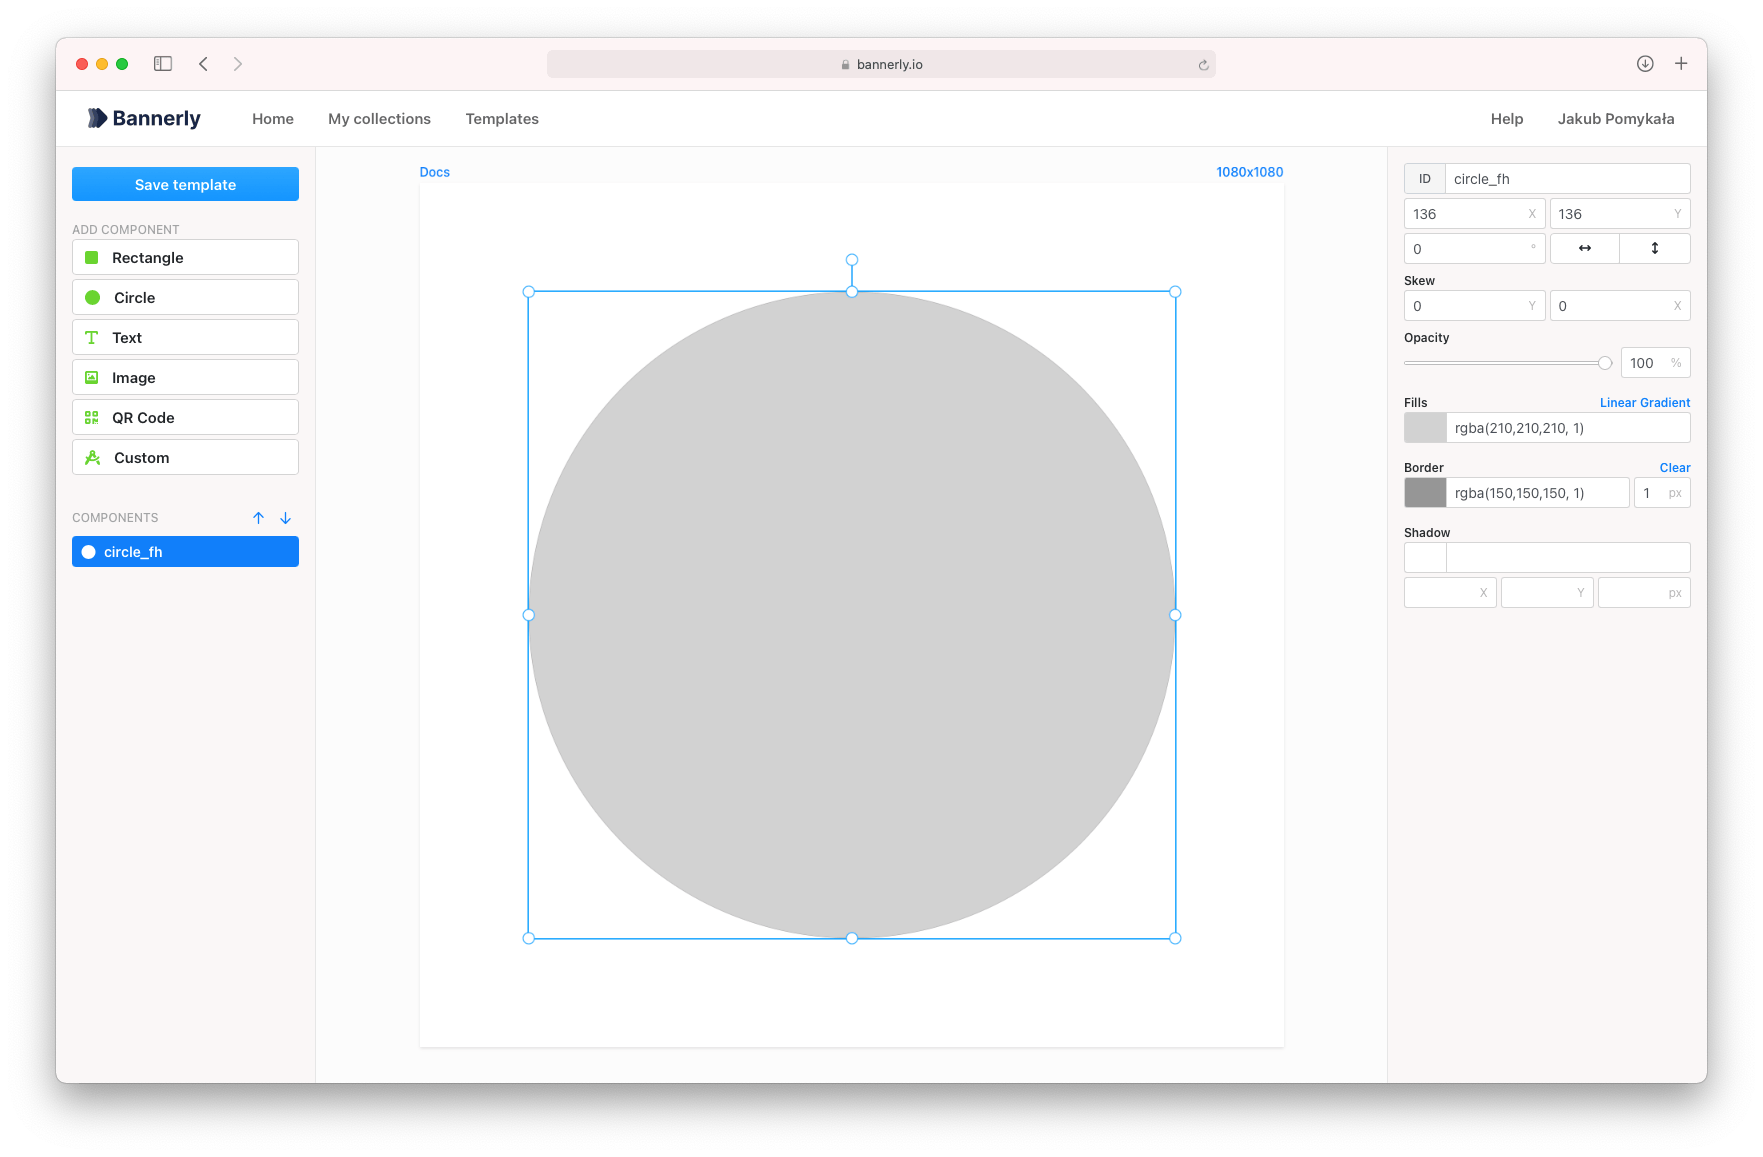
Properties:
- `color` - circle fill color (eg: `rgba(255,255,255, 1)`, `#efefef` or gradient `linear-gradient(rgba(255,255,255, 1), rgba(0,0,0, 1))`, `radial-gradient(rgba(255,255,255, 1), rgba(0,0,0, 1))`)
- `borderColor` - circle stroke color (eg: `rgba(255,255,255, 1)` or `#efefef`)
- `borderWidth` - circle stroke width (eg: `5`)
## Text Component
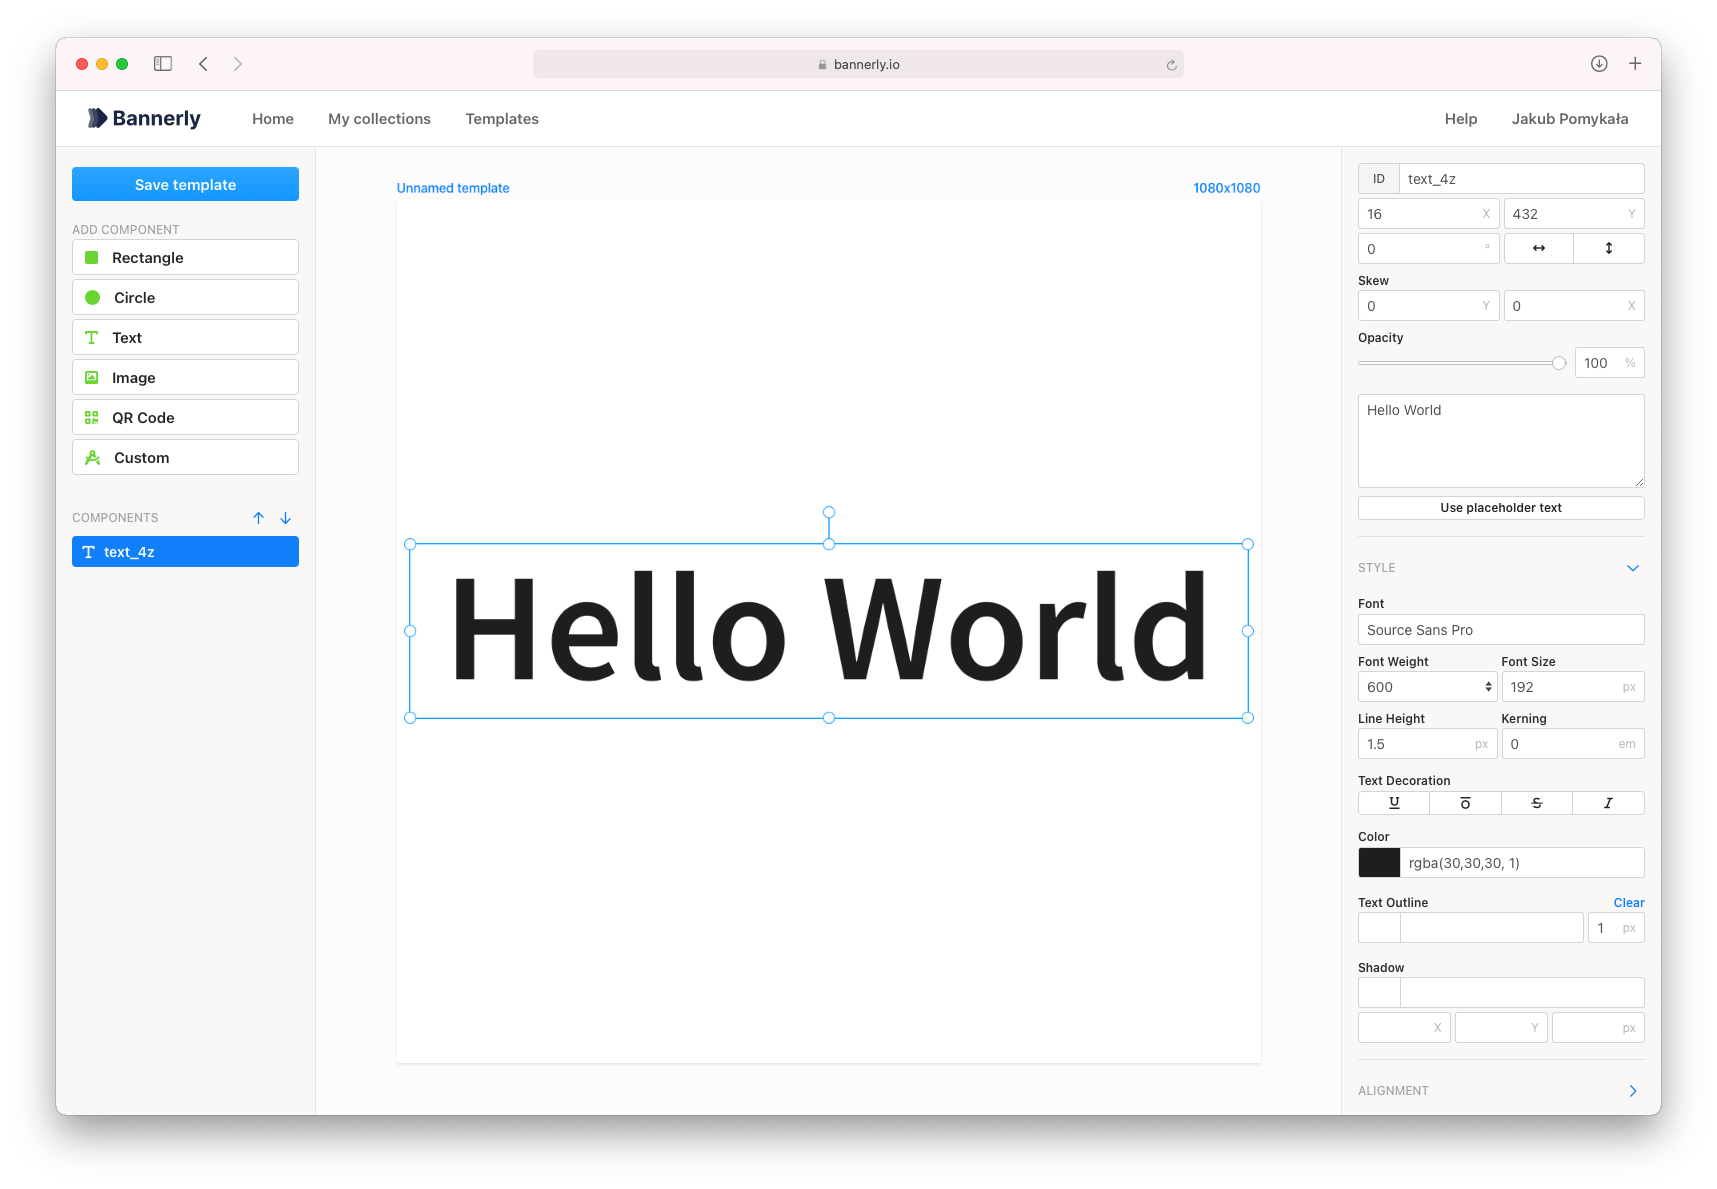
Properties:
- `text` - text value
- `color` - text color (eg: `rgba(255,255,255, 1)` or `#efefef`)
- `fontWeight` - text font weight (eg: `600`)
- `fontFamily` - text font family (eg: `Lato`)
- `textBackgroundColor` - text background color (eg: `rgba(255,255,255, 1)` or `#efefef`)
- `textBackgroundRadius` - text background radius of all corners, eg: `5`
[//]: # (- `outlineColor` - text outline color (eg: `rgba(255,255,255, 1)` or `#efefef`))
[//]: # (- `outlineWidth` - text outline width (eg: `5`))
If you used curly braces `{}` in the text, you can use also change the secondary properties:
- `secondaryColor` - text secondary color (eg: `rgba(255,255,255, 1)` or `#efefef`)
- `secondaryFontWeight` - text secondary font weight (eg: `600`)
- `secondaryFontFamily` - text secondary font family (eg: `Lato`)
- `secondaryTextBackgroundColor` - text secondary background color (eg: `rgba(255,255,255, 1)` or `#efefef`)
- `secondaryTextBackgroundRadius` - text secondary background radius of all corners, eg: `5`
[//]: # (- `secondaryOutlineColor` - text secondary outline color (eg: `rgba(255,255,255, 1)` or `#efefef`))
[//]: # (- `secondaryOutlineWidth` - text secondary outline width (eg: `5`))
## QR Code Component
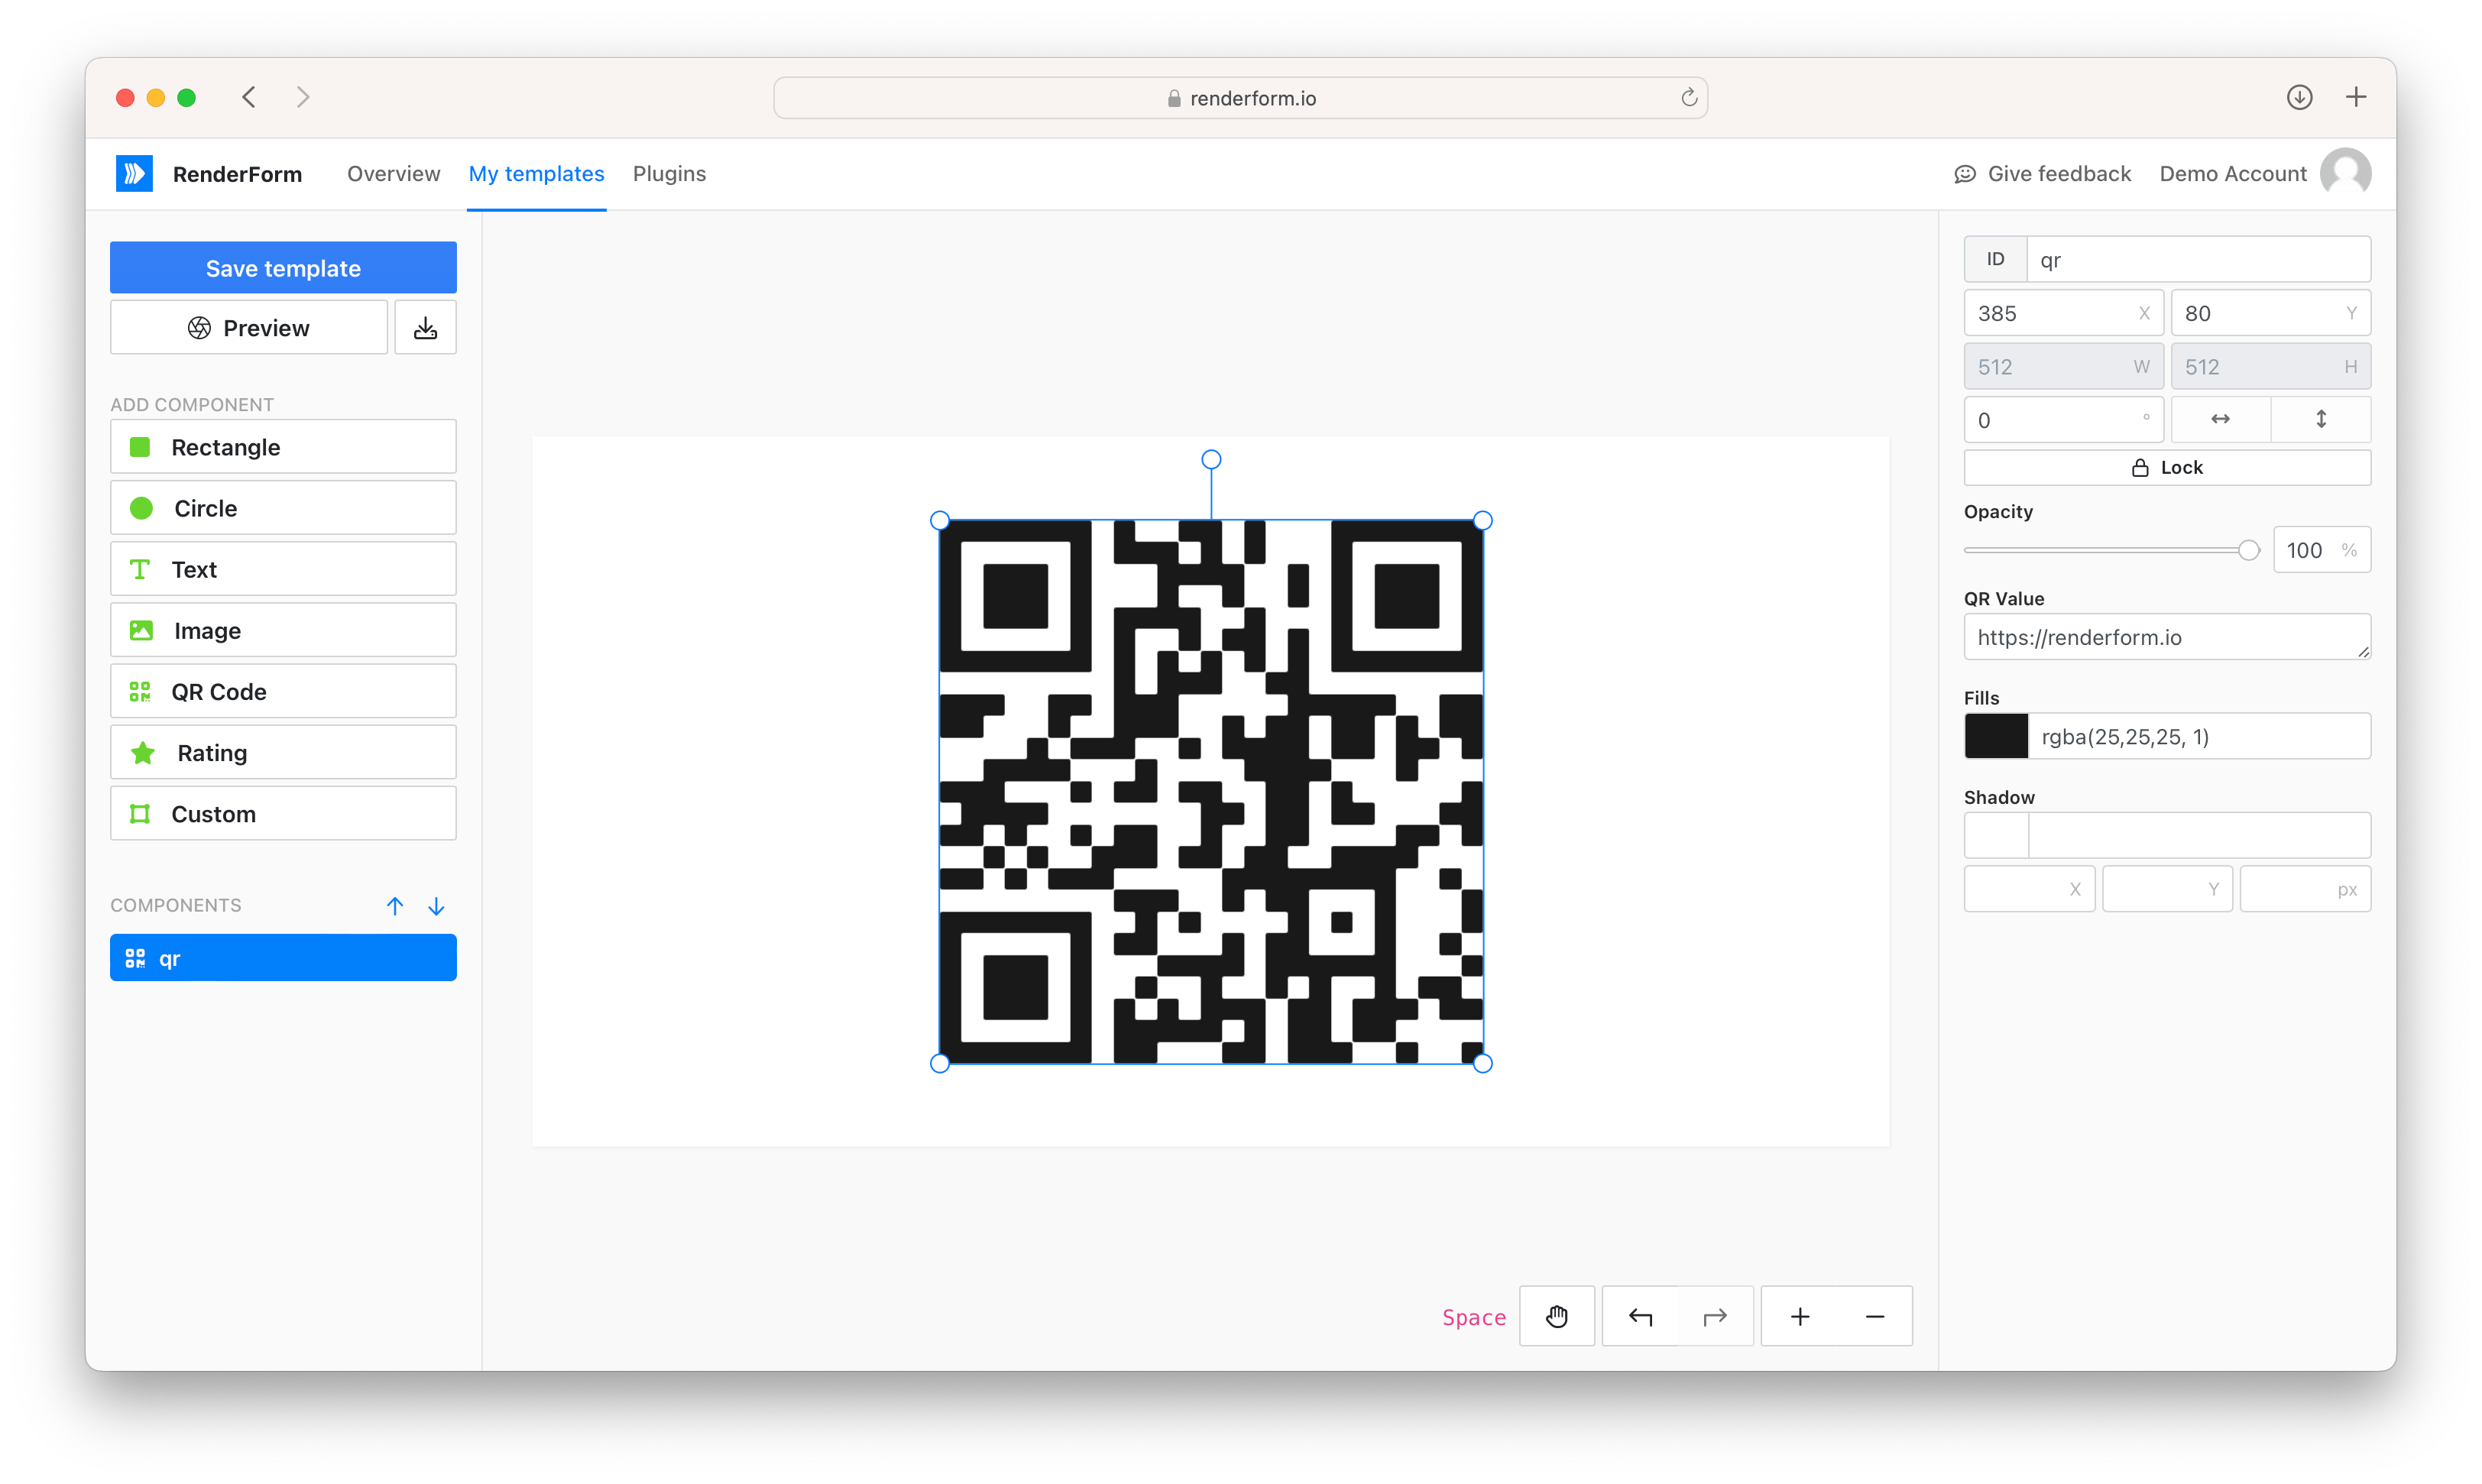
Properties:
- `value` - QR code text, URL or anything else to encode
- `color` - QR code color, eg: `rgba(255,255,255, 1)` or `#efefef`
## Image Component
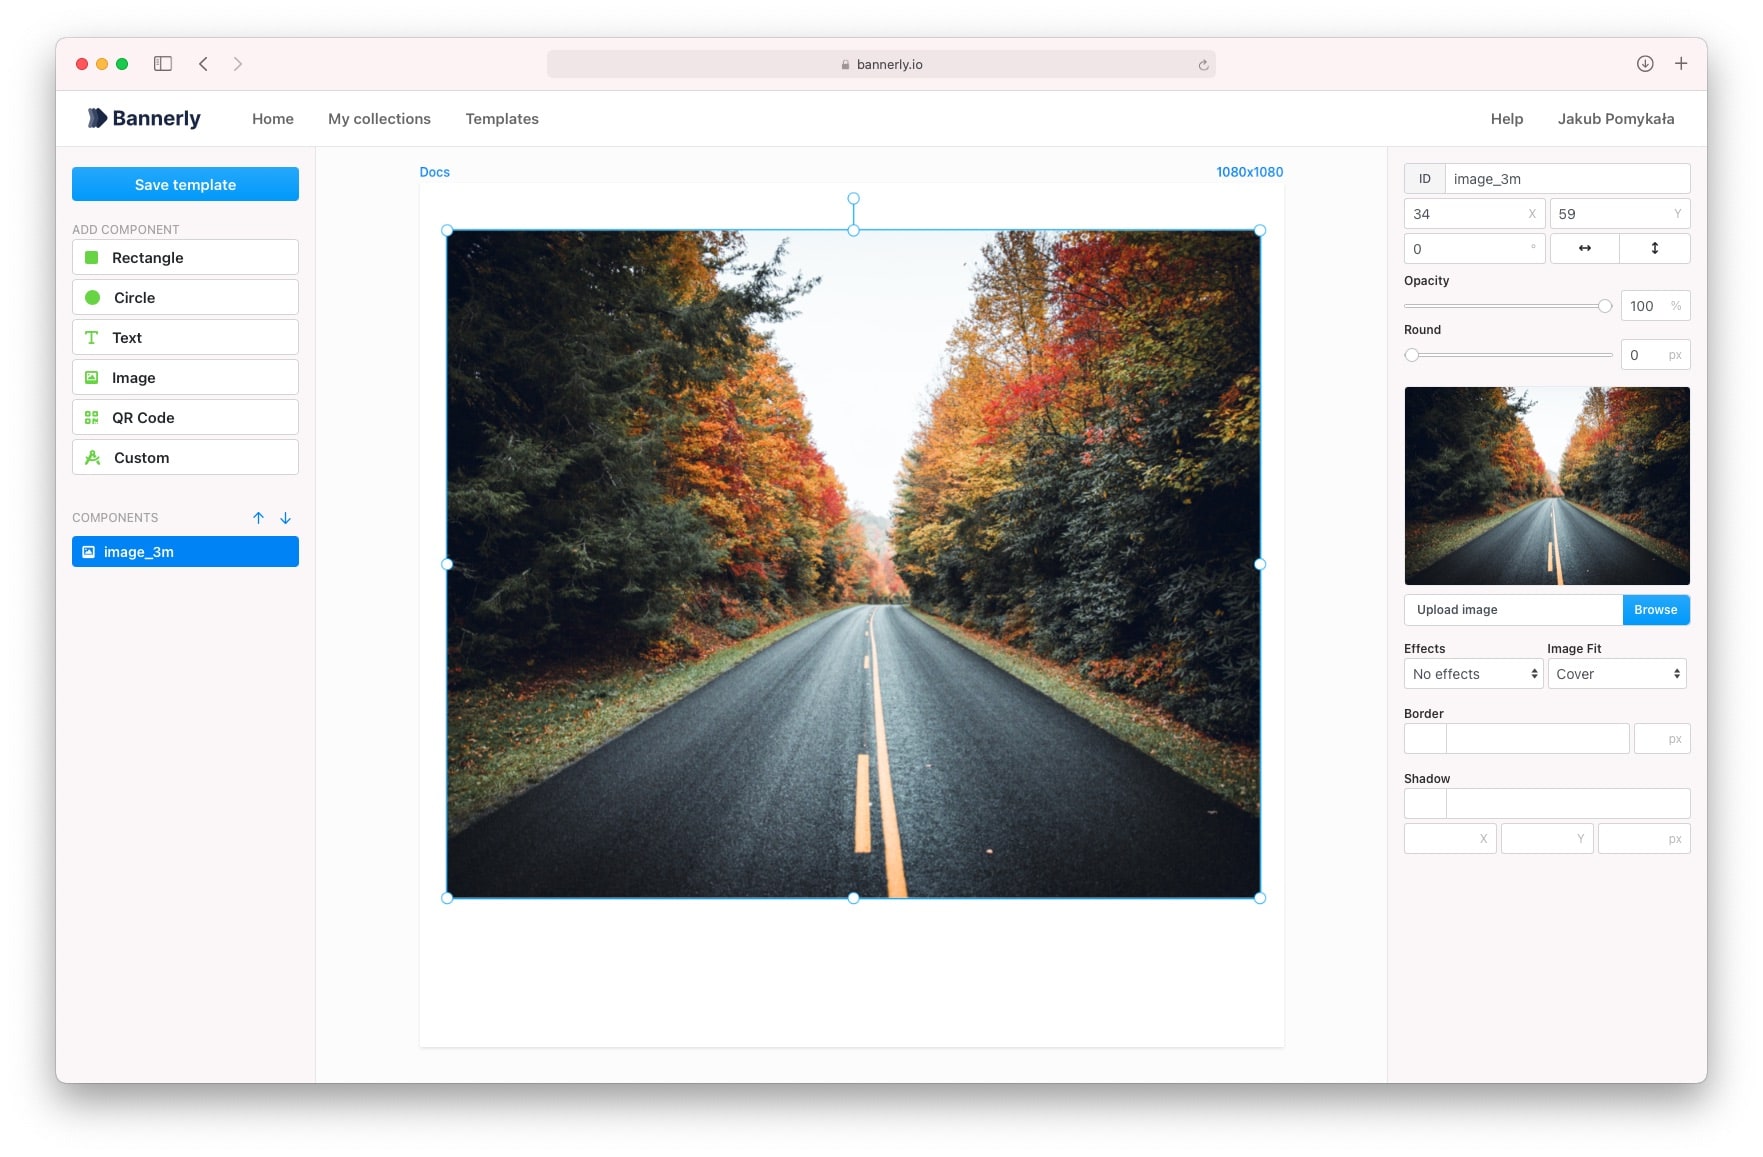
Properties:
- `src` - image URL or base64,
- `borderColor` - border color, eg: `rgba(255,255,255, 1)` or `#efefef`,
- `borderWidth` - border width in pixels (eg: `5`)
### Tip: Re-use uploaded images
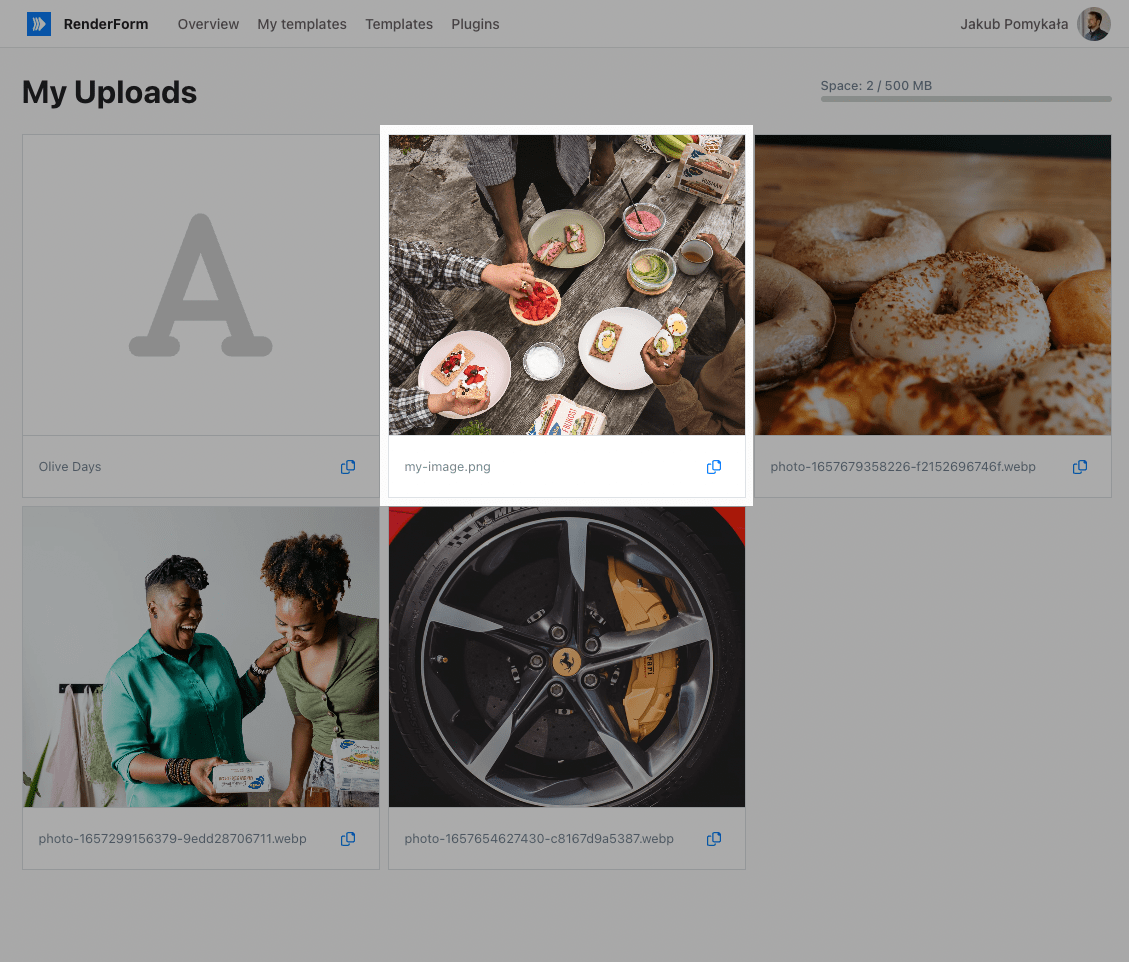
You can reuse already uploaded images by using `media:` prefix in `src` property. For example: `media:my-image.png`.
File names are always taken from original file names from your computer. The list of all your uploaded images can be found in [My uploads](https://renderform.io/console/my-uploads/).
Currently, there is no option to change image names.
## Rating Component
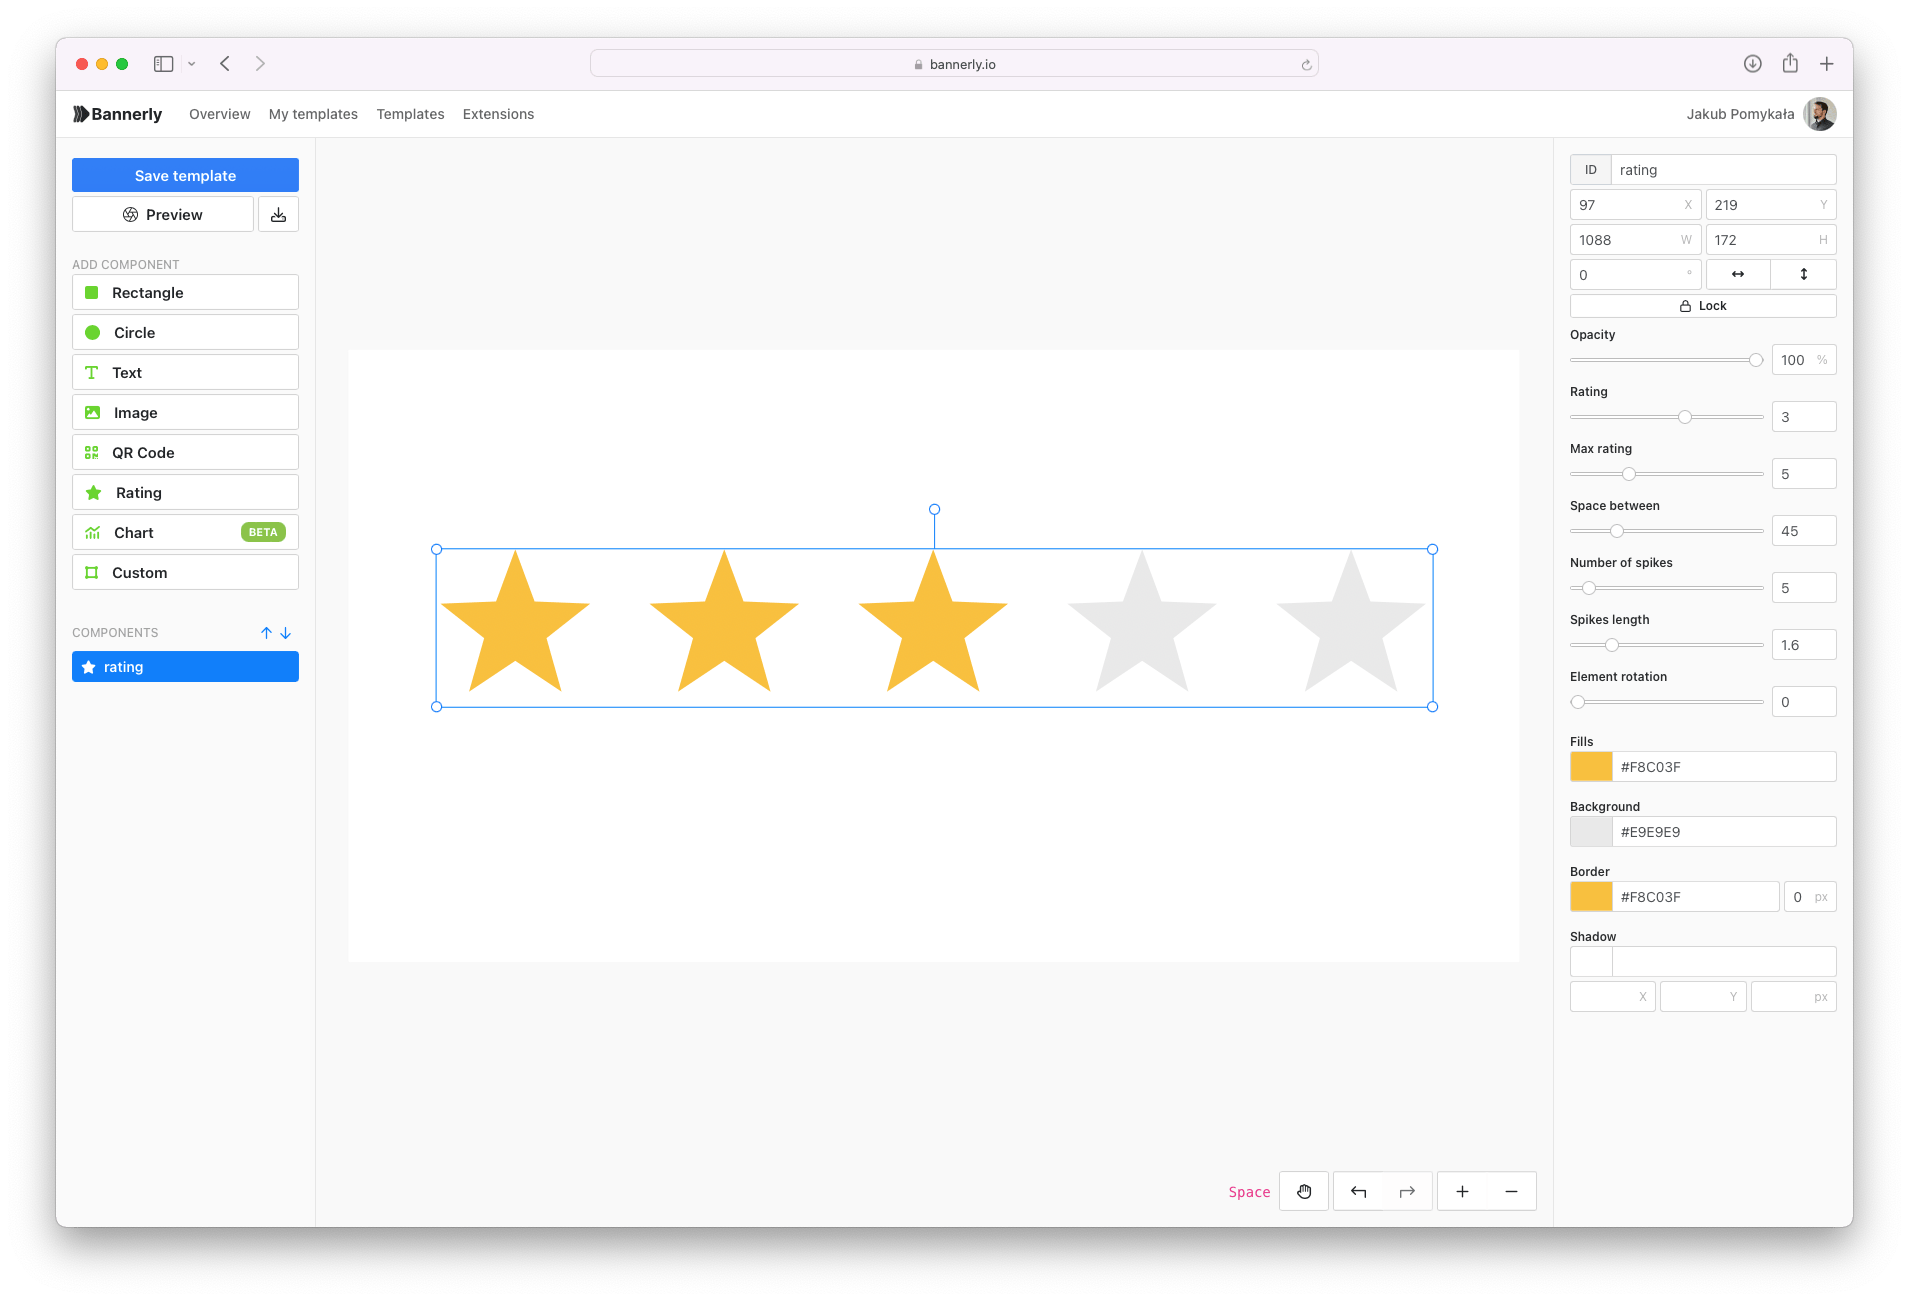
Properties:
- `value` - active rating value
## SVG Component
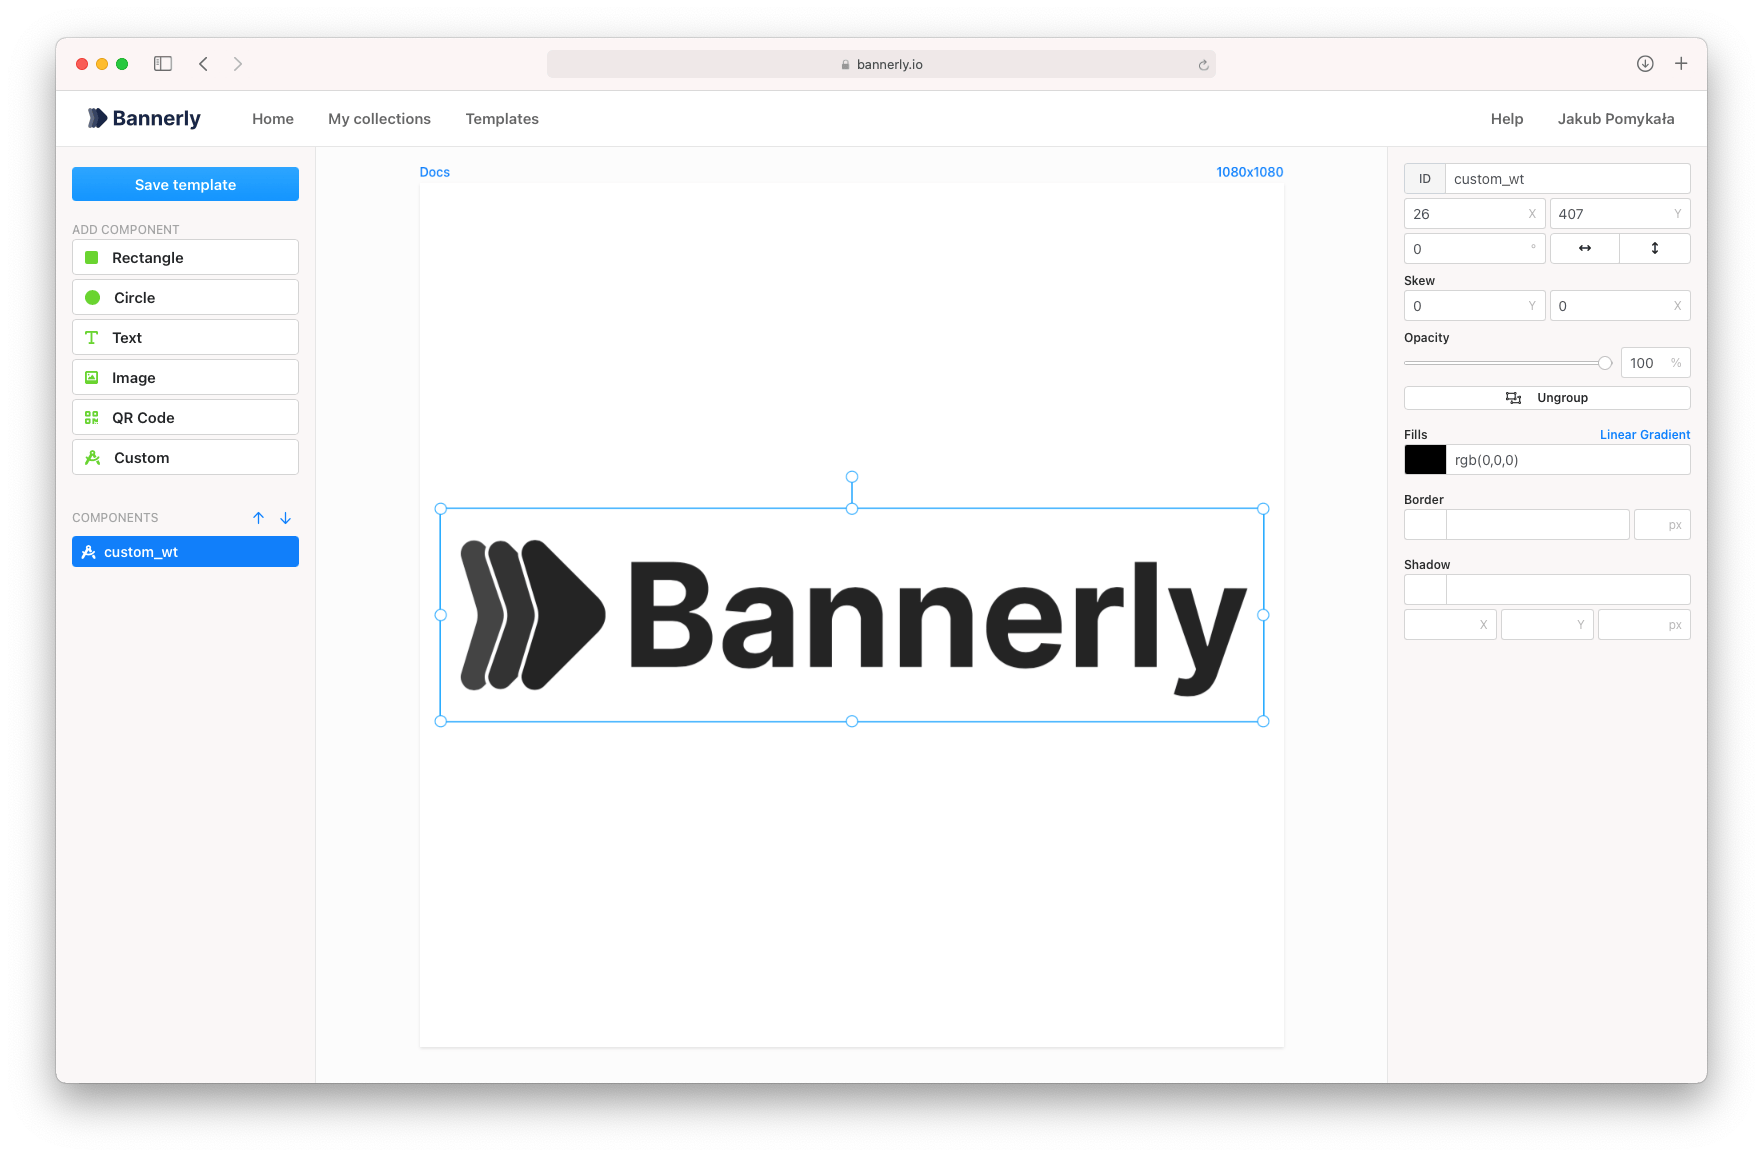
Properties:
- `color` - SVG fill color (eg: `rgba(255,255,255, 1)` or `#efefef`)
- `height` - SVG height in pixels (eg: `100`)
- `width` - SVG width in pixels (eg: `100`)
- `borderWidth` - border width in pixels (eg: `5`)
- `borderColor` - border color (eg: `rgba(255,255,255, 1)` or `#efefef`)
---
# Video templates
Source: https://renderform.io/docs/general/video-templates
Video templates let you turn the same drag & drop template you use for images into a short animated clip.
You design the layout once in the [Advanced Editor](https://renderform.io/docs/general/template-editor/), decide when each element appears and how it animates,
and RenderForm renders an MP4 or WebM file every time you send new data through the [API](https://renderform.io/docs/api/render-video/).
Video templates are available only in the **Advanced Editor**. Templates created in the Simple Editor or the [HTML editor](https://renderform.io/docs/general/html-template-editor/) can't be rendered as video.
## Creating a video template
Open **Templates** and click **Create a new template**. Choose the **Video** tab and pick a size, the same way you would for an image.
The template opens in the Advanced Editor with a video timeline at the bottom of the canvas.
Under the hood a video template is a regular Advanced Editor template with the output format set to `mp4` or `webm`.
You can also switch an existing Advanced Editor template to video by changing its **Format** in **Render Settings**.
## Timeline
The timeline shows every component of your template as a bar. The bar's left and right edges are the moment the element appears and disappears.
Drag the edges to change **element timing**, or set the exact start and end (in milliseconds) in the inspector.
An element without custom timing is visible for the whole length of the video.
Use the **play** button to preview the animation in real time or **scrub** the playhead to inspect a single frame.
The canvas always shows the state of the template at the current playhead position, so you can keep editing while paused at any point of the video.
## Animations
Select an element and open the **Animate** tab in the inspector. Animations are grouped into three phases:
- **Enter** - how the element appears: `fadeIn`, `slideIn`, `zoomIn`, `popIn`, `typewriter` (text only), `wipeIn`, `blurIn`
- **Loop** - what the element does while visible: `pulse`, `float`, `shake`, `spin`
- **Exit** - how the element disappears: `fadeOut`, `slideOut`, `zoomOut`, `wipeOut`
Each preset has its own **duration**, **delay**, **easing** (`linear`, `ease`, `easeIn`, `easeOut`, `easeInOut`, `spring`)
and, depending on the preset, a **direction** (`left`, `right`, `up`, `down`) and **intensity**.
Enter animations play at the element's start time, exit animations finish at its end time and loop animations repeat in between.
### Video elements
Besides images and texts you can drop a **Video** component on the canvas. It plays a video file from a URL and can be set to
start from a given offset, loop, or play at a different speed. The `src` of a video component is a
[template property](https://renderform.io/docs/general/template-properties/), so you can replace the clip through the API like any image.
## Render Settings
Open **Render Settings** to configure the output:
- **Format** - `mp4` or `webm`
- **Video length** - between 1 and 30 seconds (this is the length of the timeline)
- **Frame rate** - `24`, `25` or `30` fps (default `30`)
Both video length and frame rate can be overridden per request with `duration` and `fps` in the [render request](https://renderform.io/docs/api/render-video/).
## Pricing and limits
Rendering a video costs **10 credits per second** of video (rounded up to a started second). A 6.5-second clip costs 70 credits. Every plan can render any video length (1–30 s) and any size supported by the editor.
Credits are charged when the request is accepted and refunded if the render fails.
If your balance does not cover the render, the request is rejected with a `402` status code.
## Rendering videos with the API
Video renders are asynchronous: the API accepts the request and returns a `requestId` right away, then you poll for the result
or receive a [webhook](https://renderform.io/docs/api/webhooks/) when the file is ready. See [Render video](https://renderform.io/docs/api/render-video/) for the full request and response reference.
---
# Embedded editor
Source: https://renderform.io/docs/general/embedded-editor
The Embedded Editor is a version of the editor that can be embedded into your own website or application.
It provides an editor similar to the one you see in the dashboard,
but it has some limitations and disables access to certain features like: tags, exporting templates, image gallery, render settings, and preview mode.
To use the Embedded Editor, you need to create a template in the dashboard first, and enable the "Embedded Editor" option in the template settings.
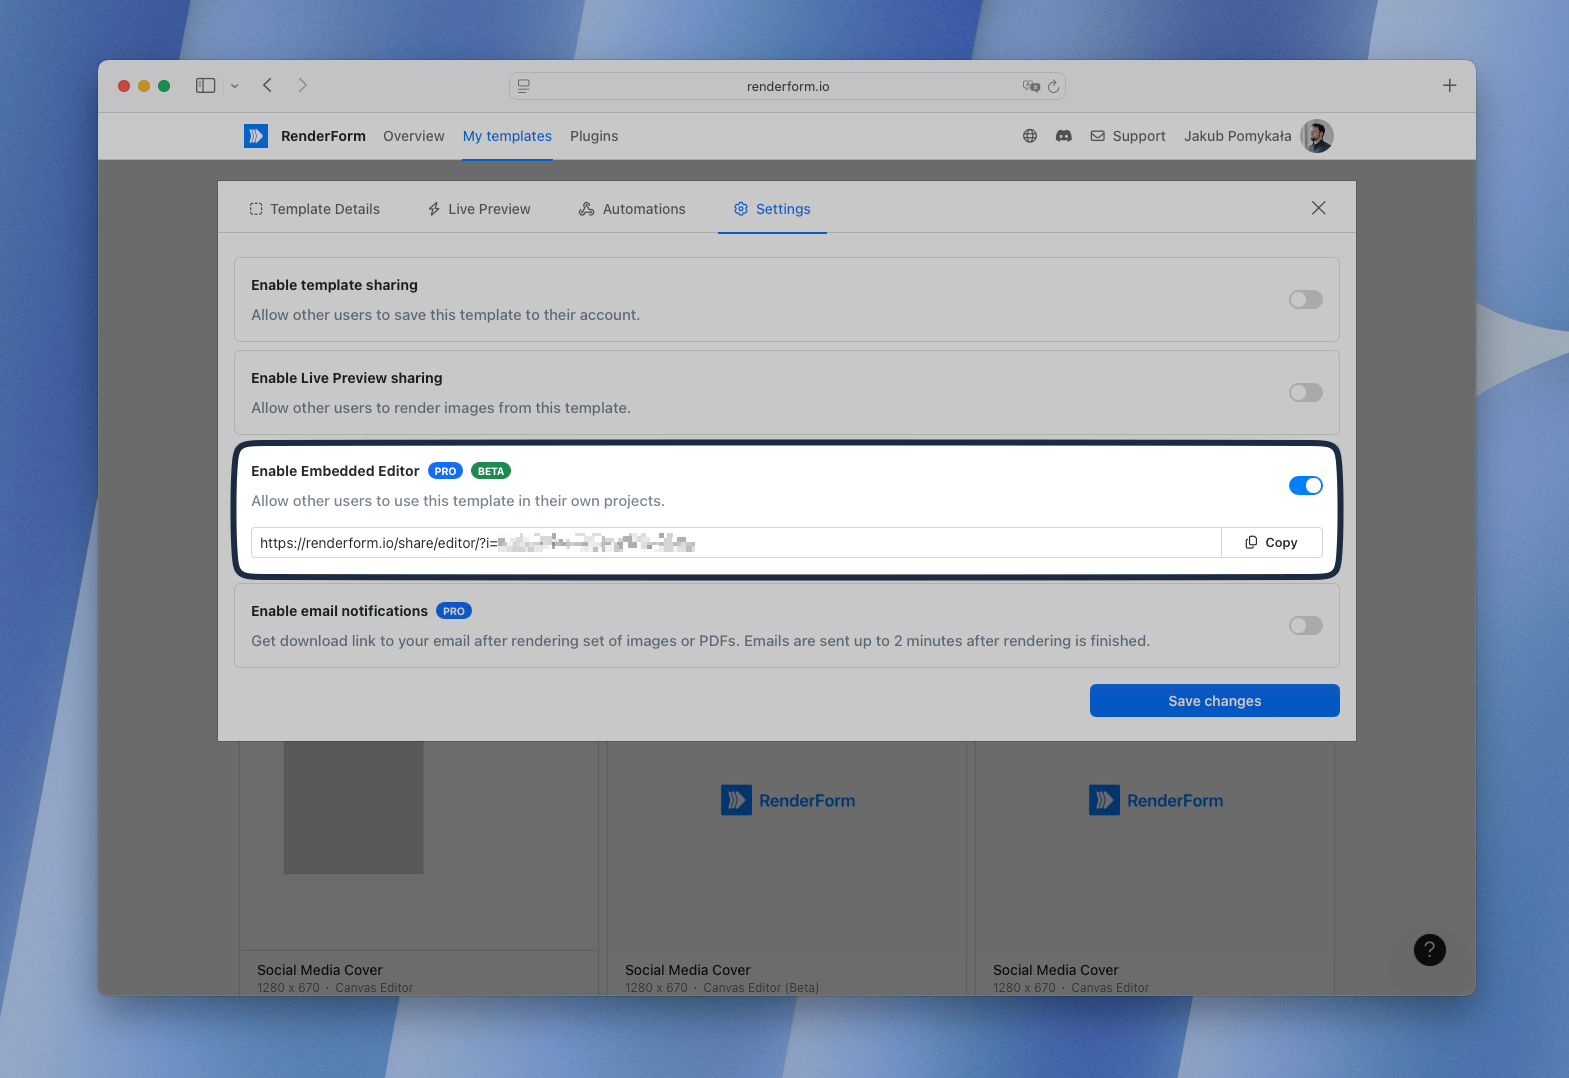
Once you have it, you can embed the editor into your website or application using the following code:
```html
```
Replace `your-template-id` with the ID of your template. You can find the template ID in the URL of the template in the dashboard.
You can also customize the width and height of the iframe to fit your needs.
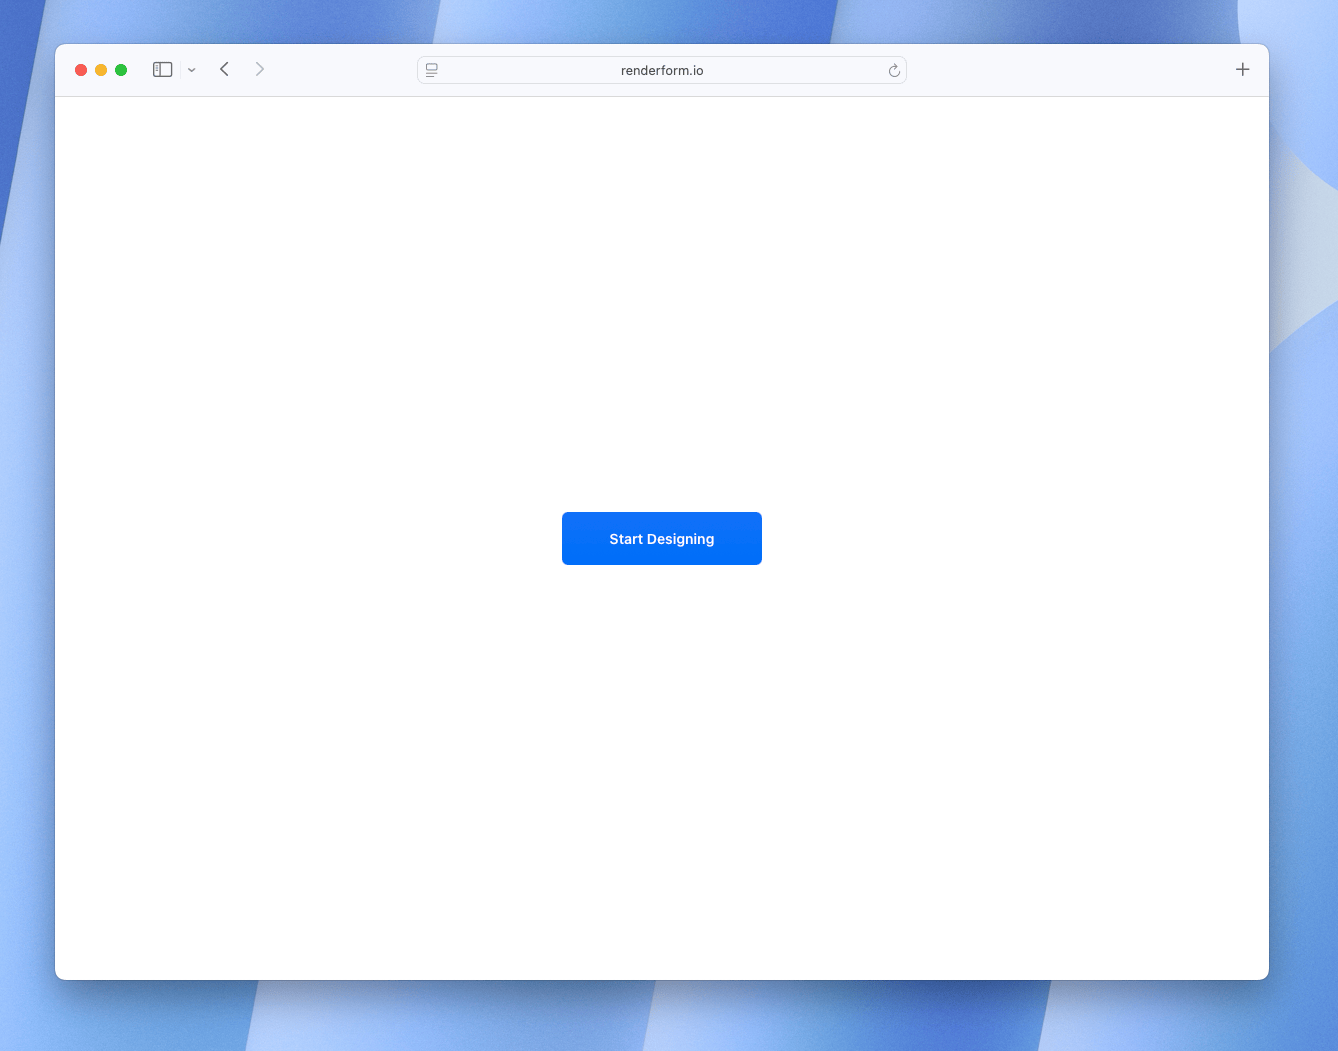
At the start, users will see the "Start Designing" button, which will open the editor with the template you specified.
Once the editor is opened, users can drag and drop elements, edit text, change colors, and customize the template as needed, and then save the changes.
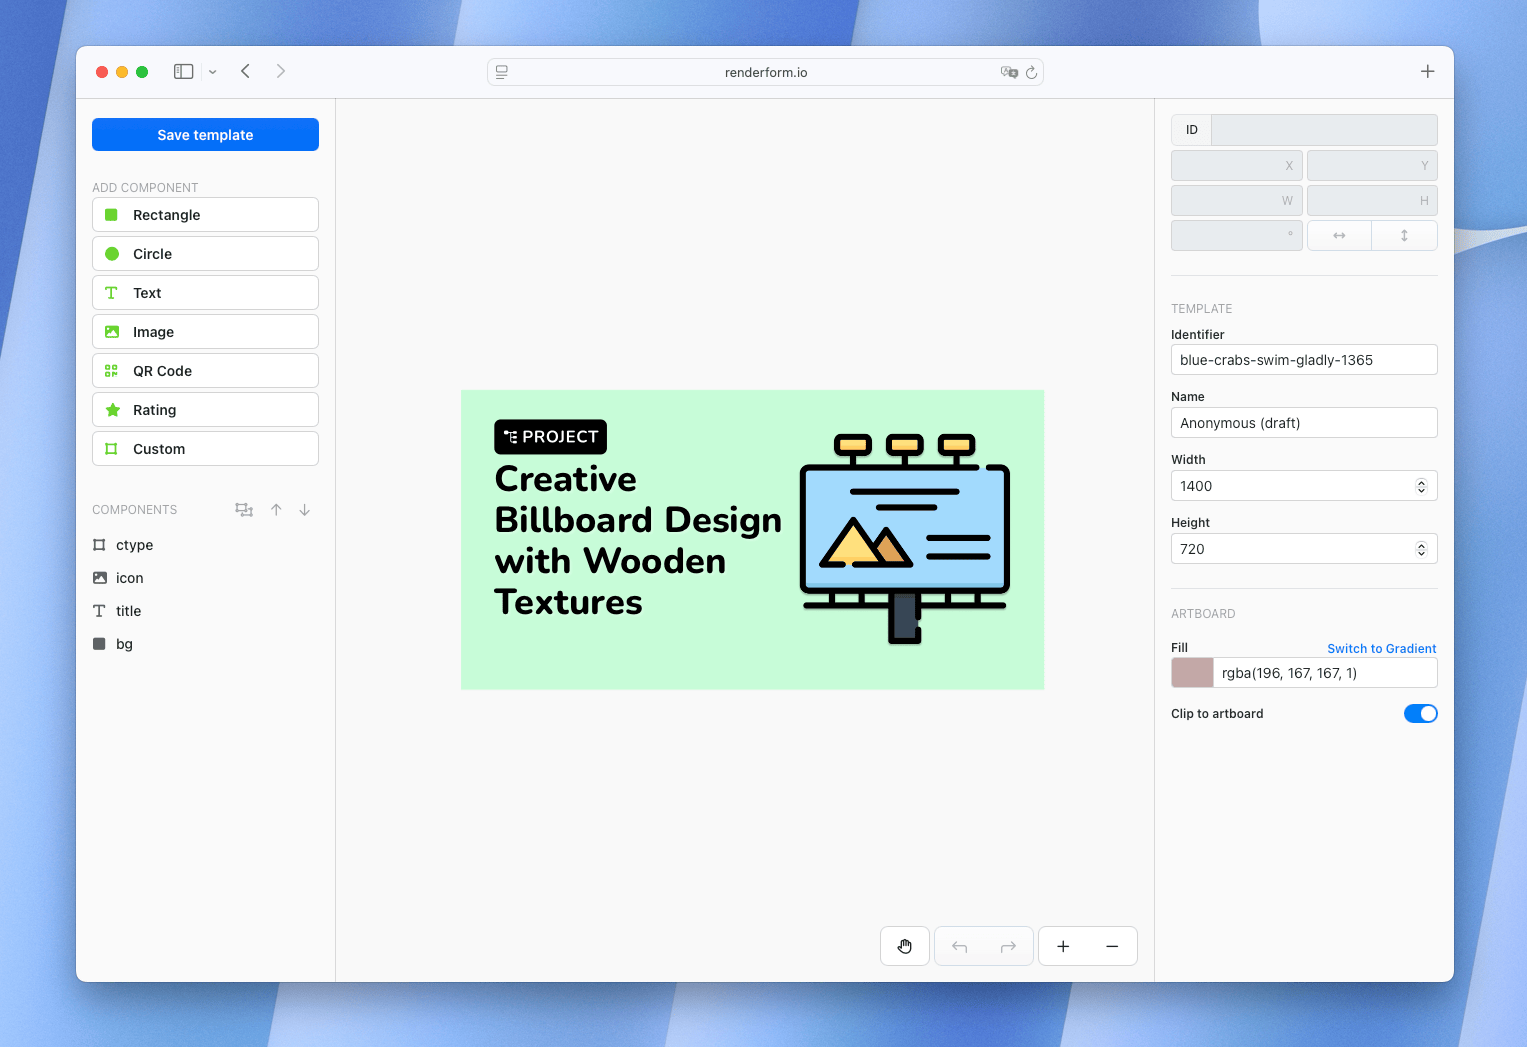
Newly created templates will be saved to your account, like any other template created in the dashboard.
## Event messages
You can receive messages from the Embedded Editor using the `window.postMessage` API.
```html
```
Currently, the following messages are sent from the Embedded Editor:
When the user clicks "Start Designing" button, the Embedded Editor will send a message to the parent window with the following data:
```json
{
"type": "template:create",
"templateId": "id-of-the-template"
}
```
When the user saves the template, the Embedded Editor will send a message to the parent window with the following data:
```json
{
"type": "template:save",
"templateId": "id-of-the-template"
}
```
## Custom template name
You can customize the name of the template that will be created in the Embedded Editor by using the `tn` (Template Name) query parameter in the iframe `src` attribute.
```html
```
Use `%20` to represent spaces in the template name. This will set the name of the template to "Custom Template Name" when the user starts designing.
## Work resuming
If the user closes the Embedded Editor and then returns to it later, they will be able to resume their work from where they left off, but it's not done automatically if it's used
via iframe. You need to implement this functionality yourself by listening for the `template:create` message and saving the template ID in your application.
Once you receive the `template:create` message, you can store the template ID in your application (e.g., in local storage or a database).
When the user returns to the Embedded Editor, you can check if there is a saved template ID and then load it into the editor by updating the iframe `src` attribute,
that will use `ut` (User Template) query parameter to load the template.
```javascript
const templateId = localStorage.getItem('savedTemplateId');
if (templateId) {
const iframe = document.querySelector('iframe');
iframe.src = `https://renderform.io/share/editor/?ut=${templateId}`;
}
```
---
# AI Images
Source: https://renderform.io/docs/general/ai-images
AI Images allow you to generate images using text prompts directly within your templates.
Instead of providing a URL to an existing image, you can describe what you want, and RenderForm
will generate it for you using OpenAI's **gpt-image-1.5** model.
> **This feature is available exclusively for [RenderForm Pro](https://renderform.io/pricing/) users.**
## How it works
To generate an AI image, use the `ai:` prefix in the `src` property of any image component.
The text after the prefix will be used as a prompt to generate the image.
```json
{
"template": "",
"data": {
"my-image.src": "ai:a cute bunny with colorful Easter eggs on a green meadow"
}
}
```
RenderForm will:
1. Detect the `ai:` prefix in the image source
2. Send the prompt to OpenAI's image generation API
3. Replace the value with the generated image
4. Render the final template with the AI-generated image
## Full API example
```bash
curl --request POST \
--url https://get.renderform.io/api/v2/render \
--header 'X-API-KEY: ' \
--header 'Content-Type: application/json' \
--data '{
"template": "",
"data": {
"title.text": "Product of the Day",
"background.src": "ai:minimalistic abstract gradient background in pastel blue and pink tones",
"product-photo.src": "https://example.com/product.jpg"
}
}'
```
You can mix AI-generated images with regular image URLs and text properties in the same request.
## Image specifications
| Parameter | Value |
|------------|------------------|
| Model | gpt-image-1.5 |
| Resolution | 1024×1024 pixels |
| Quality | High |
| Format | PNG |
## Pricing
Each AI image generation adds **20 credits** to the request cost. This is in addition to the
base render cost.
For example, if your template uses 2 AI-generated images, the total additional cost will be
**40 credits** (2 × 20 credits) on top of the standard render cost.
## Tips for writing prompts
- **Be descriptive** - the more details you provide, the better the result. Include colors, style, mood, and composition.
- **Specify the style** - mention if you want a photo, illustration, watercolor, 3D render, flat design, etc.
- **Keep it concise** - while details help, avoid overly complex prompts. Focus on the key elements.
- **Avoid text in images** - AI models often struggle with rendering text accurately in images. Use RenderForm text components instead.
### Good prompt examples
```
ai:professional product photo of a red sneaker on a white background with soft shadows
```
```
ai:flat illustration of a mountain landscape at sunset with purple and orange sky
```
```
ai:minimalistic geometric pattern in navy blue and gold colors
```
## Limitations
- AI image generation adds processing time to the render request (typically 5–15 seconds per image)
- Generated images are always 1024×1024 pixels and will be scaled to fit the image component in your template
- Prompts must follow [OpenAI's content policy](https://openai.com/policies/usage-policies). Prompts that violate these guidelines will be rejected
- The `ai:` prefix is only supported for the `src` property of image components
---
# QR code formats
Source: https://renderform.io/docs/general/qr-codes
QR codes are a type of two-dimensional barcode. They are often used for storing URLs to mobile apps or websites, but they can
do much more! You can create QR codes which stores information about:
- Contact information (vCards)
- Phone number
- SMS with prefilled text message and phone number
- WiFi password
- Calendar event (iCalc)
- Email with prefilled address, text, and subject
> We do not proxy the generated QR links through our servers. They will always point directly to the destination you specified.

## Available formats
### Phone Number
Open phone dialing screen with phone number.
Format
```shell
tel:;
```
Example
```shell
tel:+48111111111;
```
### Text Message
Open SMS application with prefilled phone number and text message.
Example
```shell
smsto:555-555-5555:QR Code Generator by RenderForm
```
### Contact details (vCard)
vCards are used to share whole contact details using QR Codes.
Example
```shell
BEGIN:VCARD
VERSION:2.1
N:John Doe
TEL;HOME;VOICE:555-555-5555
TEL;WORK;VOICE:666-666-6666
EMAIL:jakub@renderform.io
ORG:RenderForm
URL:https://renderform.io
END:VCARD
```
### Calendar event (iCal)
Open a calendar with prefilled event details.
Example
```shell
BEGIN:VEVENT
SUMMARY:My Event
DESCRIPTION:Description
LOCATION:Location
DTSTART:20211021T115429Z
END:VEVENT
```
### WiFi name and password
Share WiFi name and password with others using QR Code.
Format
```shell
WIFI:S:;T:;P:;H:;
```
Example
```shell
WIFI:S:RenderFormHQ;T:WPA;P:SecretPassword;;
```
### Email with text
Open email client with prefilled email, subject and text body.
Format
```shell
mailto:?subject=&body=
```
Example
```shell
mailto:contact@renderform.io?subject=Subject&body=Body
```
## How to add logo to QR code?
To add a logo to your QR code, you can simply put an image on it. Thanks to error correction, your QR code will be still
readable. The image cannot be too big because error correction won't be able to recover missing data. **Remember to always test your QR code if it's readable by smartphone camera.**
---
# Custom fonts
Source: https://renderform.io/docs/general/custom-fonts
To add a new custom font, open your account settings and go to 'Custom fonts' section.
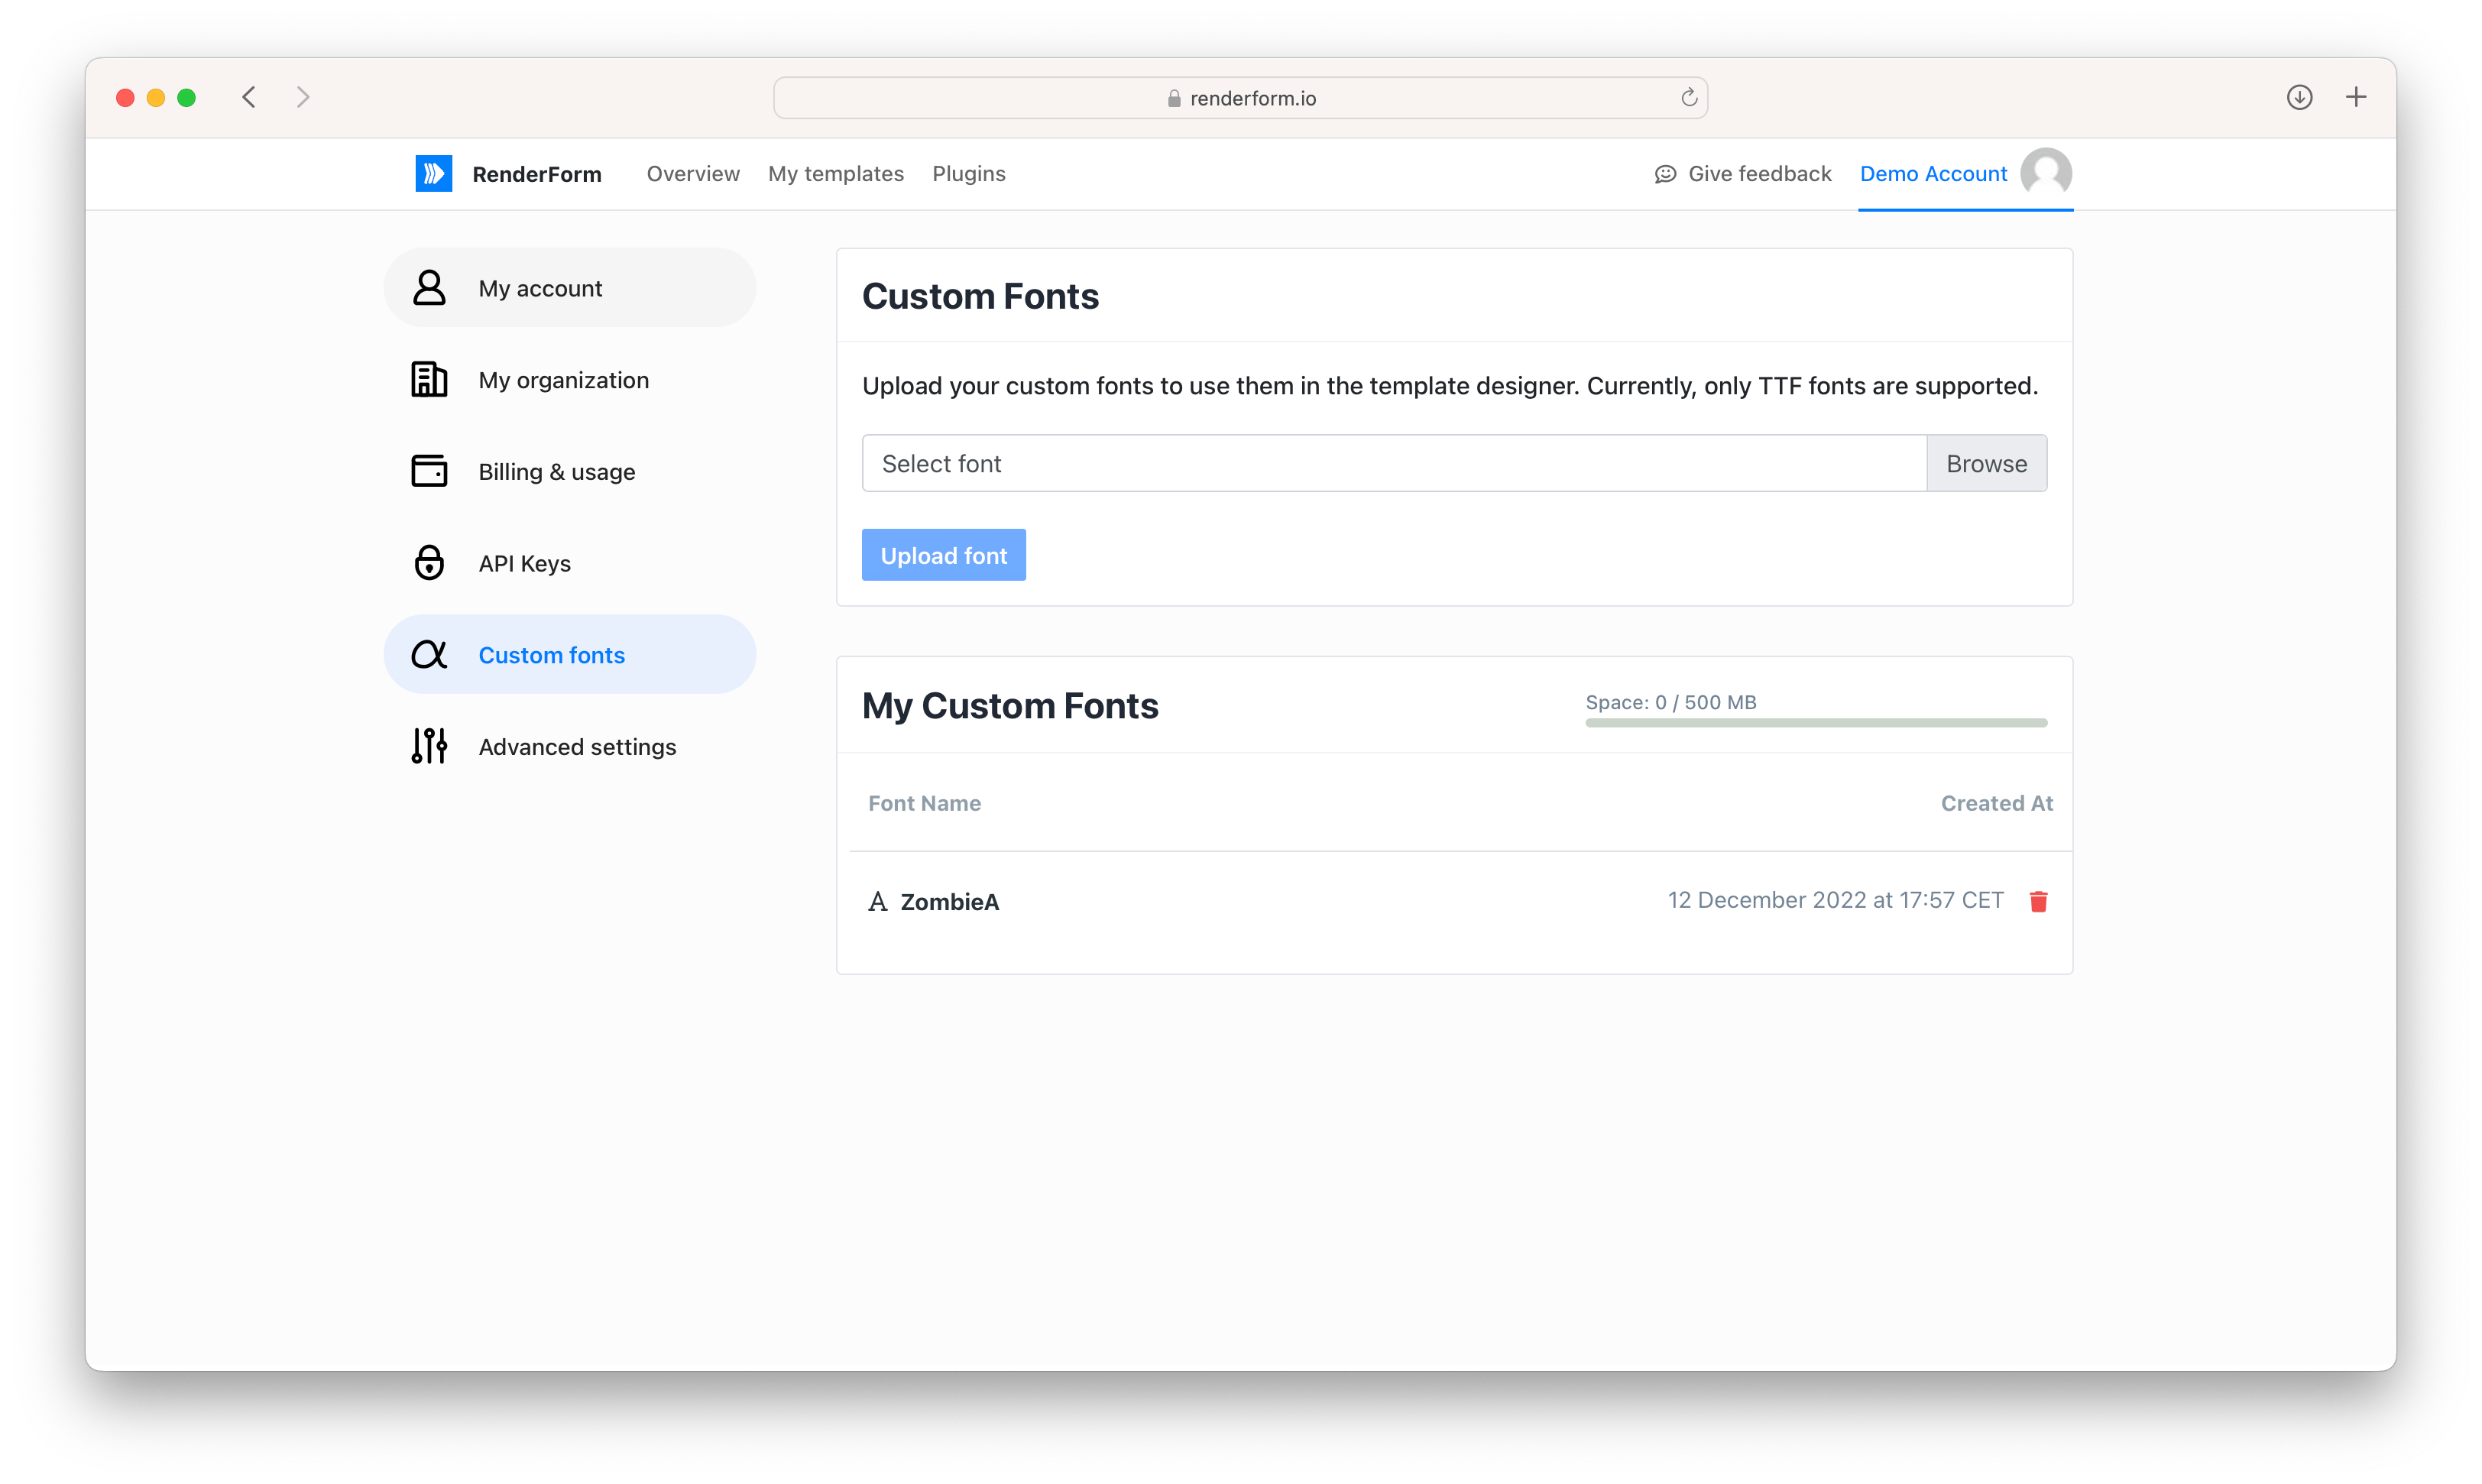
> We support full Google Fonts library. Please consider using Google Fonts first before uploading your own font files.
Choose a font file with `.ttf` extension and click 'Upload font'. After successful upload, your font will be ready to use.
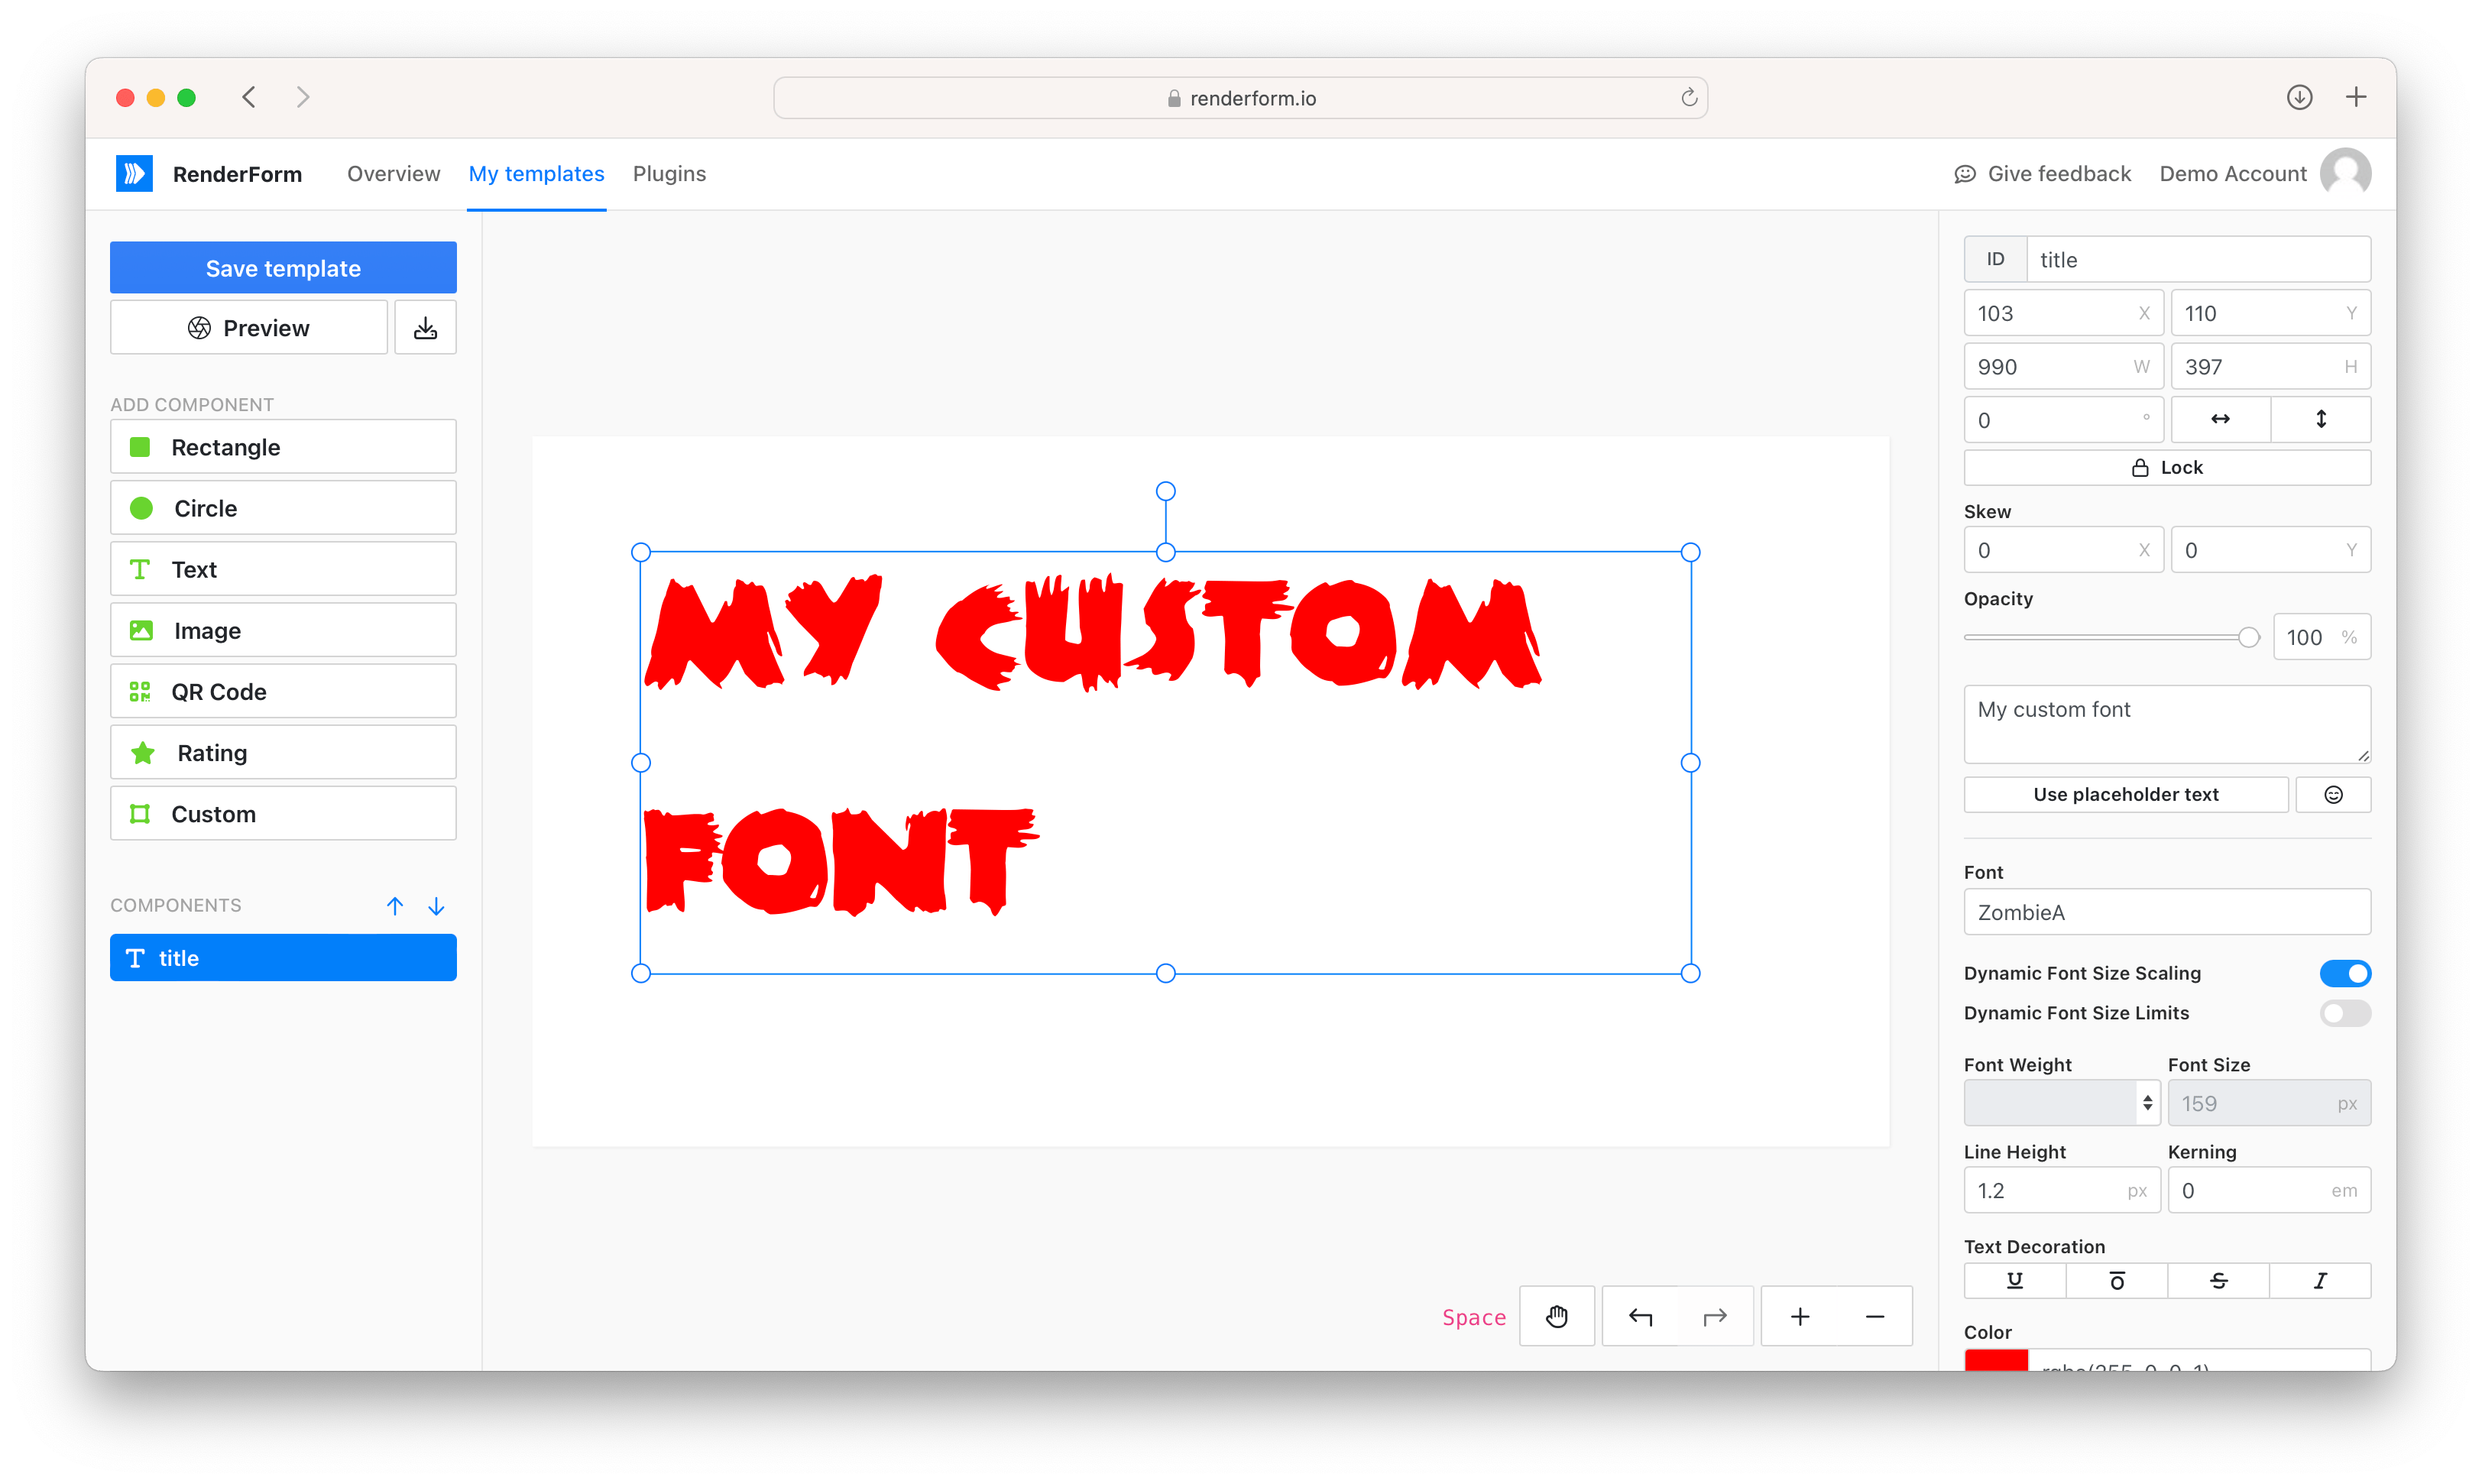
To use the uploaded font, open [template editor](https://renderform.io/docs/general/template-editor/), add a text component and pick your font from the font selector on the right side. Your custom font should be available on top of the list.
---
# Signed requests
Source: https://renderform.io/docs/general/signed-requests
Signed requests allow you to generate images with dynamic content and protect your API key from unauthorized access.
You can use it to create social media banners, article covers, or any other image with dynamic content. Links to the images needs to be generated on your server, and provided to the client.
Creating a signed request requires a template identifier, changes in the template, and a signature generated with your API key. Image is generated on the fly, and returned to the client on the first request.
## How to start?
Create a meta-link according to the following format:
```html
https://get.renderform.io/signed/{templateIdentifier}.jpg?c={changesJson}&s={signature}
```
Change values:
- `{templateIdentifier}` - with your template identifier,
- `{changesJson}` - JSON with changes in the template encoded in base64,
- `{signature}` - signature generated with HMAC-SHA256 algorithm.
## Create signed URL
Start from installing `crypto-js` package:
```bash
npm install crypto-js
```
Create a function that will generate signed URL for your template:
```tsx
const createSignedUrl = (title: string): string => {
const template = "my-template-identifier";
const baseUri = `https://get.renderform.io/signed/${template}.jpg`;
const apiKey = "my-api-key";
const changes: Array = [
{
id: "title",
text: title
}
];
const changesParam = "?c=" + Base64.stringify(Utf8.parse(JSON.stringify(changes)));
const signatureParam = "&s=" + hmacSHA256(baseUri + changesParam, apiKey);
return baseUri + changesParam + signatureParam;
};
```
## Usage
Function above does not render the image, it only creates a signed URL. You can use it in your React component like this:
```tsx
const document = getDocument(params.id);
const previewUrl = createSignedUrl(document.title);
return {
props: {
previewUrl,
document
},
};
}
```
Image will be rendered on the first request, and cached for the next 24 hours. You can use it in your HTML code like this:
```html
```
Where `{previewUrl}` is the URL generated by `createSignedUrl` function.
---
# MCP Server
Source: https://renderform.io/docs/general/mcp
RenderForm provides an official [Model Context Protocol (MCP)](https://modelcontextprotocol.io/introduction) server that lets AI
assistants such as **Claude Desktop**, **Cursor**, **Windsurf**, and **GitHub Copilot** call the RenderForm API directly from a chat
conversation - no code required.
The source code and full documentation are available on GitHub:
- [github.com/RenderForm/renderform-mcp](https://github.com/RenderForm/renderform-mcp)
## Available tools
Once connected, your AI assistant can:
- Render an image/PDF from a template
- Create a screenshot of a web page
- Convert a web page to PDF
- List render results and get render result details
- Delete a render result
- List templates and get template details
- Delete a template
- Get organization usage (credits, uploads, plan)
- List available fonts
## Installation
You'll need a RenderForm API Key, available in **Account > API Keys**.
Add the following to your MCP client configuration:
```json
{
"servers": {
"renderform": {
"type": "stdio",
"command": "npx",
"args": ["-y", "renderform-mcp", "--api-key=RENDERFORM_API_KEY"]
}
}
}
```
Replace `RENDERFORM_API_KEY` with your API key.
For client-specific setup instructions, see:
- [Claude Desktop](https://modelcontextprotocol.io/quickstart/user)
- [Cursor AI](https://docs.cursor.com/context/model-context-protocol)
- [Visual Studio Code](https://code.visualstudio.com/docs/copilot/chat/mcp-servers)
- [GitHub Copilot](https://github.blog/changelog/2025-05-19-agent-mode-and-mcp-support-for-copilot-in-jetbrains-eclipse-and-xcode-now-in-public-preview/)
- [Windsurf](https://docs.codeium.com/windsurf/mcp)
---
# Support
Source: https://renderform.io/docs/general/support
We provide all kinds of support at [contact@renderform.io](mailto:contact@renderform.io).
Please always try to include as much information as you can, to help us solve the problem, e.g.:
- template id or name,
- which integration do you use,
- and when the problem appeared.
### System status
You can check the current status of our service at [renderform.statuspage.io](https://renderform.statuspage.io).
### Credits and renders
By default, rendering one image or PDF costs one credit. However, there are situations where a single render may cost more than one credit.
We aim to keep RenderForm as simple as possible, but in some cases, we perform additional processing on our side, which can increase the cost of a single render.
Cases where a single render may cost more than one credit are related to the input images used during the rendering process.
These situations include:
- Using the `base64` format for input images instead of image URLs.
- Using large or high-resolution input images. We resize images on our side when the "Auto-resize external images" option is enabled; otherwise, your image might not render correctly.
- Using Google Drive, Dropbox, or OneDrive links instead of direct image URLs. We have to download and re-upload the image to our servers; otherwise, we might get blocked by the hosting service.
**Example**
If you use 1 image in `base64` format and 1 extra-large image, a single render will cost you 3 credits.
The best way to avoid extra costs is to use direct image URLs and optimize your images for web usage (e.g., using TinyPNG or similar services).
Please be reasonable when using our service, so that we can keep it affordable for everyone.
Additionally, if you choose "Searchable PDF" as the output format, the cost of a single render will increase by 1 credit.
### Failed renders
Failed requests do not subtract image renders from your quota.
However, we are aware that due to the incorrect configuration of the 3rd party tool you might make a lot of requests
that will end up with the correct image rendered but with the incorrect data on the image itself.
### Feature requests
You can send new feature requests, bug reports and any other feedback to [feedback@renderform.io](mailto:feedback@renderform.io).
If you are logged in to your account, you can also use the "Give feedback" option in the help menu (the question mark button in the bottom right corner) — it lets you pick the type of your request (bug, feature request, feedback or other) and send it without leaving the dashboard.
### Refund requests
We are aware that sometimes you may encounter technical issues when using 3rd-party integrations.
We always want to solve the problem first, to make sure that you can use our service.
We accept full refund requests only if you can't use our service at all.
Refund requests are accepted within 14 days from the purchase date.
---
# Get started
Source: https://renderform.io/docs/api/get-started
Every request to RenderForm API requires an account and API Key.
## OpenAPI Specification
RenderForm API is described with OpenAPI 3.0 Specification
and can be used to generate client libraries for your favorite programming language or import to REST Client, e.g.: Postman or Insomnia.
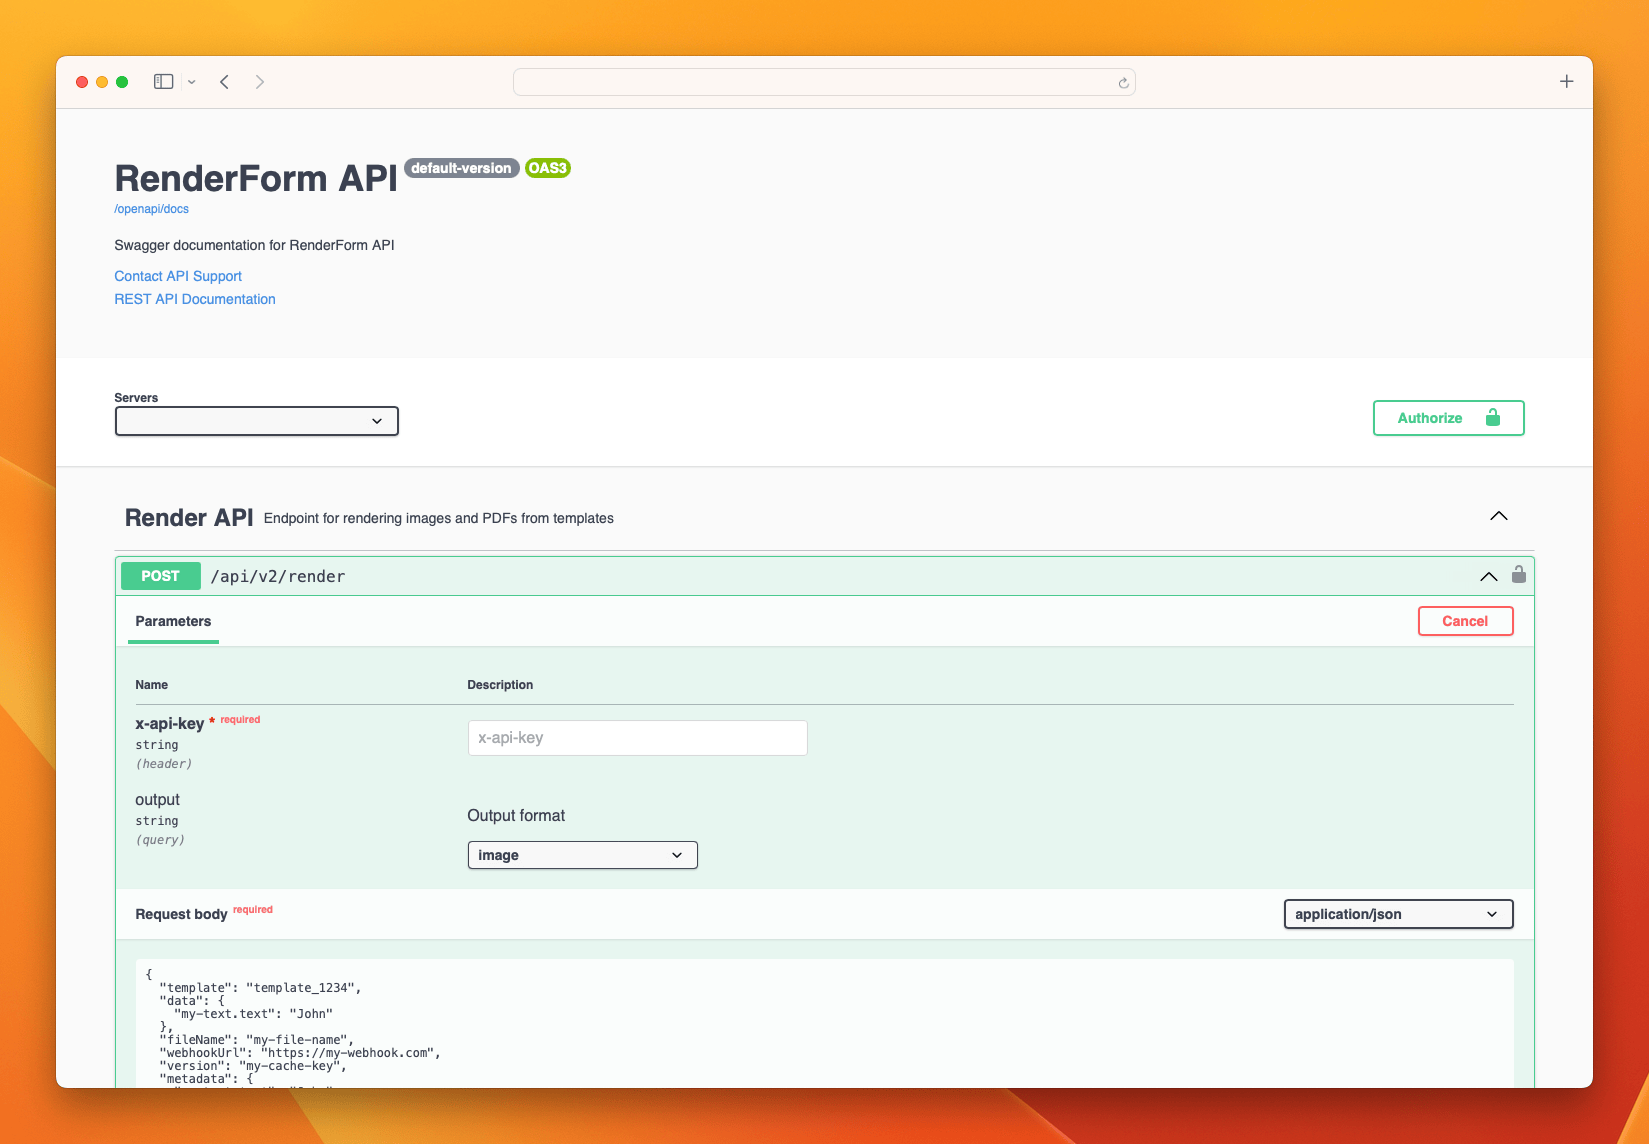
We also provide a Swagger UI to test the API.
- [Download OpenAPI Specification file](https://api.renderform.io/openapi/docs)
- [Go to Swagger UI](https://api.renderform.io/openapi/ui)
## Authorization
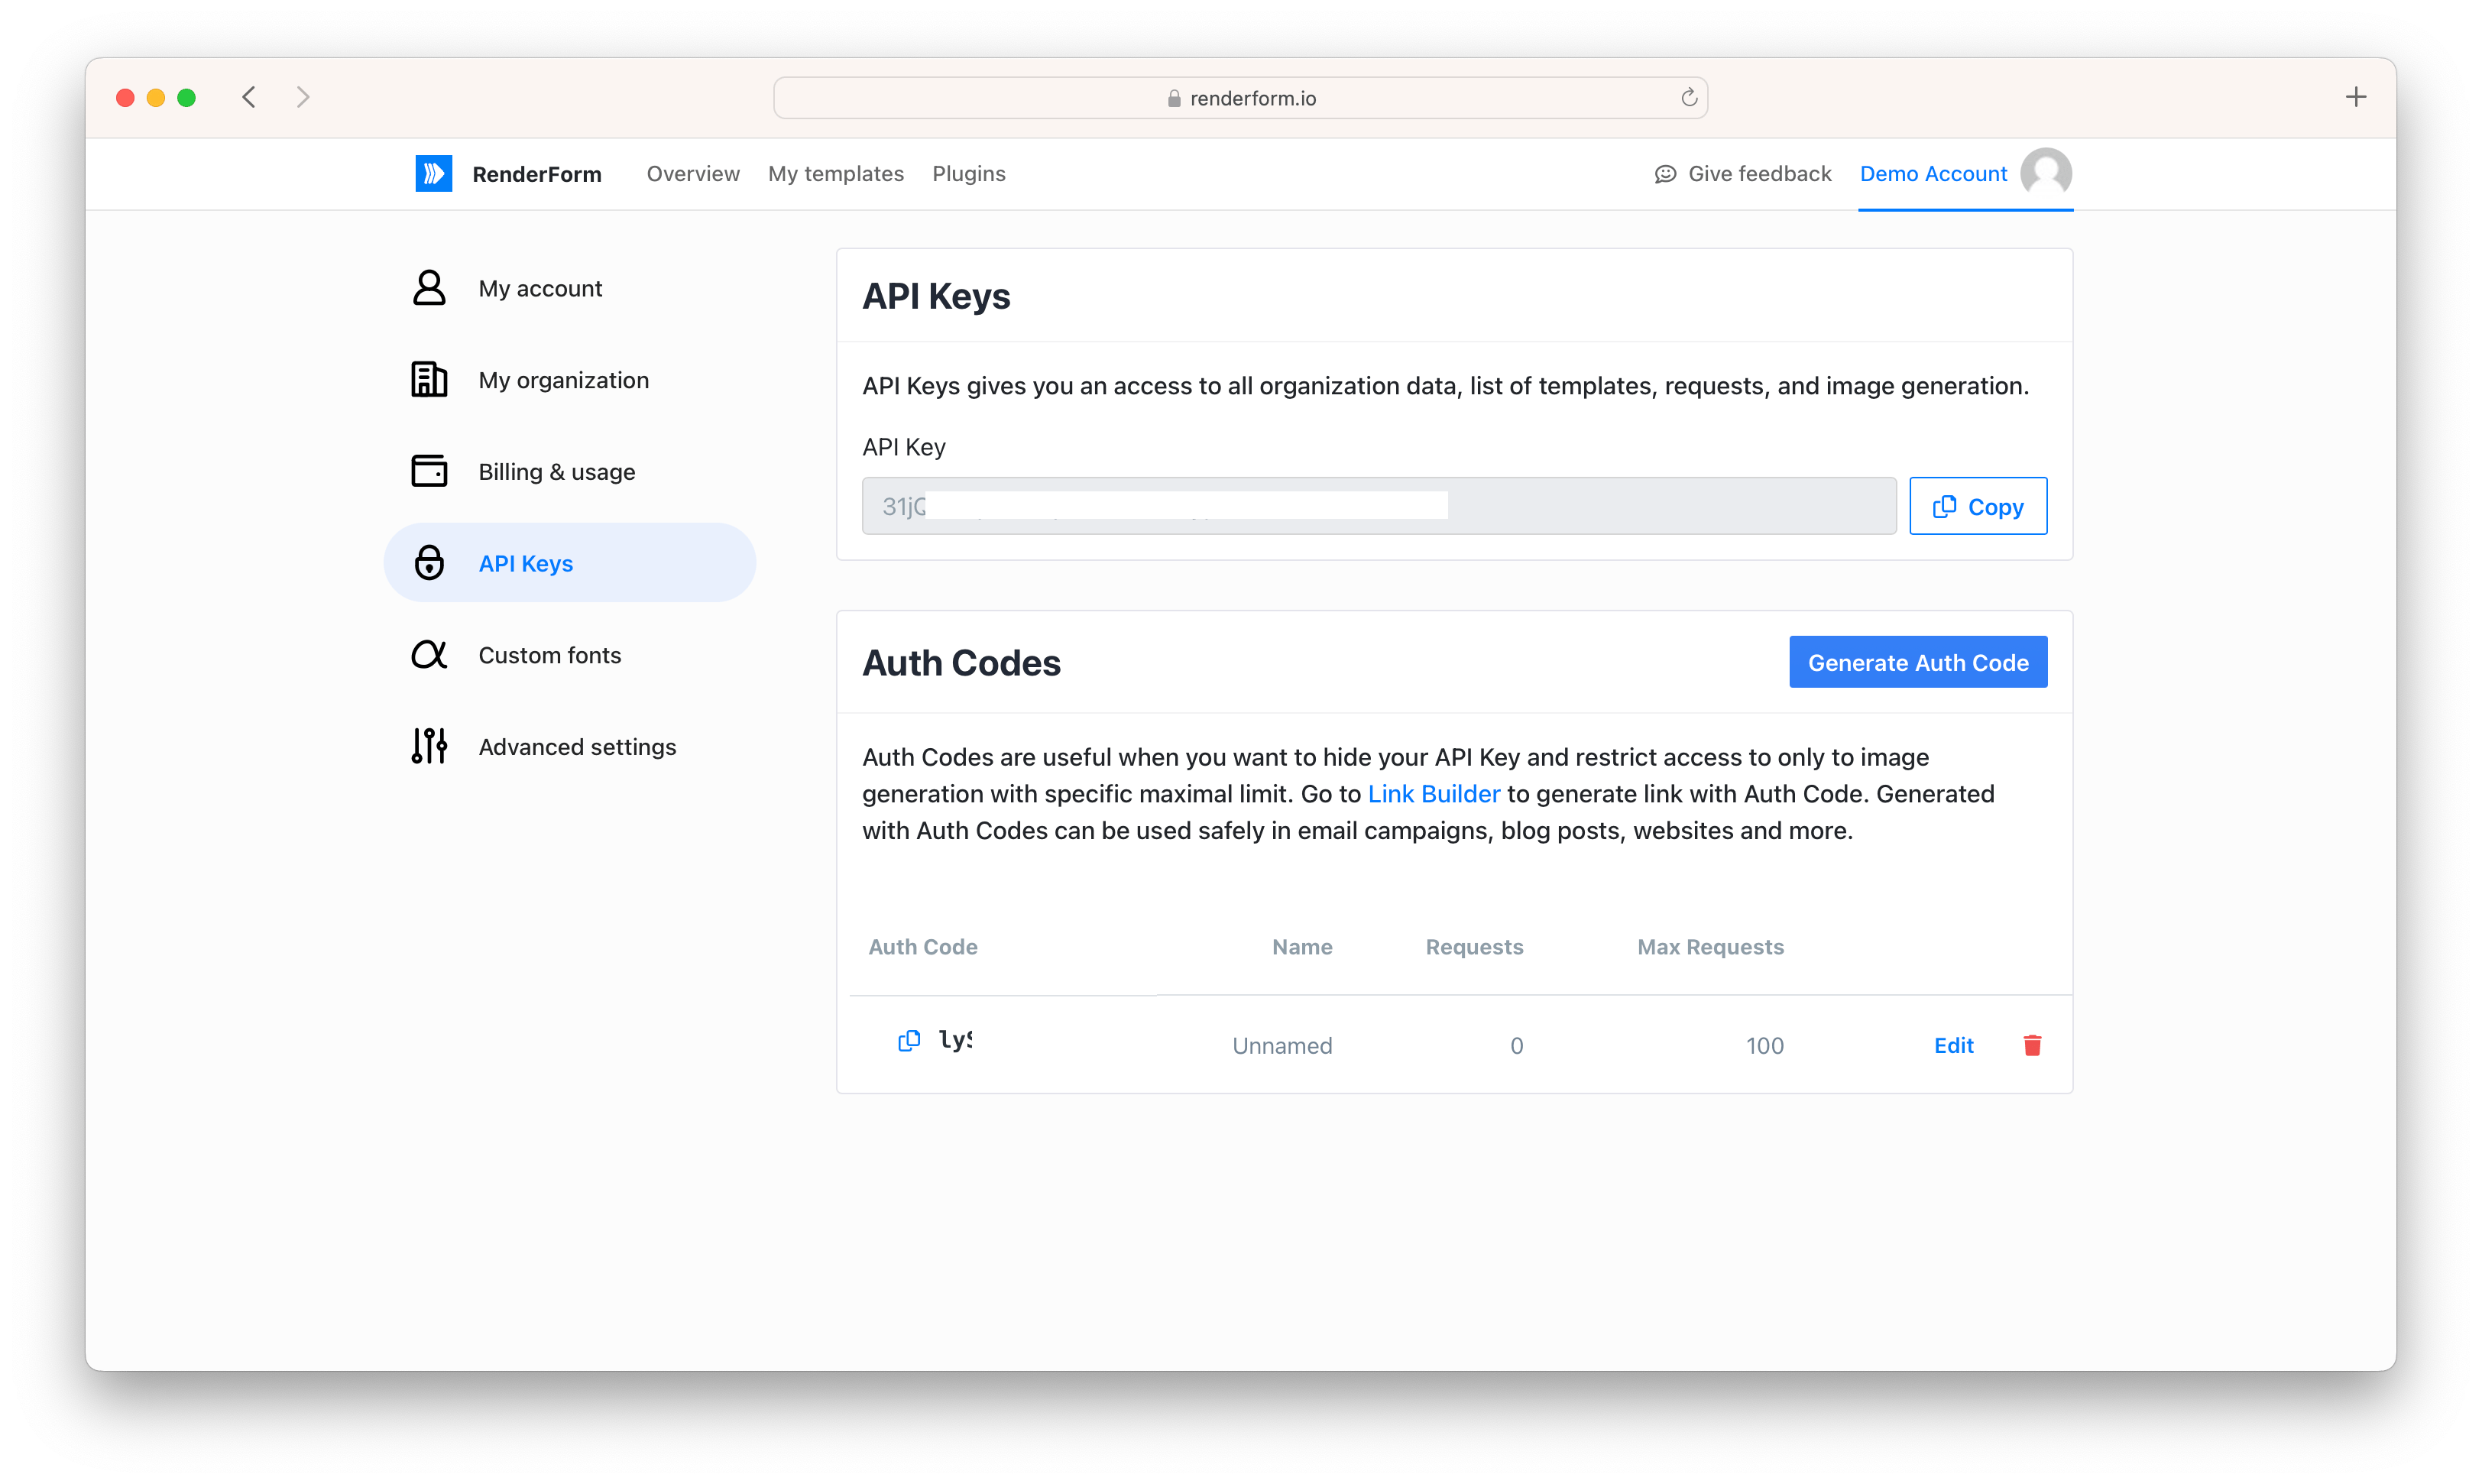
Every request that needs to be authorized and have `X-API-KEY` header with API Key.
The API Key is available in the account section in the **API Keys** tab.
## Error responses
RenderForm API error responses are returned with a JSON object with the following structure:
```json
{
"status": 500,
"msg": "Error details",
"errors": [
"Error message 1",
"Error message 2"
]
}
```
### Error status codes
RenderForm follows the standard HTTP status codes to indicate the result of the request:
- Informational responses (100 – 199)
- Successful responses (200 – 299)
- Redirection messages (300 – 399)
- Client error responses (400 – 499)
- Server error responses (500 – 599)
Here is a list of HTTP status codes that you can expect working with RenderForm API:
- **500 - Internal Server Error:** Indicates that the RenderForm encountered an unexpected condition that prevented it
from fulfilling the request. This could be due to various issues such as server misconfigurations, unhandled exceptions, or
3rd party service issue. You may want to retry the request immediately or after some time.
- **503 - Service Unavailable:** Indicates that the server is temporarily unable to handle the request. This could be due to server maintenance, overload, or other temporary conditions. You may want to retry the request immediately or after some time.
- **429 - Too Many Requests:** Indicates that the server has received too many requests from your application in a given amount of time.
- **404 - Not Found:** Indicates that entity could not be found. Verify if your request is correct and try again.
- **403 - Forbidden:** Indicates that server understands the request but refuses to authorize it. Verify if your request credentials, and try again.
- **402 - Payment Required:** You have reached your plan limits, or you don't have enough credits to render image or PDF. Verify your credit balance and try again.
- **400 - Bad Request:** Your request body, request params, headers or request method is incorrect. Verify the request and try again.
### Rate limits
60 requests per minute for all endpoints
---
# Render image
Source: https://renderform.io/docs/api/render-image
This endpoint allows you to render images and PDF files based on a template created in [Template Editor](https://renderform.io/docs/general/template-editor/)
and your properties.
## POST Endpoint
```bash
https://get.renderform.io/api/v2/render
```
Looking for the [v1 endpoint](https://renderform.io/docs/api/render-image-v1/)? Want to [render a video](https://renderform.io/docs/api/render-video/)?
### Sample request
```bash
curl --request POST \
--url https://get.renderform.io/api/v2/render \
--header 'X-API-KEY: ' \
--header 'Content-Type: application/json' \
--data '{
"template": "",
"data": {
"my-text-component-id.color": "#eeeeee",
"my-text-component-id.text": "Hello {John}!",
"my-image-component-id.src": "https://my-blog.com/my-image.jpg"
}
}'
```
#### Request body
- `template` (required) - template identifier
- `data` (optional) - values for the [template properties](https://renderform.io/docs/general/template-properties/)
- `fileName` (optional) - custom file name for generated image
- `webhookUrl` (optional) - [send response to the given URL](https://renderform.io/docs/api/render-image/#sample-request-with-webhook-execution) as a POST request
- `metadata` (optional) - any key-value object can be used as metadata container
- `version` (optional) - used as cache differentiator, if you want to force re-rendering of the template
- `width` (optional) - width of the generated image
- `height` (optional) - height of the generated image
- `waitTime` (optional) - time in milliseconds to wait before rendering, useful for HTML templates
- `outputFormat` (optional) - file format of the result: `jpeg`, `png`, `webp`, `pdf`, or `mp4` / `webm` for [video templates](https://renderform.io/docs/api/render-video/)
### Custom dimensions
You can specify the width and height of the generated image by providing the `width` and `height` properties in the request body.
Output image will be cropped to the specified dimensions where the starting point is the top left corner.
```bash
curl --request POST \
--url https://get.renderform.io/api/v2/render \
--header 'X-API-KEY
--header 'Content-Type: application/json' \
--data '{
"template": "",
"data": {
"my-text-component-id.text": "Hello {John}!",
"my-image-component-id.src": "https://my-blog.com/my-image.jpg"
},
"width": 800,
"height": 600
}'
```
#### Successful response
Successful response always returns `200` status code,
`requestId`, and `href` property with url to the rendered result.
```json
{
"requestId": "febbd34c-cadf-43e6-926c-5942016aea4e",
"href": "https://cdn.renderform.io/.../febbd34c-cadf-43e6-926c-5942016aea4e.jpg"
}
```
#### Error response
Unsuccessful response always returns `400` status code,
an error message with details about the error in `msg` property and `status` with the HTTP status code.
```json
{
"msg": "Template not found",
"status": 400
}
```
### Sample request with metadata
Metadata field allows you to store any JSON object with the generated image.
```bash
curl --request POST \
--url https://get.renderform.io/api/v2/render \
--header 'X-API-KEY: ' \
--header 'Content-Type: application/json' \
--data '{
"template": "",
"data": {
"my-text-component-id.color": "#eeeeee",
"my-text-component-id.text": "Hello {John}!",
"my-image-component-id.src": "https://my-blog.com/my-image.jpg"
},
"metadata": {
"userId": "12345",
"userName": "John Doe",
"my-custom-key": "Hello World!"
}
}'
```
### Sample request for HTML template
HTML template can be rendered using the same endpoint as an image.
The only difference is that you skip the Component ID part as HTML templates doesn't have any components.
```bash
curl --request POST \
--url https://get.renderform.io/api/v2/render \
--header 'X-API-KEY: ' \
--header 'Content-Type: application/json' \
--data '{
"template": "",
"waitTime": 2000, //optional, time in milliseconds to wait before rendering
"data": {
"my-property": "#eeeeee",
"my-text": "Hello {John}!",
"my-image": "https://my-blog.com/my-image.jpg"
}
}'
```
### Sample request with webhook execution
`webhookUrl` can be used to send the response to the given URL as a POST request after the image or PDF is rendered.
```bash
curl --request POST \
--url https://get.renderform.io/api/v2/render \
--header 'X-API-KEY: ' \
--header 'Content-Type: application/json' \
--data-raw '{
"template": "",
"webhookUrl": "https://my-service.com/webhook-receiver"
"data": {
"my-property": "#eeeeee",
"my-text": "Hello {John}!",
"my-image": "https://my-blog.com/my-image.jpg"
}
}'
```
RenderForm will respond immediately with `requestId` and a link where the rendered image will be saved.
```shell
{
"requestId": "febbd34c-cadf-43e6-926c-5942016aea4e"
"href": "https://cdn.renderform.io/8af2cacf-a328-4a8f-a4a7-fc6419b5b805/results/febbd34c-cadf-43e6-926c-5942016aea4e.jpg"
}
```
After a successful render, RenderForm will send a request to the given `webhookUrl` with `requestId`, `href` and request which has been sent to render the image.
```shell
{
"requestId": "febbd34c-cadf-43e6-926c-5942016aea4e"
"href": "https://cdn.renderform.io/8af2cacf-a328-4a8f-a4a7-fc6419b5b805/results/febbd34c-cadf-43e6-926c-5942016aea4e.jpg"
"request": {
//your request
}
}
```
> You can also configure a global webhook in the [settings](https://renderform.io/console/webhooks/) that will be triggered for every render request.
## GET Endpoint
```html
https://get.renderform.io/img/TEMPLATE_ID.jpg?componentId.property=value&apiKey=API_KEY
```
Use [Query String](https://en.wikipedia.org/wiki/Query_string) notation in order to provide changes.
### Sample request
```html
https://get.renderform.io/img/TEMPLATE_ID.jpg?title.text=Hello!&avatar.src=example.com/me.jpg&apiKey=MY_API_KEY
```
Please note that only the first element is separated with `?` (question mark) and all
other changes must be separated with `&` (ampersand).
---
# Render video
Source: https://renderform.io/docs/api/render-video
This endpoint allows you to render MP4 and WebM videos based on a [video template](https://renderform.io/docs/general/video-templates/) created in the Advanced Editor
and your properties. It's the same endpoint used to [render images](https://renderform.io/docs/api/render-image/), the difference is that video renders are
asynchronous.
## POST Endpoint
```bash
https://get.renderform.io/api/v2/render
```
### Sample request
```bash
curl --request POST \
--url https://get.renderform.io/api/v2/render \
--header 'X-API-KEY: ' \
--header 'Content-Type: application/json' \
--data '{
"template": "",
"outputFormat": "mp4",
"duration": 8000,
"fps": 30,
"data": {
"my-text-component-id.text": "Hello {John}!",
"my-image-component-id.src": "https://my-blog.com/my-image.jpg",
"my-video-component-id.src": "https://my-blog.com/my-clip.mp4"
}
}'
```
#### Request body
- `template` (required) - template identifier of a video template
- `data` (optional) - values for the [template properties](https://renderform.io/docs/general/template-properties/)
- `outputFormat` (optional) - `mp4` or `webm`, overrides the format set in the template
- `duration` (optional) - length of the video in milliseconds (`1000` to `30000`), overrides the video length set in the template
- `fps` (optional) - frame rate of the video, `24`, `25` or `30` (default `30`)
- `fileName` (optional) - custom file name for the generated video
- `webhookUrl` (optional) - [send response to the given URL](https://renderform.io/docs/api/render-image/#sample-request-with-webhook-execution) as a POST request
- `metadata` (optional) - any key-value object can be used as metadata container
- `version` (optional) - used as cache differentiator, if you want to force re-rendering of the template
`duration` and `fps` can also be passed inside `data` using the `_render` prefix, which is handy when your integration only lets you send template properties:
```json
{
"template": "",
"data": {
"my-text-component-id.text": "Hello {John}!",
"_render.duration": 8000,
"_render.fps": 25
}
}
```
#### Successful response
Video renders are always asynchronous. A successful request returns `202` status code, `requestId`, `href` with the URL where the video
will be available once it's rendered, and `status` set to `pending`.
```json
{
"requestId": "febbd34c-cadf-43e6-926c-5942016aea4e",
"href": "https://cdn.renderform.io/.../febbd34c-cadf-43e6-926c-5942016aea4e.mp4",
"status": "pending"
}
```
The file under `href` does not exist yet. Poll the result endpoint below or use a webhook to find out when it's ready.
#### Error response
Unsuccessful response returns `400` status code with an error message in `msg` property and `status` with the HTTP status code.
Requests that your credit balance cannot cover return `402`.
```json
{
"msg": "Video renders are available only with output=json",
"status": 400
}
```
> `output=image` is not supported for video renders. The endpoint always responds with JSON for video templates.
## GET Polling for the result
```bash
https://get.renderform.io/api/v2/results/{requestId}
```
Request the result every few seconds (3 seconds is a good interval) until `status` changes from `pending` to `done` or `failed`.
Rendering usually takes from a few seconds to a couple of minutes depending on the video length and frame rate.
### Sample request
```bash
curl --request GET \
--url https://get.renderform.io/api/v2/results/febbd34c-cadf-43e6-926c-5942016aea4e \
--header 'X-API-KEY: '
```
### Sample response
```json
{
"identifier": "febbd34c-cadf-43e6-926c-5942016aea4e",
"status": "done",
"type": "video",
"href": "https://cdn.renderform.io/.../febbd34c-cadf-43e6-926c-5942016aea4e.mp4",
"thumbnailHref": "https://cdn.renderform.io/.../febbd34c-cadf-43e6-926c-5942016aea4e.jpg",
"durationMs": 8000,
"width": 1080,
"height": 1080,
"templateName": "Product teaser",
"errorMessage": null,
"createdAt": "2026-09-02T10:15:08Z"
}
```
- `status` - `pending` while the video is being rendered, `done` when the file is ready, `failed` when the render failed
- `type` - `video` for video renders (`image`, `screenshot` or `preview` for other results)
- `href` - URL of the rendered video, available when `status` is `done`
- `thumbnailHref` - URL of a JPEG poster frame of the video, `null` until the render is done
- `durationMs` - length of the rendered video in milliseconds, `null` until the render is done
- `errorMessage` - reason of the failure when `status` is `failed`, otherwise `null`
Pending video renders are also included in [list results](https://renderform.io/docs/api/list-results/), so you can show a placeholder for them in your app.
### Webhook
If you provide `webhookUrl` in the request (or configure a [global webhook](https://renderform.io/docs/api/webhooks/)), RenderForm sends a `RENDER_COMPLETE`
POST request to your URL with `requestId`, `href` and the original request as soon as the video is ready, so you don't have to poll.
## Credits
Every started second of video costs **10 credits** (`ceil(duration / 1000) * 10`). Credits are charged when the request is accepted
and refunded if the render fails.
`duration` accepts `1000`–`30000` ms on every plan. When your credit balance does not cover the render, the API responds with `402`.
---
# Get template
Source: https://renderform.io/docs/api/get-template
This endpoint allows you to get a template details by its identifier.
## GET Endpoint
```shell
https://get.renderform.io/api/v2/my-templates/:templateId
```
### Sample request
```shell
curl --location \
--request GET 'https://get.renderform.io/api/v2/my-templates/:templateId' \
--header 'X-API-KEY: '
```
### Sample response
```json
{
"identifier": "hairy-newts-chuckle-blindly-7342",
"name": "Social Media Cover",
"preview": "https://cdn.renderform.io/previews/hairy-newts-chuckle-blindly-7342.jpg",
"scaleFactor": 1.0,
"outputFormat": "jpeg",
"quality": 90,
"width": 1280,
"height": 670,
"createdBy": "John Doe",
"properties": [
{
"key": "title.color",
"type": "color",
"defaultValue": "rgba(30,30,30, 1)",
"componentId": "title",
"componentType": "TEXT",
"property": "color"
},
{
"key": "title.height",
"type": "number",
"defaultValue": "364",
"componentId": "title",
"componentType": "TEXT",
"property": "height"
}
//...
]
}
```
Properties are the list of all properties that can be changed in the template to render an image or PDF.
Each property has the following fields:
| Field | Type | Description |
|:----------------|:----------|:-------------------------------------|
| `key` | `string` | Combined component id and property |
| `type` | `string` | Property input type |
| `defaultValue` | `string` | The default value from the template |
| `componentId` | `string` | The component identifier |
| `componentType` | `string` | The component type from the template |
| `property` | `string` | The property name |
If you are an integration developer,
please use the `key` value in `data` key in [render requests](https://renderform.io/docs/api/render-image/).
---
# List templates
Source: https://renderform.io/docs/api/list-templates
This endpoint allows you to get a list of all your templates with metadata and preview links.
## GET Endpoint
```bash
https://get.renderform.io/api/v2/my-templates
```
Looking for the [v1 endpoint](https://renderform.io/docs/api/list-templates-v1/)?
### Example request
```bash
curl --location
--request GET 'https://get.renderform.io/api/v2/my-templates' \
--header 'X-API-KEY: ' \
--header 'Content-Type: application/json'
```
### Pagination
You can paginate the results by using the `page` and `size` query parameters.
| Parameter | Type | Description |
|:----------|:-----------|:----------------------------------------|
| `name` | `string` | Filter by template name |
| `tags` | `string[]` | Filter by tags |
| `page` | `integer` | The page number |
| `size` | `integer` | The number of results per page (max 50) |
### Sample response
```json
[
{
"identifier": "tall-panthers-sting-rudely-6345",
"name": "Social Media Cover",
"scaleFactor": 1.0,
"outputFormat": "jpeg",
"width": 1280,
"height": 670,
"createdBy": "John Doe",
"editor": "canvas-html",
"tags": ["Social Media"]
},
{
"identifier": "dirty-dragonflies-chat-gladly-2623",
"name": "Who is hiring?",
"preview": "https://cdn.renderform.io/previews/dirty-dragonflies-chat-gladly-2623.jpg",
"scaleFactor": 1.0,
"outputFormat": "pdf",
"width": 1024,
"height": 1024,
"createdBy": "John Doe",
"editor": "canvas-editor",
"tags": ["Social Media"]
}
]
```
---
# Manage templates
Source: https://renderform.io/docs/api/modify-templates
These endpoints allow you to create, update and delete templates directly through the API,
instead of using the [Template Editor](https://renderform.io/docs/general/template-editor/).
## POST Create template
```bash
https://get.renderform.io/api/v2/my-templates
```
Creates a new, empty template with the given name, size and editor.
### Sample request
```bash
curl --request POST \
--url https://get.renderform.io/api/v2/my-templates \
--header 'X-API-KEY: ' \
--header 'Content-Type: application/json' \
--data '{
"name": "Instagram post",
"width": 1080,
"height": 1080,
"editor": "html-editor",
"tags": ["marketing", "instagram"]
}'
```
#### Request body
- `name` (required) - name of the template
- `width` (required) - width of the template in pixels
- `height` (required) - height of the template in pixels
- `editor` (required) - `html-editor`, `canvas-editor` or `canvas-html`
- `tags` (optional) - tags assigned to the template, created automatically if they don't exist yet
- `outputFormat` (optional) - output format of the template: `jpeg` (default), `png`, `webp`, `pdf`, `mp4` or `webm`. Video formats are available only for the `canvas-html` editor
- `recordDuration` (optional) - video templates only, length of the video timeline in milliseconds (`1000`-`30000`, default `5000`)
- `fps` (optional) - video templates only, frames per second: `24`, `25` or `30` (default `30`)
## PATCH Update template metadata
```bash
https://get.renderform.io/api/v2/my-templates/:templateId
```
Updates the name, size, output format and/or tags of a template. Only the fields provided in the request
body are changed.
### Sample request
```bash
curl --request PATCH \
--url https://get.renderform.io/api/v2/my-templates/ \
--header 'X-API-KEY: ' \
--header 'Content-Type: application/json' \
--data '{
"name": "Instagram post v2",
"outputFormat": "png",
"tags": ["marketing", "instagram"]
}'
```
#### Request body
- `name` (optional) - new name of the template
- `width` (optional) - new width of the template in pixels
- `height` (optional) - new height of the template in pixels
- `outputFormat` (optional) - new output format of the template: `jpeg`, `png`, `pdf`
- `tags` (optional) - replaces the full set of tags currently assigned to the template
## DELETE Delete template
```bash
https://get.renderform.io/api/v2/my-templates/:templateId
```
### Sample request
```bash
curl --request DELETE \
--url https://get.renderform.io/api/v2/my-templates/ \
--header 'X-API-KEY: '
```
## Get / update template content
These endpoints let you read and overwrite a template's raw content directly. **Currently, they only work for
templates using the `html-editor`.**
### GET Endpoint
```bash
https://get.renderform.io/api/v2/my-templates/:templateId/html-editor
```
```bash
curl --request GET \
--url https://get.renderform.io/api/v2/my-templates//html-editor \
--header 'X-API-KEY: '
```
#### Sample response
```json
{
"html": "\n
{{title}}
\n",
"css": "body {\n font-family: 'Helvetica';\n}\n",
"sampleData": {
"title": "My HTML Template",
"pills": ["Design", "Automate", "Scale"]
}
}
```
- `html` - HTML markup of the template
- `css` - CSS styles of the template
- `sampleData` - sample values (as a JSON object) used to preview merge fields in the editor
### PUT Endpoint
```bash
https://get.renderform.io/api/v2/my-templates/:templateId/html-editor
```
```bash
curl --request PUT \
--url https://get.renderform.io/api/v2/my-templates//html-editor \
--header 'X-API-KEY: ' \
--header 'Content-Type: application/json' \
--data '{
"html": "\n
{{title}}
\n",
"css": "body {\n font-family: '\''Helvetica'\'';\n}\n",
"sampleData": {
"title": "My HTML Template",
"pills": ["Design", "Automate", "Scale"]
}
}'
```
#### Request body
- `html` (required) - HTML markup to store for the template
- `css` (optional) - CSS styles to store for the template
- `sampleData` (optional) - sample values (as a JSON object) used to preview merge fields
The response has the same shape as the `GET` endpoint and reflects what was actually persisted.
---
# List results
Source: https://renderform.io/docs/api/list-results
This endpoint allows you to list all of your rendered images and PDFs.
## GET Endpoint
```shell
https://get.renderform.io/api/v2/results
```
Looking for the [v1 endpoint](https://renderform.io/docs/api/list-requests/)?
### Example request
```shell
curl --location
--request GET 'https://get.renderform.io/api/v2/results' \
--header 'X-API-KEY: ' \
--header 'Content-Type: application/json'
```
### Pagination
You can paginate the results by using the `page` and `size` query parameters.
| Parameter | Type | Description |
|:----------|:----------|:----------------------------------------|
| `page` | `integer` | The page number |
| `size` | `integer` | The number of results per page (max 50) |
### Sample response
```json
{
"content": [
{
"identifier": "req-2fbdb726-ca4c-4ec7-853a-0331160a9557",
"href": "https://cdn.renderform.io/dfa26701ea7ba9e6c1cbff99a2ab81f5378d0e0af7035452e1bc9105ea1f33ae/results/req-2fbdb726-ca4c-4ec7-853a-0331160a9557.jpg",
"width": 1172,
"height": 1437,
"templateName": "Hotel card Airtable",
"createdAt": "2022-12-12T14:35:08Z"
}
],
"pageable": {
"sort": {
"empty": true,
"unsorted": true,
"sorted": false
},
"offset": 0,
"pageNumber": 0,
"pageSize": 1,
"unpaged": false,
"paged": true
},
"totalPages": 13102,
"totalElements": 13102,
"last": false,
"size": 1,
"number": 0,
"sort": {
"empty": true,
"unsorted": true,
"sorted": false
},
"numberOfElements": 1,
"first": true,
"empty": false
}
```
---
# Usage
Source: https://renderform.io/docs/api/credits-usage
This endpoint allows you to check your organization's current credit usage, upload storage, and subscription plan details.
## GET Endpoint
```bash
https://get.renderform.io/api/v1/usage
```
### Example request
```bash
curl --location \
--request GET 'https://get.renderform.io/api/v1/usage' \
--header 'X-API-KEY: ' \
--header 'Content-Type: application/json'
```
### Sample response
```json
{
"identifier": "my-organization-identifier",
"credits": {
"used": 450,
"total": 5000,
"nextRenewalAt": "2026-04-01",
"renewalAmount": 5000
},
"uploads": {
"used": 524288000,
"total": 1073741824
},
"plan": {
"name": "Business",
"status": "active",
"nextBillingAt": "2026-04-01"
}
}
```
### Response body
| Property | Type | Description |
|:------------------------|:----------|:---------------------------------------------------------|
| `identifier` | `string` | Unique organization identifier |
| `credits.used` | `integer` | Number of credits used in the current billing period |
| `credits.total` | `integer` | Total number of credits available in the current period |
| `credits.nextRenewalAt` | `string` | Date when credits will be renewed (format: `yyyy-MM-dd`) |
| `credits.renewalAmount` | `integer` | Number of credits that will be granted upon renewal |
| `uploads.used` | `long` | Current upload storage used in bytes |
| `uploads.total` | `long` | Maximum upload storage available in bytes |
| `plan.name` | `string` | Name of the current subscription plan |
| `plan.status` | `string` | Current status of the subscription (e.g. `active`) |
| `plan.nextBillingAt` | `string` | Next billing date (format: `yyyy-MM-dd`) |
---
# Take screenshot
Source: https://renderform.io/docs/api/take-screenshots
This endpoint allows you to take a screenshot of any website. The screenshot image will be automatically saved, and you will receive a link to it.
## POST Endpoint
```shell
https://api.renderform.io/api/v1/screenshots
```
## Example request
```shell
curl
--location
--request POST 'https://api.renderform.io/api/v1/screenshots' \
--header 'X-API-KEY: ' \
--header 'Content-Type: application/json' \
--data-raw '{
"url": "https://renderform.io",
"width": 1366,
"height": 768
}'
```
### Request body
- `url` (required) - website URL of which RenderForm should take a screenshot,
- `height` (required) - screenshot height,
- `width` (required) - screenshot width,
- `waitTime` (optional) - wait time in milliseconds before taking a screenshot (`500` to `5000`).
## Example response
```json
{
"requestId": "ed39c85ac41f4c54b95e4caaad4ebff8",
"href": "https://cdn.renderform.io/.../image.png",
"request": {
"url": "https://renderform.io",
"width": 1366,
"height": 768
}
}
```
---
# Webhooks
Source: https://renderform.io/docs/api/webhooks
Webhooks allow you to notify external services when your image is ready to download, or when a new has been created, updated, or deleted.
Webhooks can be configured in the [Webhooks configuration](https://renderform.io/console/webhooks/) section of the RenderForm account and are triggered for all requests made to RenderForm API.
You can also [configure a webhook for a specific request](https://renderform.io/docs/api/render-image/#sample-request-with-webhook-execution) by providing a `webhookUrl` parameter in the request body when rendering an image.
You can create up to 10 global webhooks.
## Webhook actions
Webhooks can be triggered for the following actions:
- `RENDER_COMPLETE` - when the image or PDF is ready to download
- `TEMPLATE_CREATE` - when a new template is created
- `TEMPLATE_UPDATE` - when a template is updated
- `TEMPLATE_DELETE` - when a template is deleted
Action names are sent in the `action` field of the webhook payload.
## Sample webhook payload
Webhooks are always sent via POST request. The payload is a JSON object with the following fields:
### On image generation
```shell
{
"action": "RENDER_COMPLETE",
"requestId": "febbd34c-cadf-43e6-926c-5942016aea4e"
"href": "https://cdn.renderform.io/8af2cacf-a328-4a8f-a4a7-fc6419b5b805/results/febbd34c-cadf-43e6-926c-5942016aea4e.jpg"
}
```
### On template action
```shell
{
"action": "TEMPLATE_CREATE", // or "TEMPLATE_UPDATE", "TEMPLATE_DELETE"
"templateId": "hairy-newts-chuckle-blindly-7342",
"name": "Social Media Cover",
"tags": ["demo", "test"],
"preview": "https://cdn.renderform.io/8af2cacf-a328-4a8f-a4a7-fc6419b5b805/templates/hairy-newts-chuckle-blindly-7342/preview.png",
}
```
You can use websites like [Webhook.site](https://webhook.site) to test webhooks.